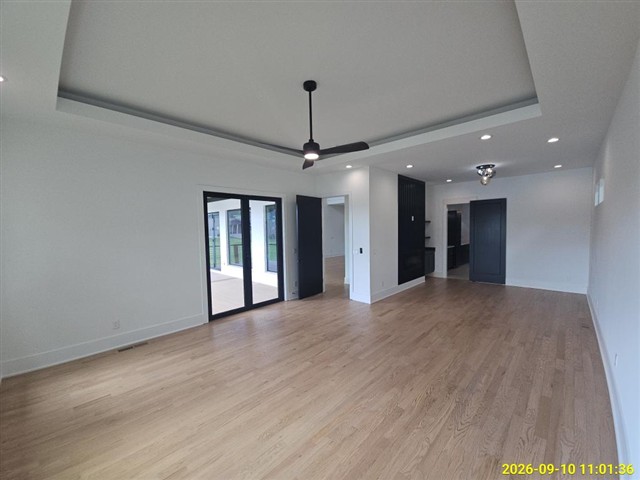
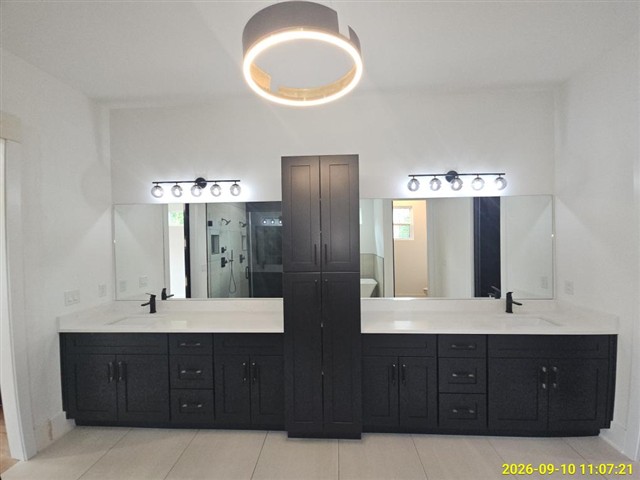
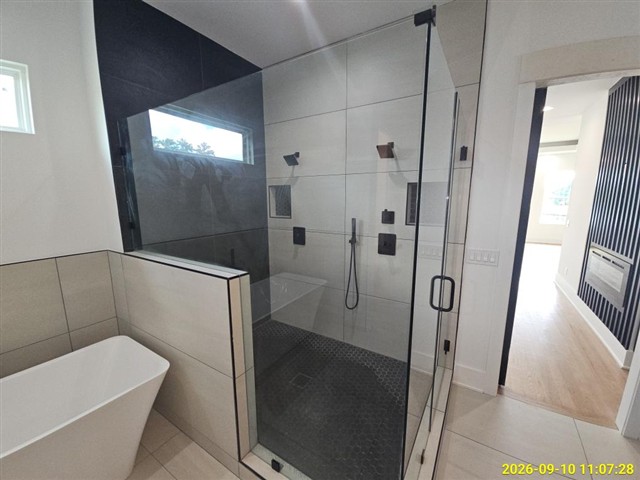
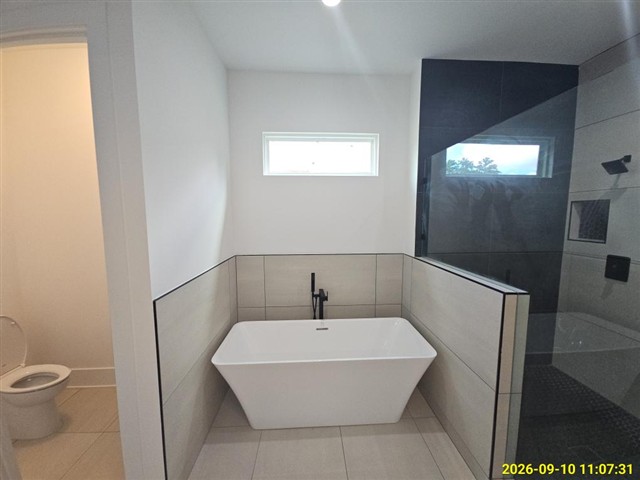
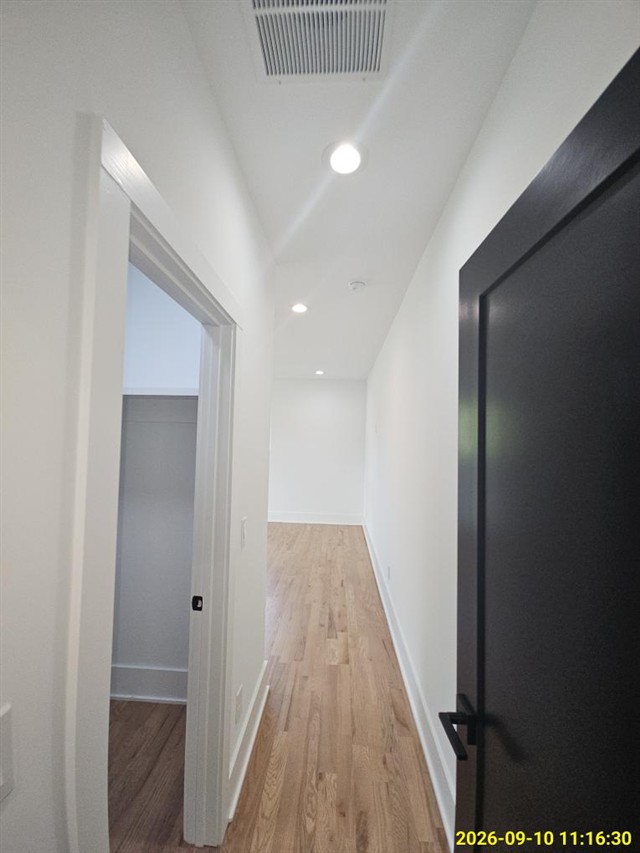
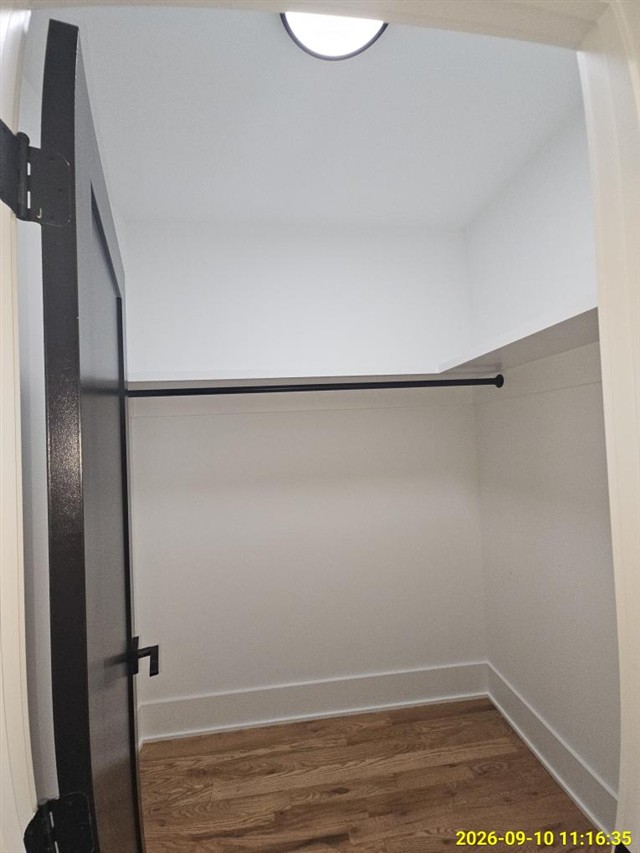
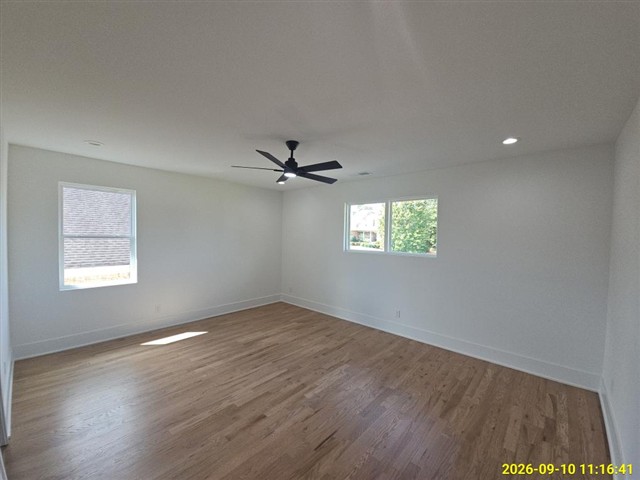
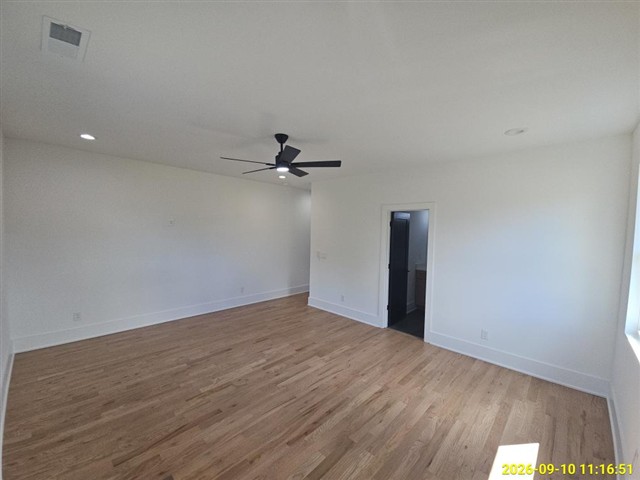
Official Sample Report Foresight Home Inspections • Dual-Inspector CMI® Audit • All Client & Property Details Redacted for Privacy
Get Instant Quote Schedule Inspection ← Back to Samples
Foresight Home Inspections, LLC [Confidential Client]
INSPECTION REPORT
[Confidential Property Address]
Metro Atlanta, GA
INSPECTED BY
Christopher Boykin
Foresight Home Inspections, LLC
INSPECTION DATE
9/10/2026
10:00 AM
INSPECTION REPORT
[Confidential Property Address]
Metro Atlanta, GA
INSPECTED BY
Christopher Boykin
Foresight Home Inspections, LLC
INSPECTION DATE
9/10/2026
10:00 AM
Top Table of Contents Bottom

General Summary


Foresight Home Inspections, LLC

678-480-2110
www.fhinspectionsatl.com

Customer
[Client Name Withheld for Privacy]

Address
[Confidential Property Address]
Metro Atlanta, GA

The following items or discoveries indicate that these systems or components do not function as intended or adversely affects the habitability of the dwelling; or warrants further investigation by a specialist, or requires subsequent observation. This summary shall not contain recommendations for routine upkeep of a system or component to keep it in proper functioning condition or recommendations to upgrade or enhance the function or efficiency of the home. This Summary is not the entire report. The complete report may include additional information of concern to the customer. It is recommended that the customer read the complete report.

Foresight Home Inspections is willing to do a re-inspection of repairs to confirm repairs are adequate. The reinspection fee is $200

1. Roofing
1.2 Flashings  
inspection
1.2 Item 1 (Picture)
1.2 Item 2 (Picture)
1.2 Item 3 (Picture)
1.2 Item 4 (Picture)
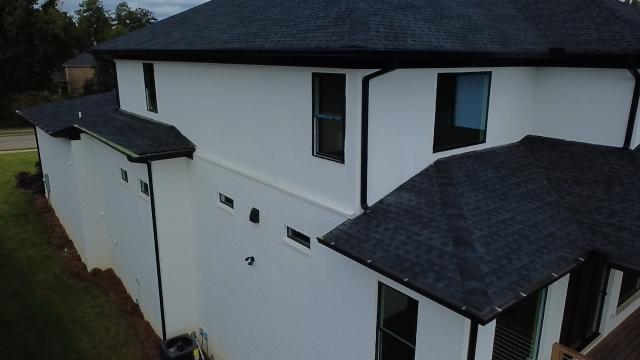
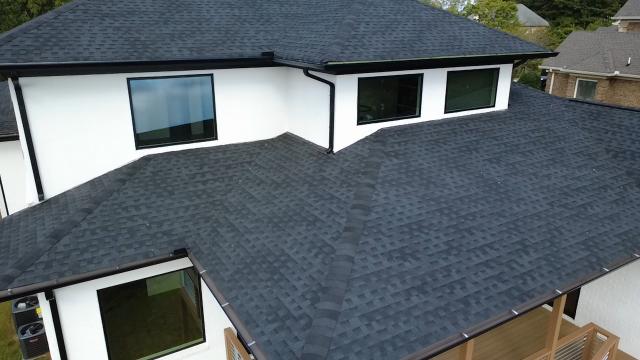
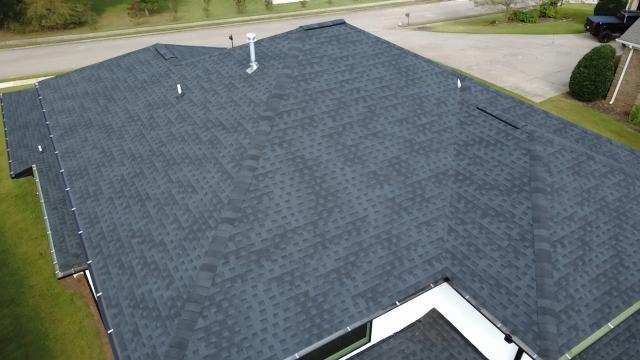
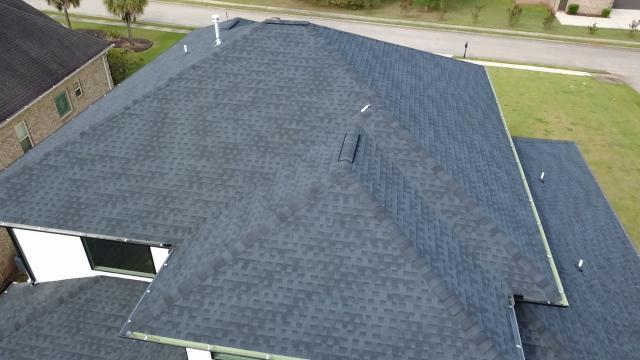
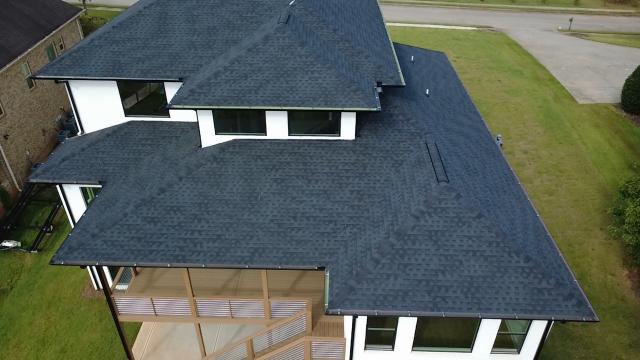
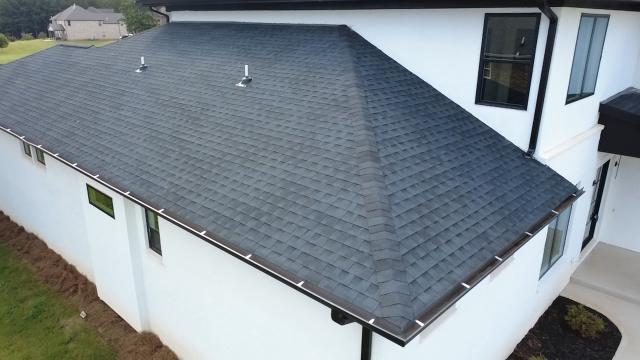
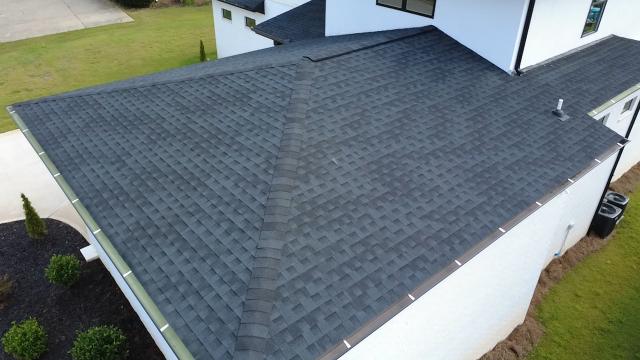
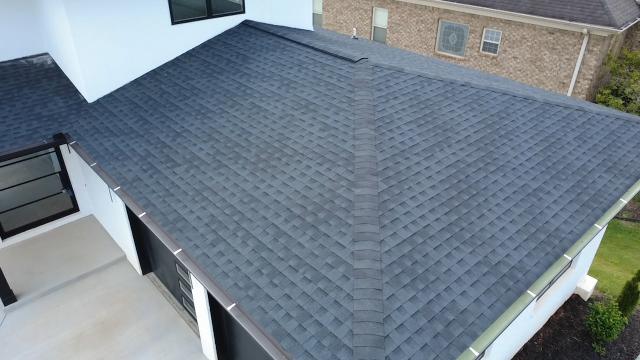
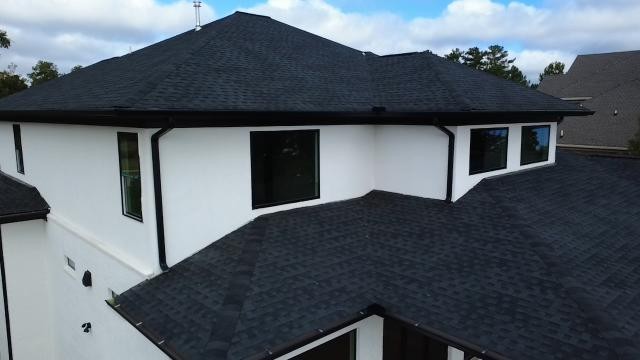
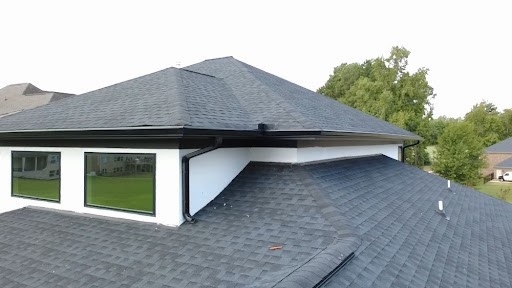
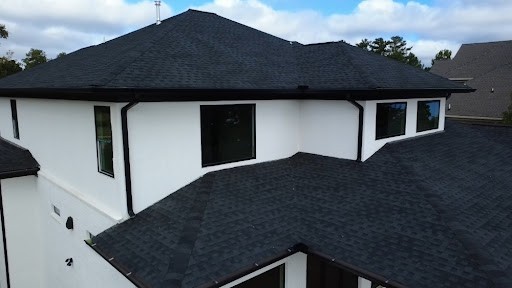
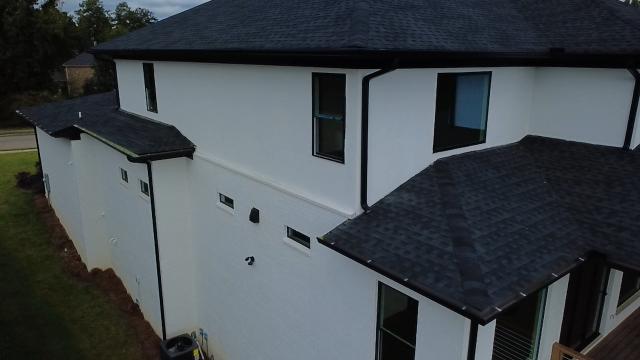
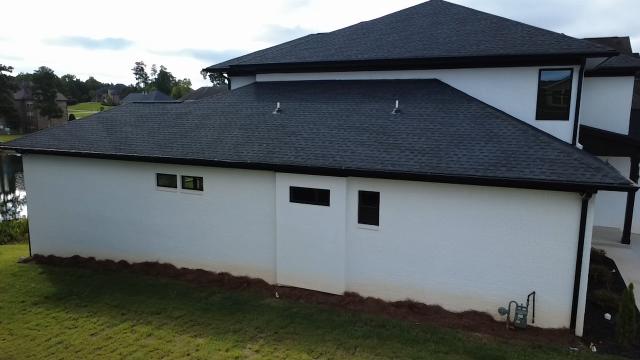
OBSERVATION: From our roof-level and exterior views, we focused closely on the areas where the upper exterior walls meet the lower shingle roof planes. In several locations where the roofline intersects the vertical stucco walls and along the gutter terminations, kick-out flashings and proper sidewall step flashings appear missing, buried, or terminating directly against the wall cladding. In addition, an upper downspout drains directly onto the lower shingle surface near a wall return without a splash diverter. While the architectural shingles and black gutters appear newly installed, roof-to-wall intersections require dedicated metal flashings properly integrated behind the cladding to kick runoff away from the home.

 WHAT THIS COULD MEAN: Flashing acts like an umbrella for the seams of your home. When rainwater runs down a roof valley or off an eave next to an exterior wall, missing kick-out or step flashings can direct high volumes of water straight into the wall assembly. Over time, this water could seep behind the stucco and siding, causing hidden wood rot, structural framing damage, or mold growth inside the wall cavities.

RECOMMENDATION: Have a qualified licensed roofing contractor evaluate all roof-to-wall transitions, headwall junctions, and gutter ends, and install proper step flashings and kick-out diverters integrated correctly with the exterior wall cladding.

1.3 Roof Drainage Systems  
inspection
1.3 Item 1 (Picture)
1.3 Item 2 (Picture)
1.3 Item 3 (Picture)
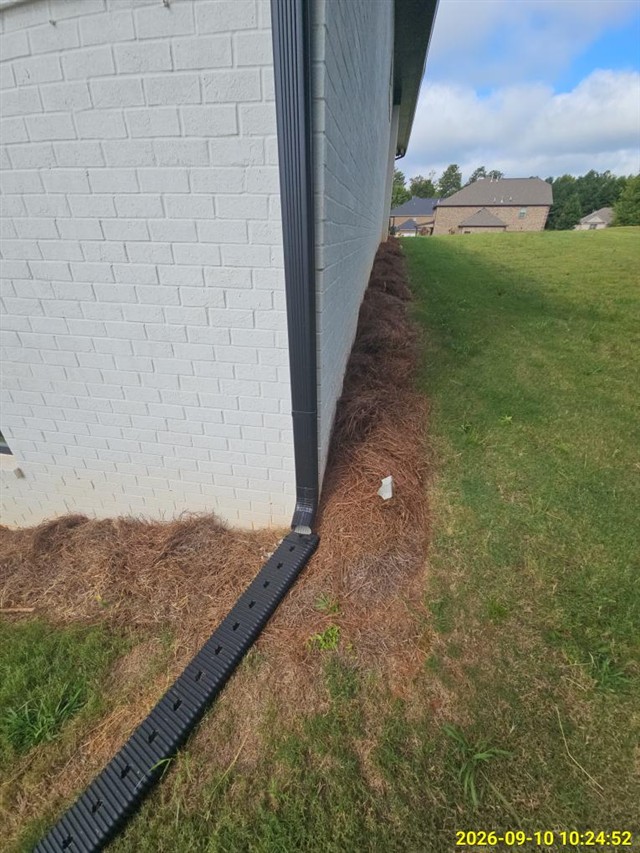
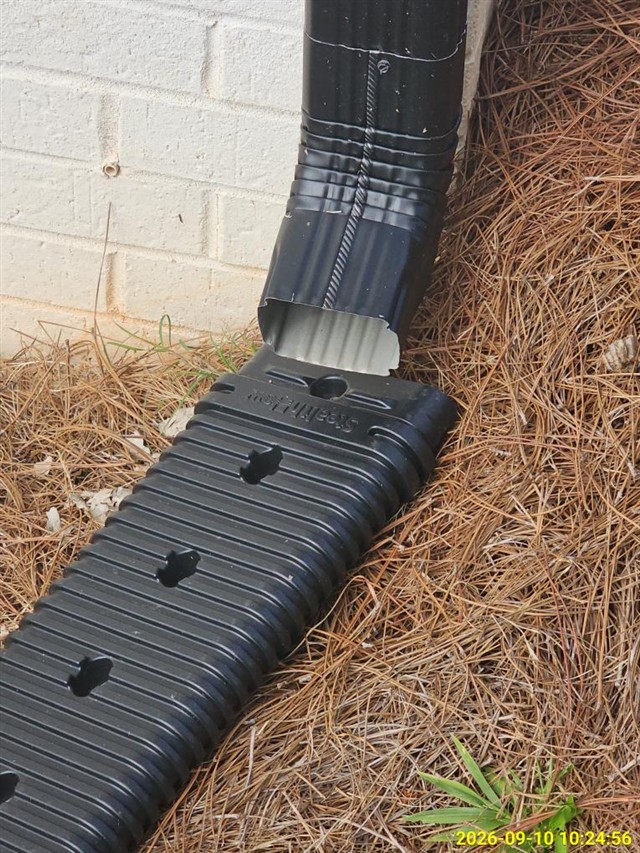
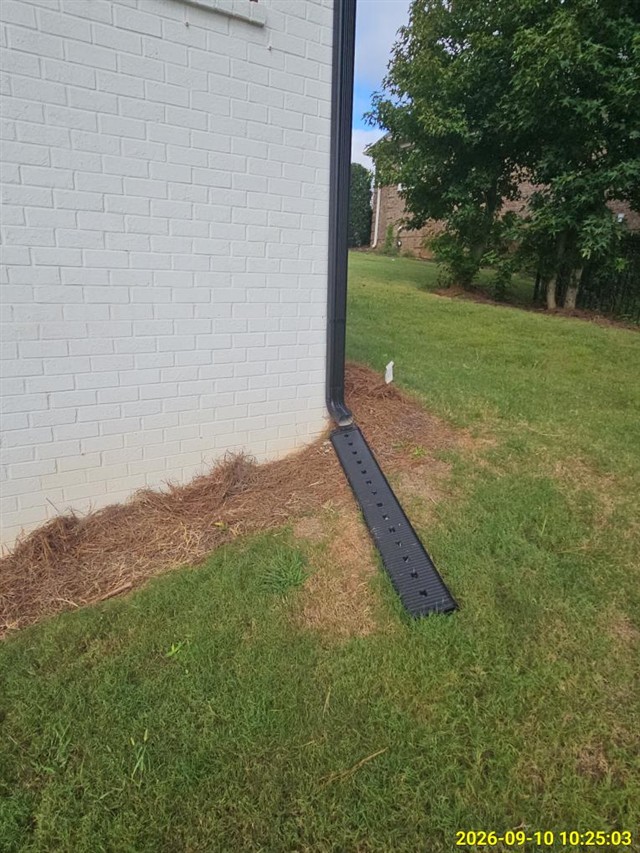
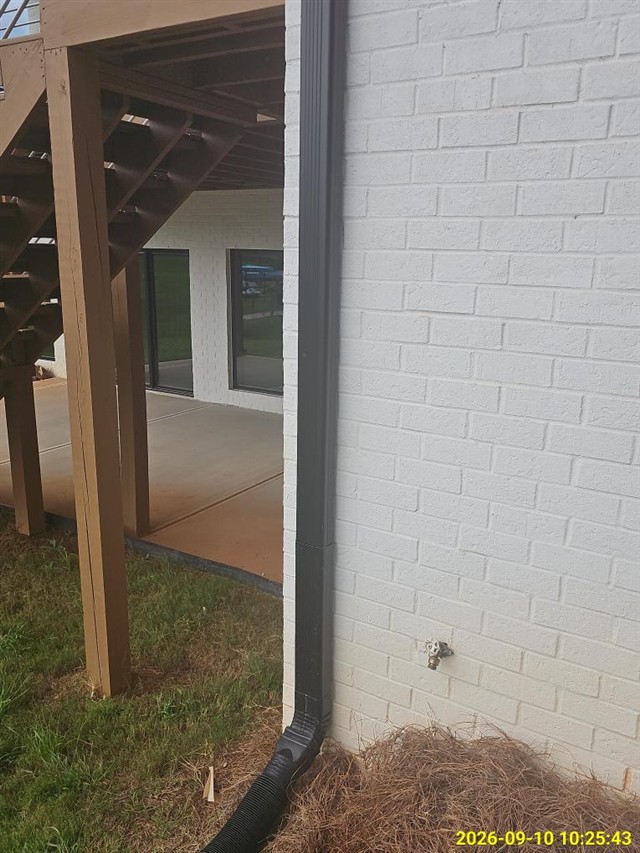
OBSERVATION: Along the exterior corner of the home, we looked closely at the gutter downspout and its ground drainage setup. The vertical metal downspout connects to a low-profile plastic ground extender designed to carry rainwater away from the house. However, the metal elbow at the bottom is pulled apart from the plastic tray opening. Instead of sliding fully inside the receiver slot, the downspout sits crooked and detached above it. The painted brick wall and black downspout materials look clean and new, but this joint was left misaligned and disconnected.


WHAT THIS COULD MEAN: Gutters and downspouts work together to move thousands of gallons of rainwater safely away from your foundation. When an elbow disconnects right at ground level, roof runoff pours directly onto the soil next to the brick wall instead of flowing out through the extender. Over time, ponding water near the foundation could cause soil erosion, ground settling, or moisture seeping into lower foundation walls.


RECOMMENDATION: Have a qualified gutter specialist or licensed general contractor evaluate the downspout termination, realign the metal elbow fully into the plastic ground extender, and secure the joint with appropriate sheet metal screws.

2. Exterior
2.0 Wall Cladding Flashing and Trim  
inspection
(1)
2.0 Item 1 (Picture)
2.0 Item 2 (Picture)
2.0 Item 3 (Picture)
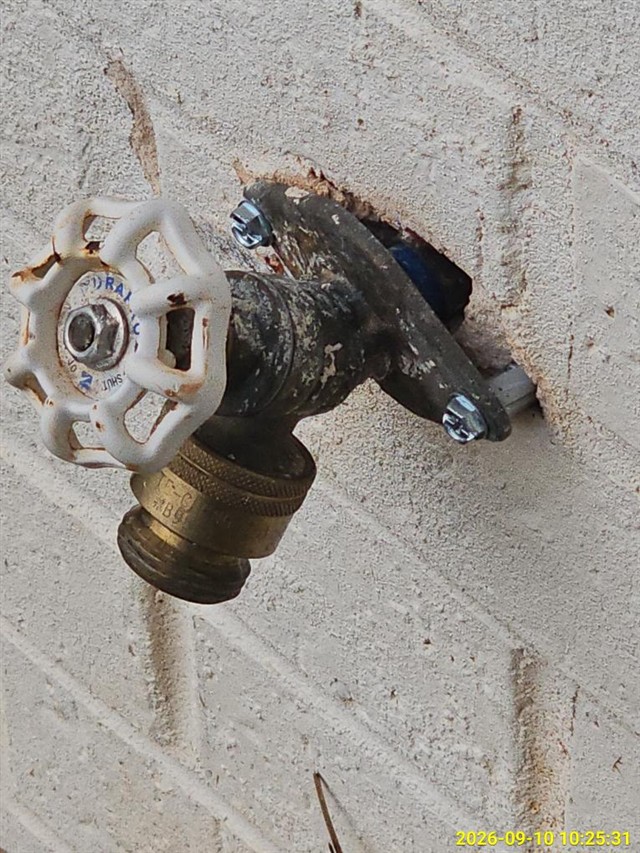
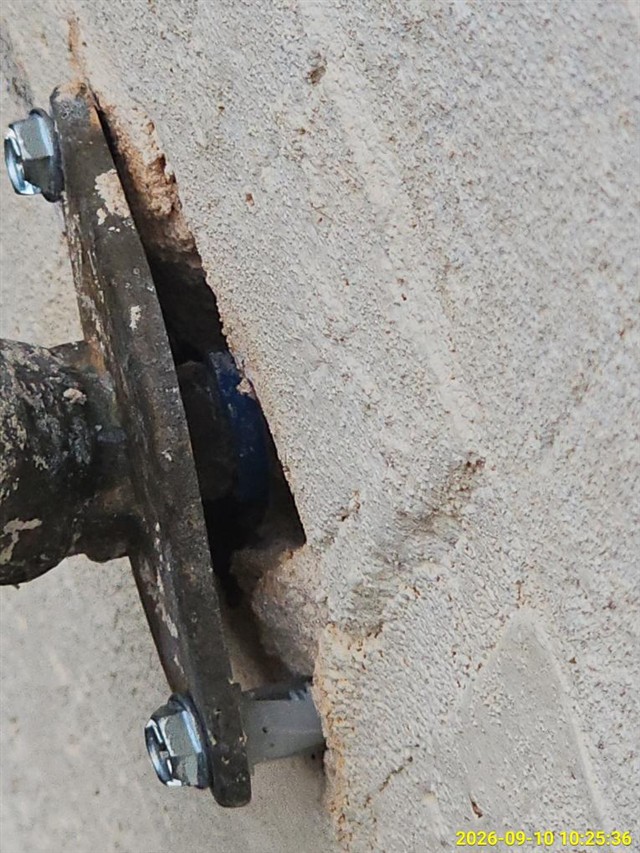
OBSERVATION: While examining the exterior wall, we looked closely at the outdoor hose bibb (sillcock) assembly. The metal mounting flange is pulled loose from the brick masonry, leaving the plastic wall anchors and screws exposed. Additionally, the oversized hole drilled through the masonry around the pipe is completely unsealed, creating an open gap into the wall cavity behind the loose valve body. An outdoor spigot should be anchored tight to the wall so it does not twist when a garden hose is pulled or operated.


WHAT THIS COULD MEAN: When a hose bibb is loose, pulling on a garden hose could stress, bend, or break the internal plumbing supply line inside the wall cavity, potentially causing a hidden water leak. An unsealed opening around the pipe also allows outdoor drafts, rainwater, and pests like rodents or insects to enter the wall cavity, while increasing the risk of cold winter air freezing the pipe.


RECOMMENDATION: Have a qualified licensed plumbing contractor evaluate the exterior hose bibb assembly, fasten the mounting flange firmly to the brick masonry, and properly seal the wall penetration with exterior-grade silicone or masonry sealant.

(2)
2.0 Item 4 (Picture)
2.0 Item 5 (Picture)
2.0 Item 6 (Picture)
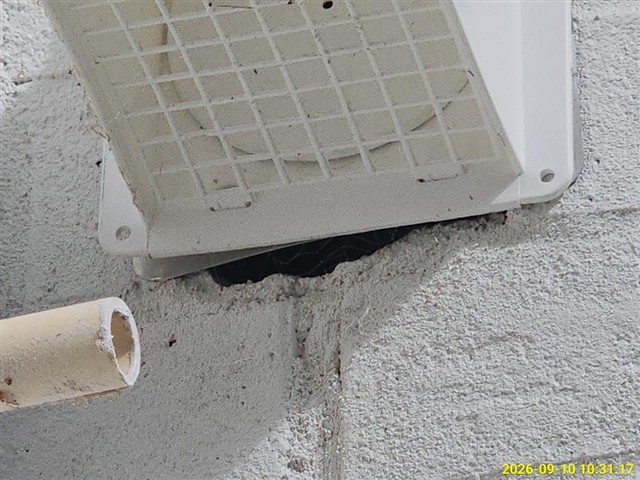
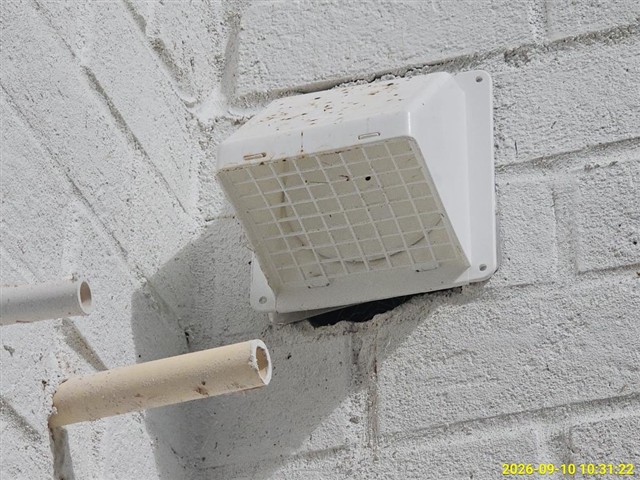
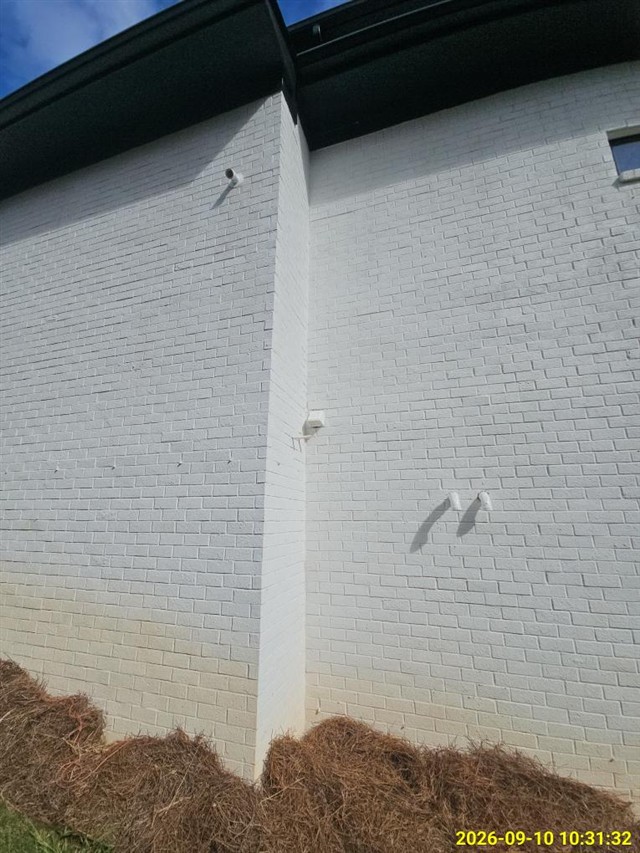
OBSERVATION: Outside on the exterior brick wall, we evaluated the wall penetrations and exhaust vent hood. The white plastic vent hood cover is loose and pulling away from the masonry. It is missing mounting fasteners at the corner screw holes, and the perimeter has not been sealed with exterior-grade caulk. As a result, a large, dark opening is visible directly beneath the hood where it enters the wall. Nearby drain pipes penetrate the brick cleanly, but this vent termination was left unfastened and unsealed against the building envelope.


WHAT THIS COULD MEAN: The exterior walls of your home keep the outside elements from getting indoors. When an exterior vent hood is loose and unsealed, wind-driven rain could enter the brick opening and soak the wall framing or insulation. The unsealed gap also creates an easy path for mice, insects, or wasps to enter the wall cavity or ductwork.


RECOMMENDATION: Have a qualified general contractor or siding specialist evaluate the exterior vent hood, anchor the mounting flange securely to the brick masonry, and seal the perimeter with exterior-grade silicone or polyurethane sealant.

(3)
2.0 Item 7 (Picture)
2.0 Item 8 (Picture)
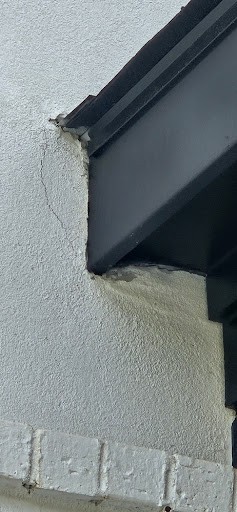
OBSERVATION: Right where the dark front porch roof overhang meets the exterior wall, we took a close look at the stucco finish. We found a visible crack and a chipped, broken section of stucco right at the joint line. The painted brick below and the porch trim look clean and sharp, but this transition area where the roofline intersects the wall shows damaged material and an unsealed gap. In home construction, intersections between roof returns and exterior walls need to be tightly sealed and properly flashed so rainwater shedding off the roof cannot find a path behind the cladding.


WHAT THIS COULD MEAN: The exterior finish of your home acts like a raincoat. When cracks or damaged gaps open up right along a roofline, wind-driven rain running down the wall or off the overhang could seep behind the stucco. Over time, trapped moisture behind the wall covering could cause damage to the wood framing, rot out the wall sheathing, or lead to hidden cosmetic deterioration behind the stucco surface.


RECOMMENDATION: Have a qualified stucco and siding contractor evaluate the damaged stucco, verify that appropriate kickout and sidewall flashing are installed behind the roof-to-wall intersection, and make proper repairs using exterior-grade patching compound and sealant.

2.3 Decks, Balconies, Stoops, Steps, Areaways, Porches, Patio/Cover and Applicable Railings  
inspection
2.3 Item 1 (Picture)
2.3 Item 2 (Picture)
2.3 Item 3 (Picture)
X
2.3 Item 4 (Video)
2.3 Item 5 (Picture)
2.3 Item 6 (Picture)
X
2.3 Item 7 (Video)
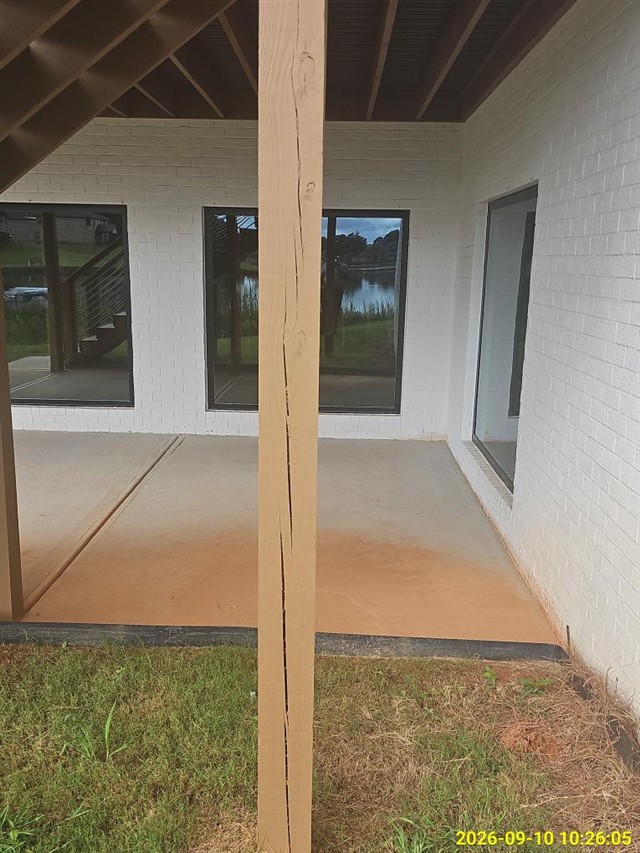
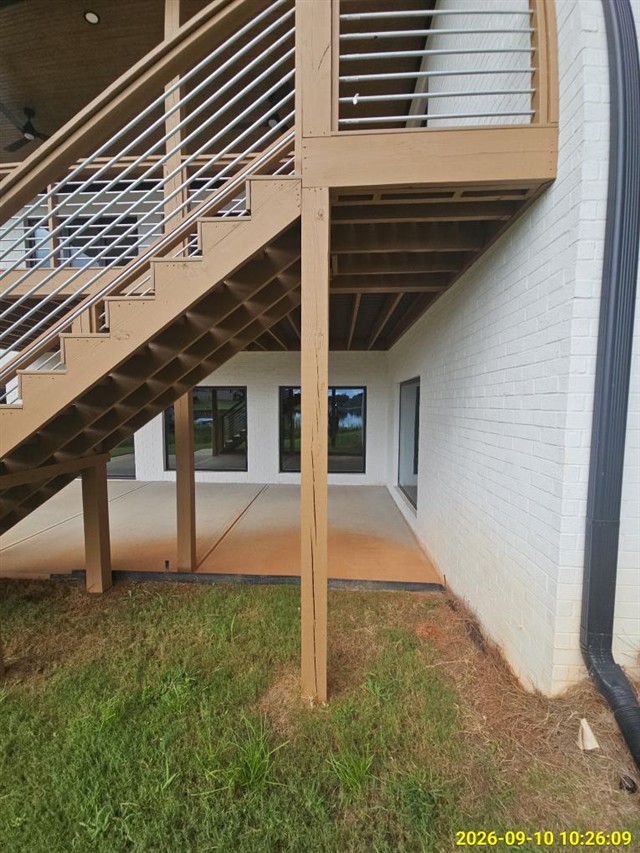
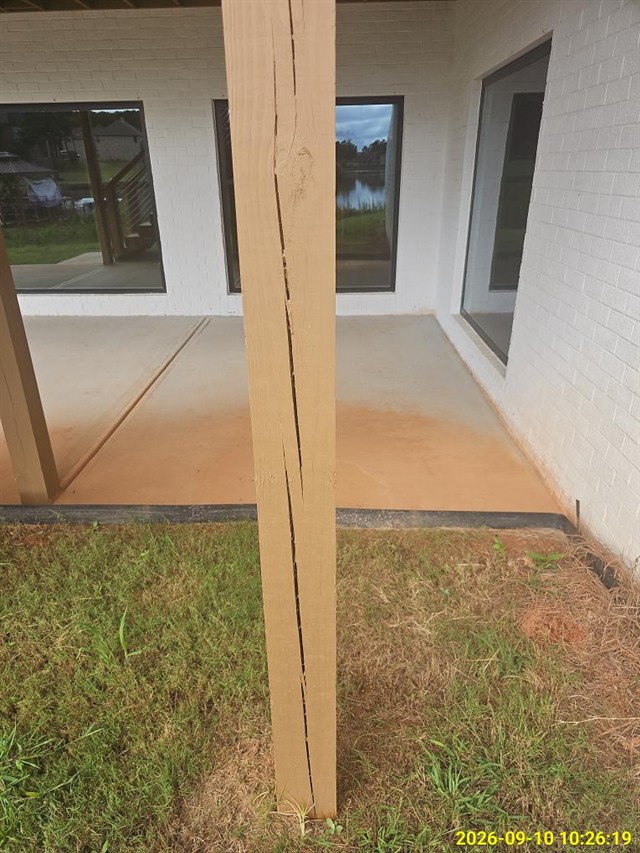
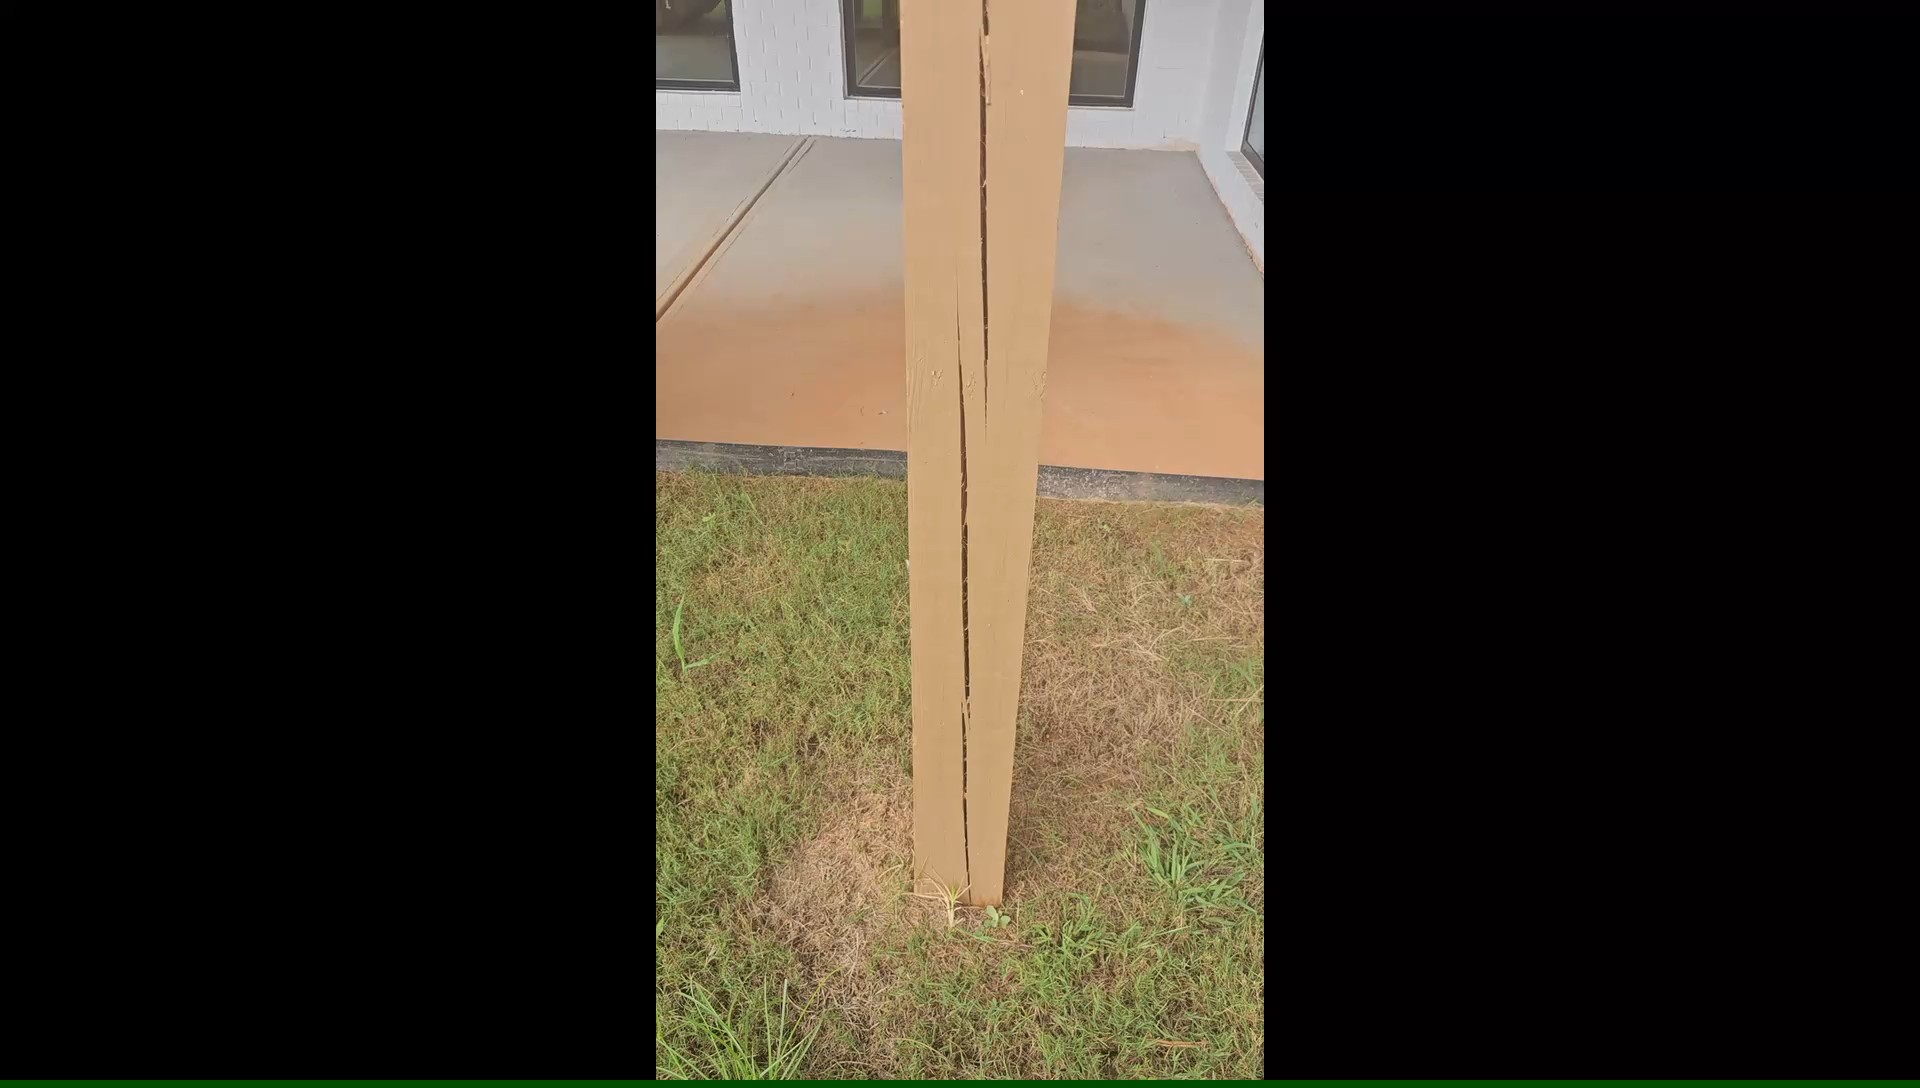
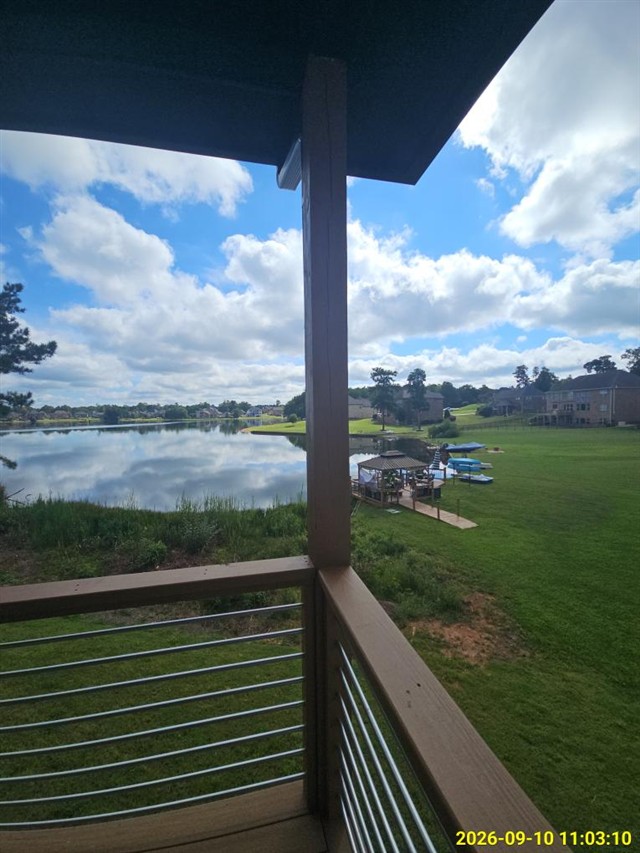
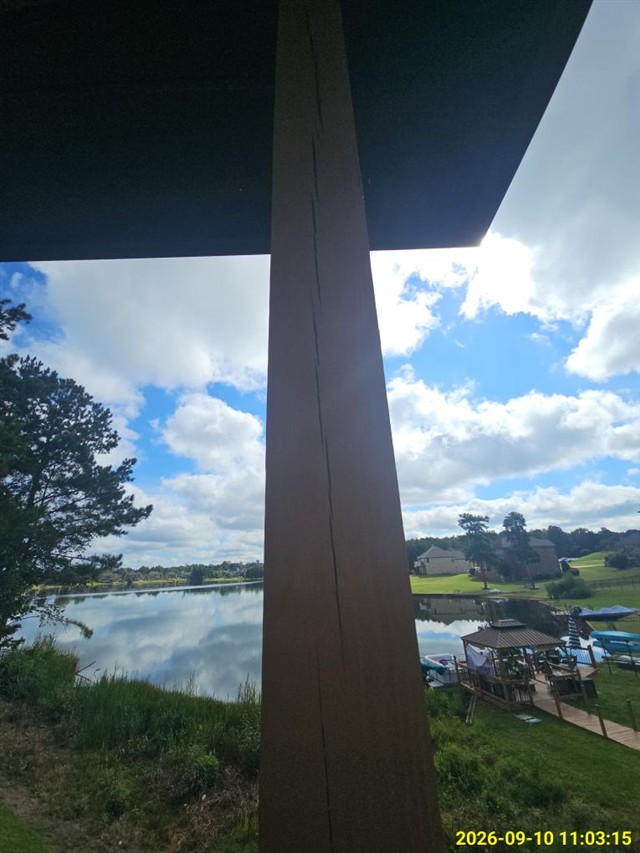
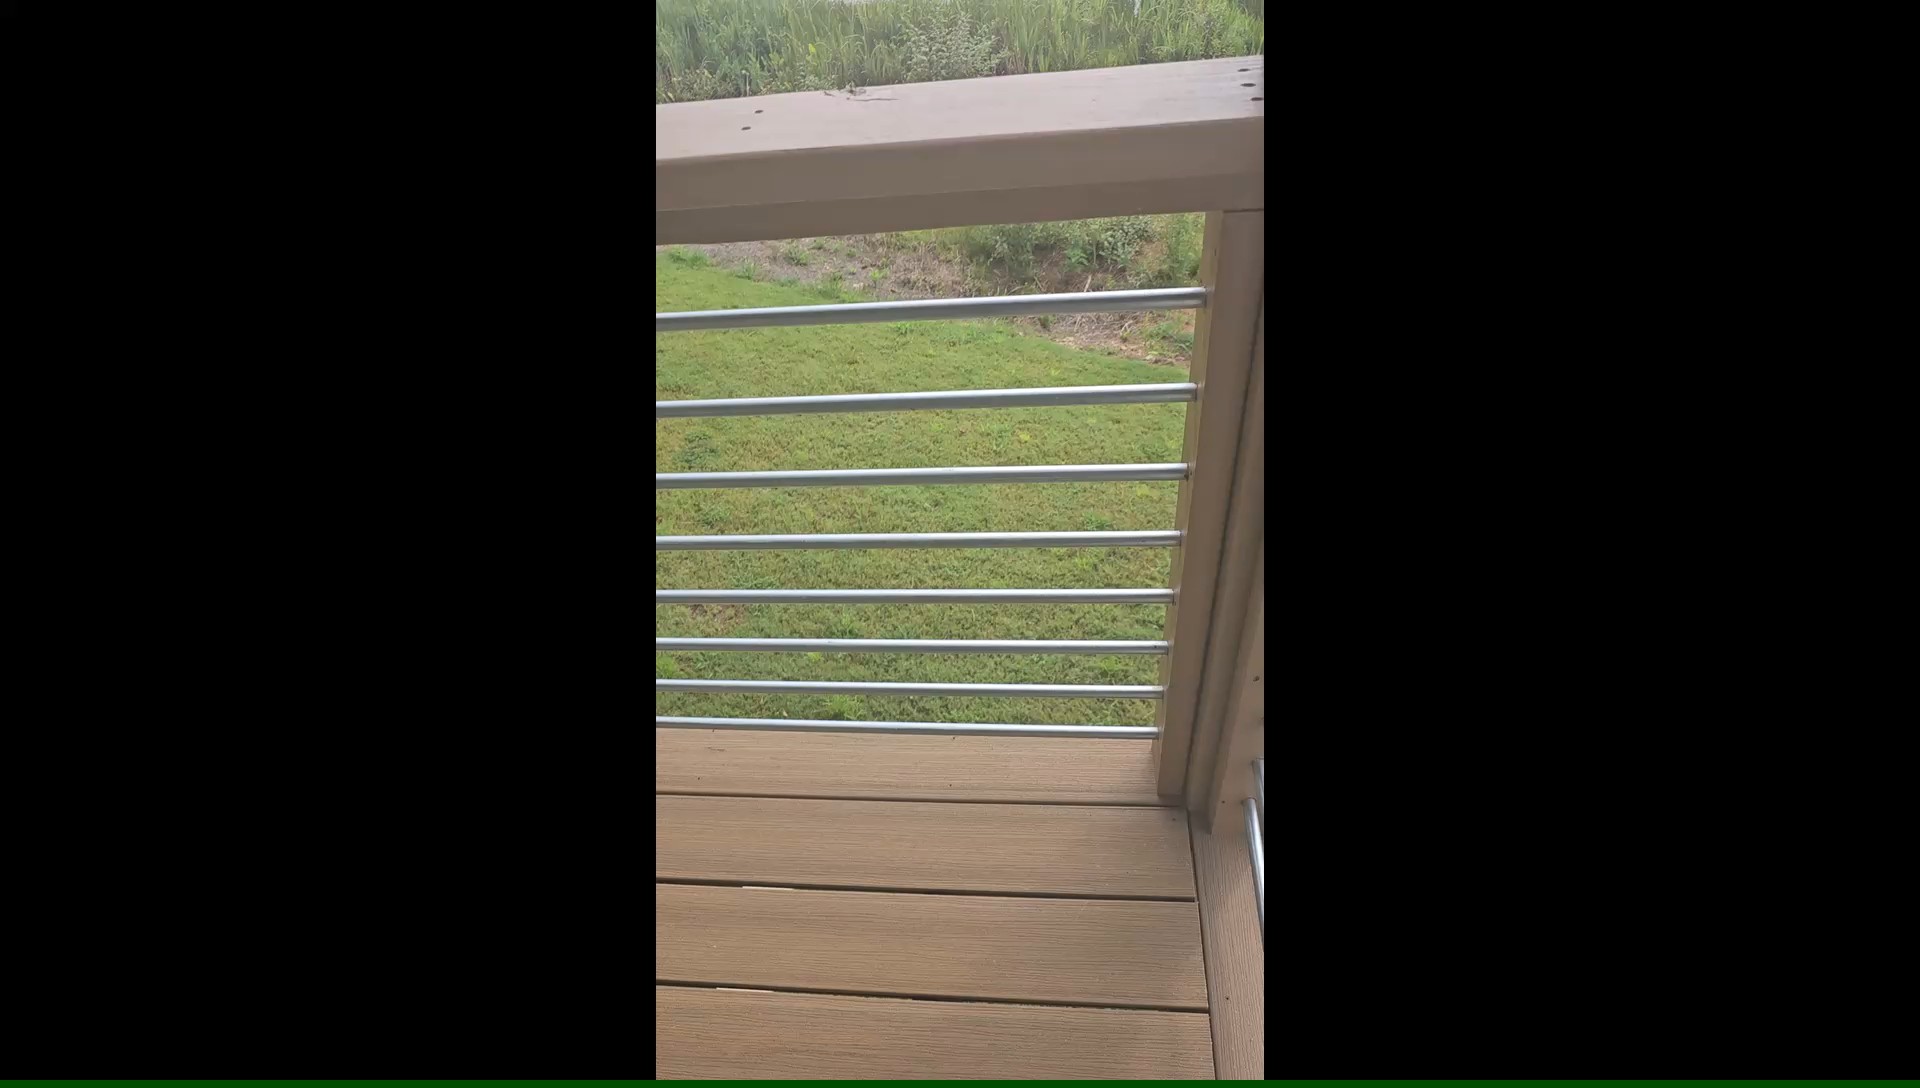
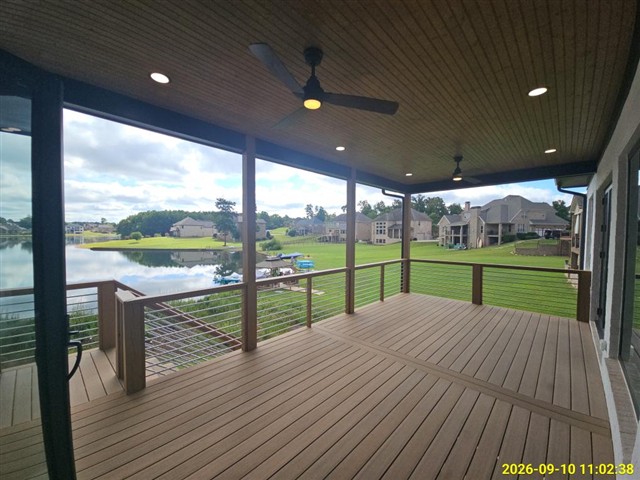
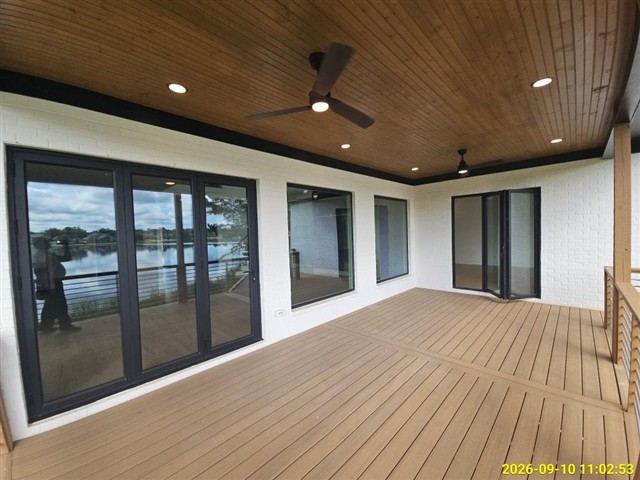
OBSERVATION: During our evaluation of the exterior deck structure, we inspected the vertical support posts holding up the upper deck level and stair landing. Along the faces of these large dimensional wood posts, we observed deep, continuous vertical cracks running straight through the grain. While solid wood posts naturally develop surface cracks as they dry out in the open air, these particular fissures are exceptionally long, wide, and deep. The deck framing, horizontal metal guardrails, and stair stringers are otherwise clean and neatly aligned, but the severe depth of these separations warrants a closer look to confirm the internal strength of the posts.


WHAT THIS COULD MEAN: Large timber posts support the downward weight of the entire deck, stairs, and anyone walking above. Minor surface checks are normal, but when cracks run deep into the core, moisture from rain can get trapped inside the post. Over time, trapped water could accelerate internal rot or weaken the load-bearing capacity of the wood. Deep fissures may also compromise the integrity of fasteners securing the post to the overhead beam or foundation.


RECOMMENDATION: Have a qualified deck builder or licensed structural engineer evaluate the cracked vertical support posts to determine if reinforcement or post replacement is necessary for safe, long-term support.

2.4 Vegetation, Grading, Drainage, Driveways, Patio Floor, Walkways and Retaining Walls (With respect to their effect on the condition of the building)  
inspection
2.4 Item 1 (Picture)
2.4 Item 2 (Picture)
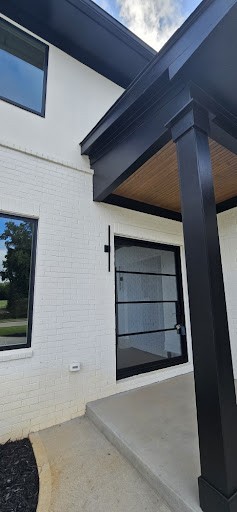
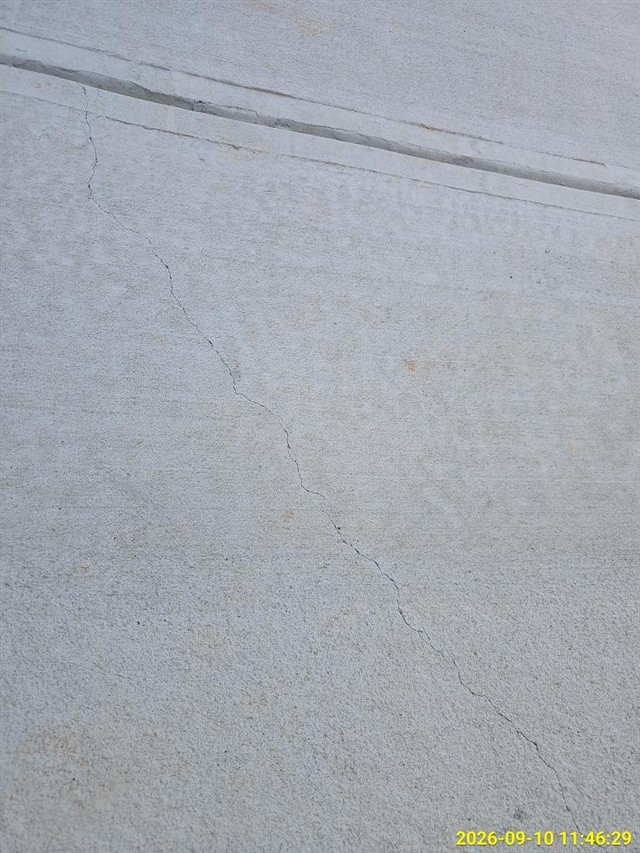
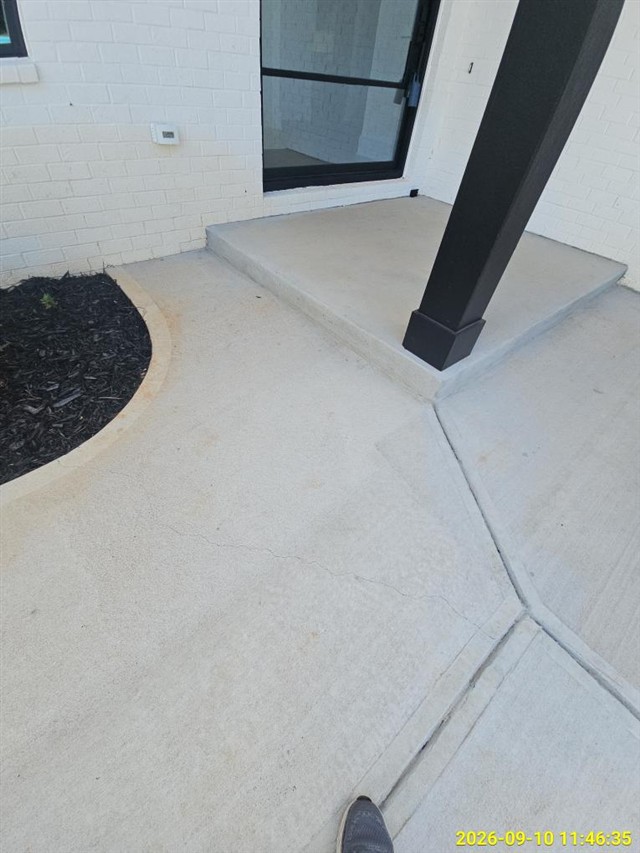
OBSERVATION: While walking the front entry area, we looked closely at the poured concrete walkway right in front of the porch steps. We found a visible hairline settlement crack running diagonally across the concrete slab. The surrounding brick facade, porch support post, and steps look sturdy and square. Concrete naturally shrinks slightly as it cures, and the ground underneath settles as soil compacts after construction. The concrete panels remain flush with no vertical trip ledge, but the surface shows this open separation across the walkway.


WHAT THIS COULD MEAN: When small cracks open up in outdoor concrete, rainwater can seep inside. During cold winter months, trapped water can freeze and expand, which may widen the crack over time or cause small pieces of the concrete surface to chip. Sealing the crack keeps water from washing away the soil underneath the slab.


RECOMMENDATION: Have a qualified concrete specialist evaluate the walkway and seal the crack using a flexible, exterior-grade polyurethane concrete sealant to prevent water entry.

3. Garage
3.2 Garage Floor  
inspection
3.2 Item 1 (Picture)
3.2 Item 2 (Picture)
3.2 Item 3 (Picture)
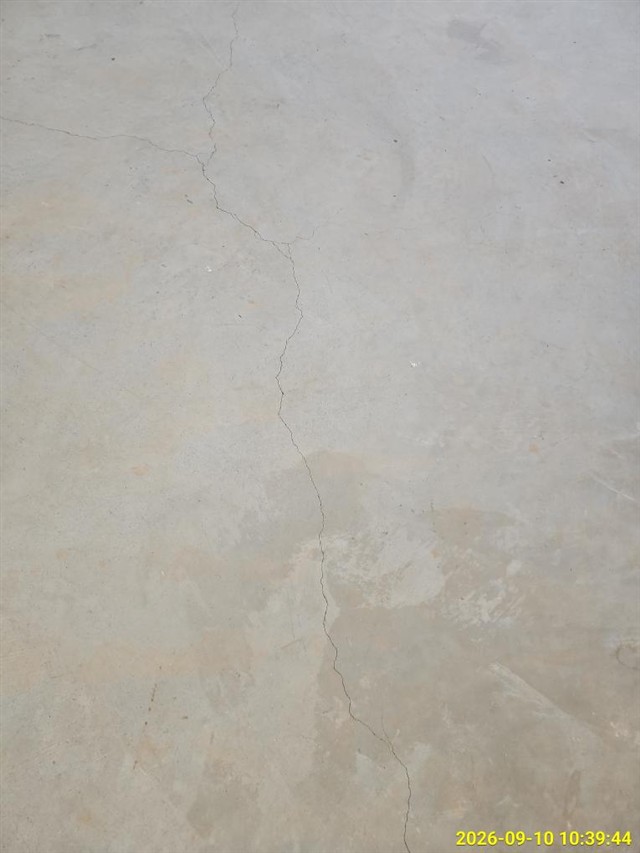
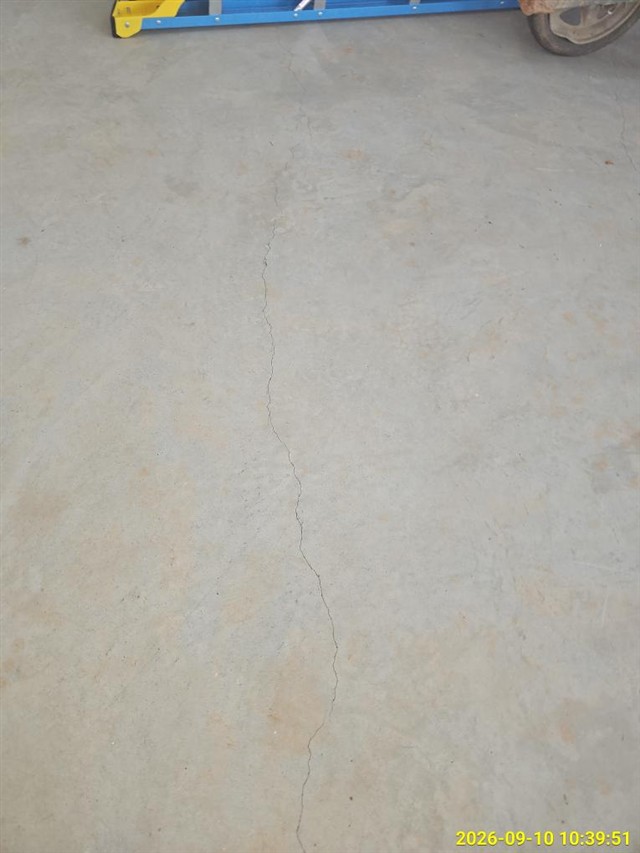
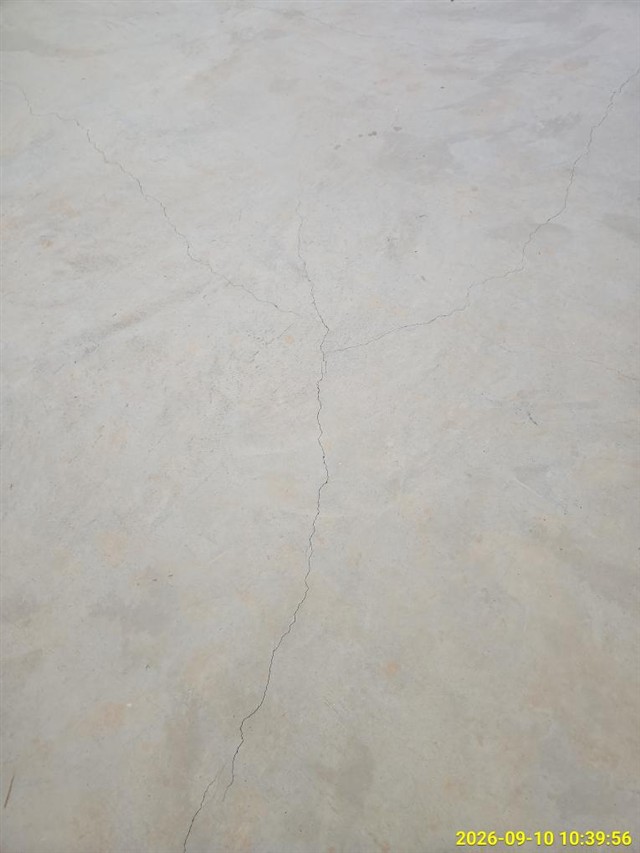
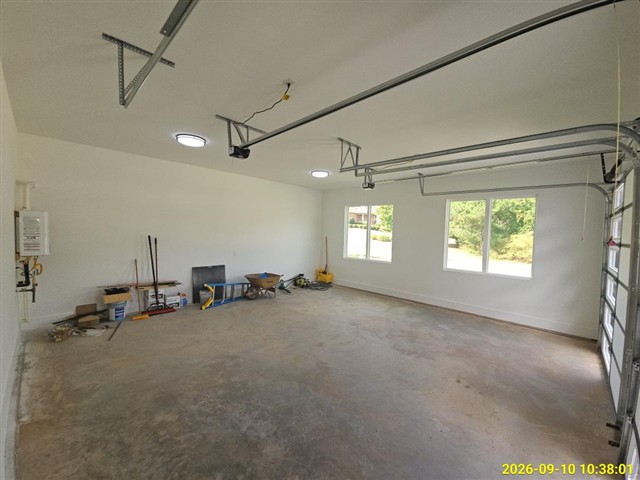
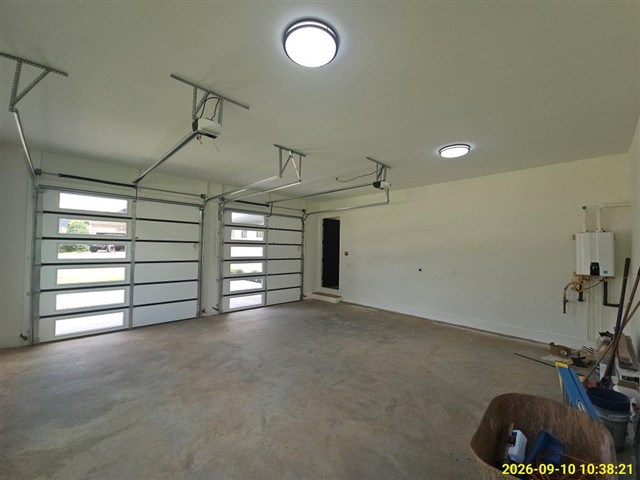
OBSERVATION: While walking the concrete slab floor inside the garage, we took a close look at the surface near the vehicle bays. We found a continuous hairline crack running across the floor, branching out into a Y-shaped pattern in one section. Concrete naturally shrinks slightly as the water inside it evaporates during the curing process, and ground settlement can also cause fine surface separations. The concrete on both sides of the fracture line remains completely flush and level, with no vertical height difference, heaving, or tripping edges observed.


WHAT THIS COULD MEAN: Fine hairline cracks in garage floors are very common and are usually cosmetic rather than structural. However, when cracks remain unsealed, water from rain, wet tires, or washdowns can soak into the opening. During freezing temperatures, trapped moisture could expand and cause the crack edges to chip or widen over time. Sealing the surface keeps water and automotive fluids from soaking into the concrete.


RECOMMENDATION: Have a qualified concrete repair contractor or handyman evaluate the garage floor crack and seal it with an exterior-grade, flexible polyurethane concrete joint sealant.

4. Interiors
4.1 Walls  
inspection
(1)
4.1 Item 1 (Picture)
4.1 Item 2 (Picture)
4.1 Item 3 (Picture)
4.1 Item 4 (Picture)
4.1 Item 5 (Picture)
4.1 Item 6 (Picture)
4.1 Item 7 (Picture)
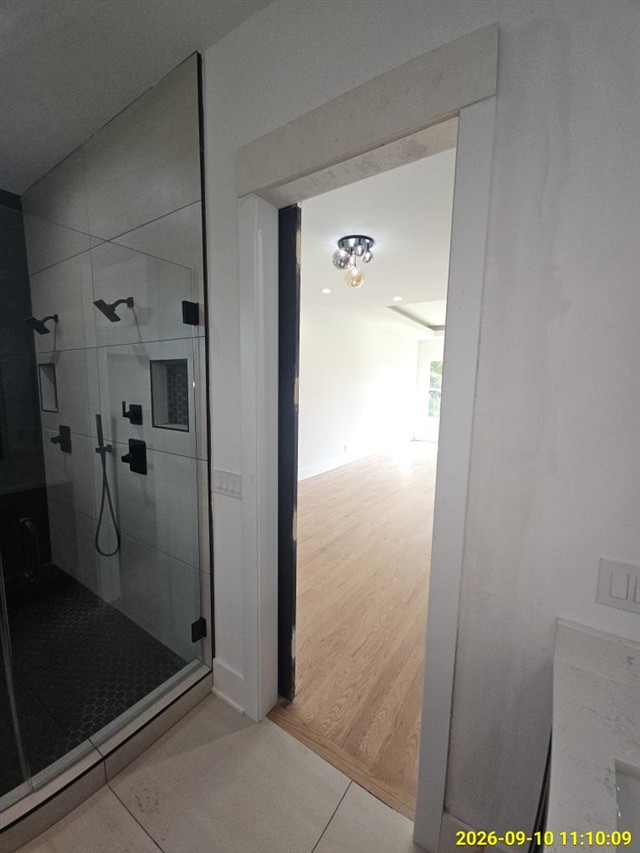
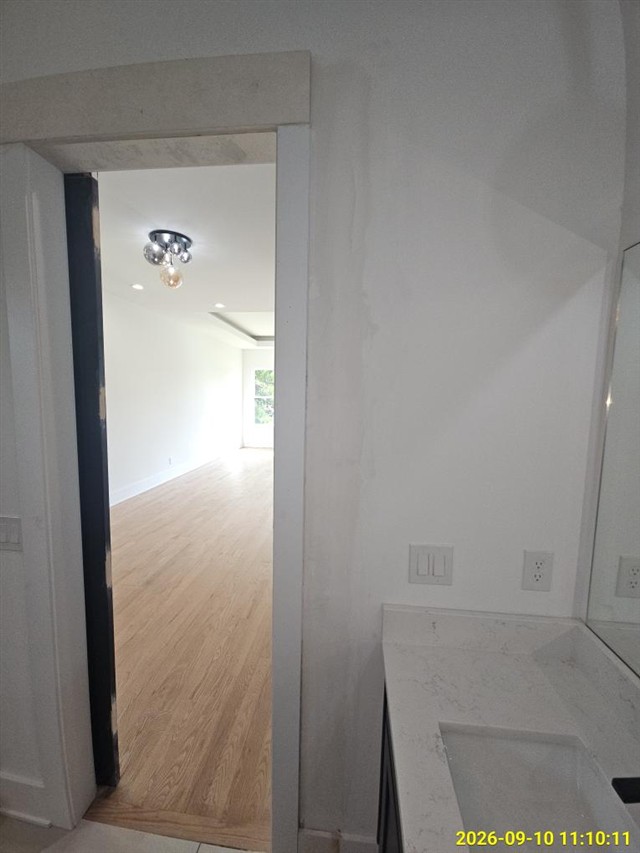
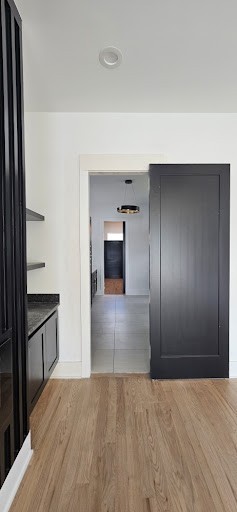
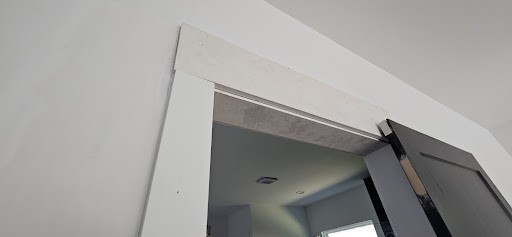
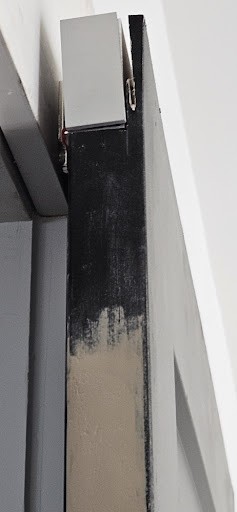
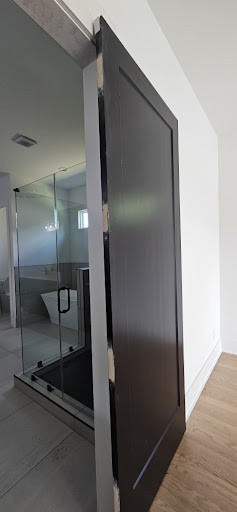
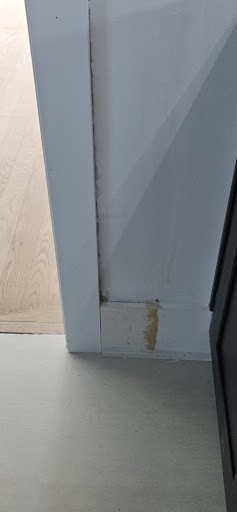
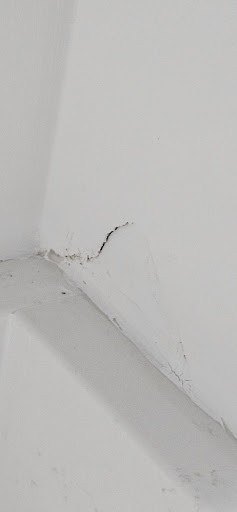
OBSERVATION: At the primary bathroom doorway, we took a close look at the sliding door and the surrounding trim. We found that the paint work is incomplete on both sides of the entrance. The upper head casing and the inner jamb face are unpainted or only primed. The vertical leading edge of the dark door slab shows bare, unpainted wood where it was planed or sanded. Additionally, the baseboard trim and wall return corner show unsealed seams and patched areas that are missing their finish paint coat.

 WHAT THIS COULD MEAN: Paint and primer do more than make a room look good. In a bathroom where showers create steam and humidity, raw wood and unsealed trim joints can absorb moisture from the air. Over time, that moisture could cause the wood trim or door edges to swell, stick, or peel. Sealing these surfaces protects the materials and keeps your doorway looking sharp for years to come.

RECOMMENDATION: Have a qualified painting and trim contractor evaluate the doorway, complete the prep work, and apply a durable, moisture-resistant finish paint to all unpainted door edges and trim surfaces.

(2)
4.1 Item 8 (Picture)
4.1 Item 9 (Picture)
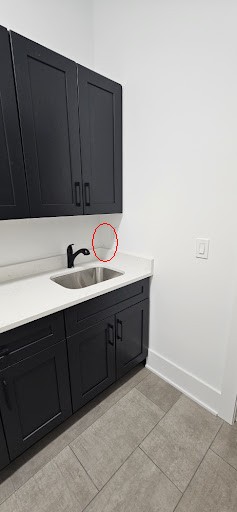
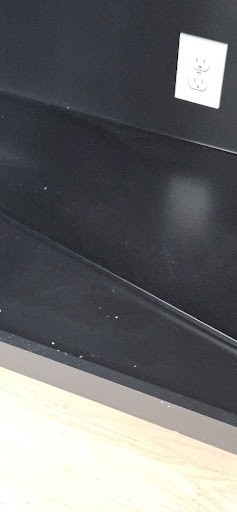
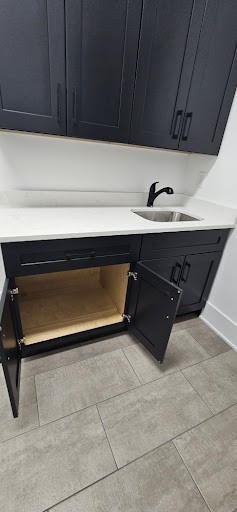
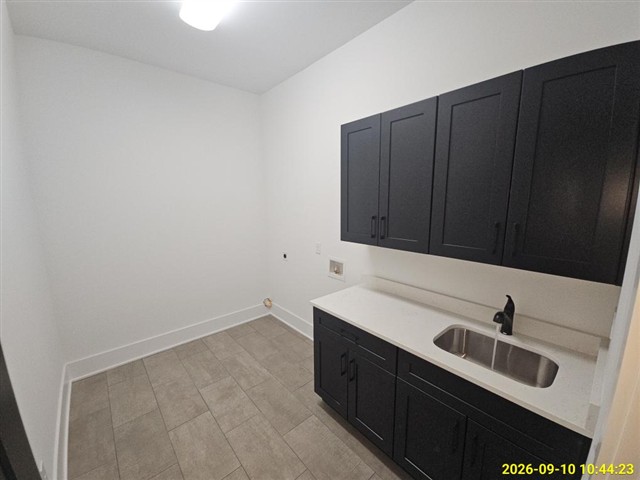
OBSERVATION: During our walk through the laundry area, we took a close look right above the sink countertop where the wall meets the backsplash. We noticed a small area of cracked and broken drywall with an open gap right along the edge. In a brand-new setup, you want these joints tight, clean, and well-sealed. While the cabinetry and countertop look great, this spot has exposed paper and plaster core material that is missing its finished surface and paint coat. It appears to be impact or installation stress damage that was not patched before the final turnover.


WHAT THIS COULD MEAN: Laundry sinks see plenty of splashes and daily use. When drywall is cracked or left open next to a countertop, water droplets and moisture may seep into the wall cavity over time. While this is not an emergency, moisture inside the wall could soften the gypsum board or lead to hidden cosmetic deterioration down the road. Keeping this area sealed tight helps protect your framing and keeps water where it belongs.


RECOMMENDATION: Have a qualified drywall and paint specialist evaluate and repair this damaged section. The area should be patched, textured, painted, and properly sealed along the countertop edge with a flexible, waterproof silicone caulk.

4.2 Floors  
inspection
4.2 Item 1 (Picture)
4.2 Item 2 (Picture)
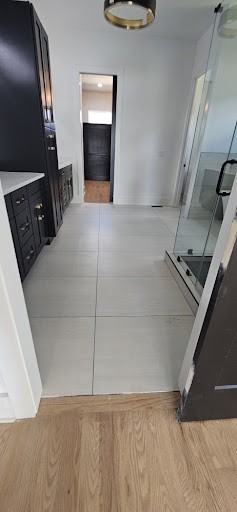
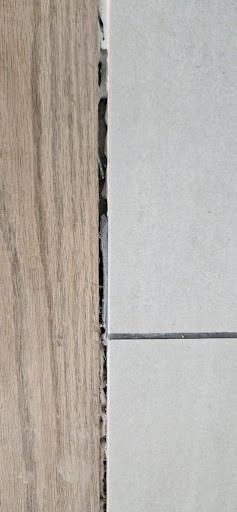
OBSERVATION: At the doorway transition between the wood flooring and the bathroom tile, we observed an open expansion gap that has not been sealed. Both the tile and wood flooring materials look great, but the line where they meet currently shows exposed subflooring and mortar. In home construction, different materials naturally expand and contract at different rates as seasons and indoor temperatures change. Leaving this seam open without a flexible seal or transition strip leaves the floor edge unprotected during daily use.


WHAT THIS COULD MEAN: In an area right outside a bathroom, water droplets from wet feet or splashes could easily seep into this open gap. Over time, trapped moisture could cause the edges of the hardwood to swell, cup, or darken. An unsealed seam could also collect dirt and debris that is difficult to sweep out.


RECOMMENDATION: Have a qualified flooring contractor evaluate this floor transition and install a color-matched, flexible silicone sealant or appropriate transition trim strip.

4.3 Steps, Stairways, Balconies and Railings  
inspection
(1)
4.3 Item 1 (Picture)
4.3 Item 2 (Picture)
4.3 Item 3 (Picture)
4.3 Item 4 (Picture)
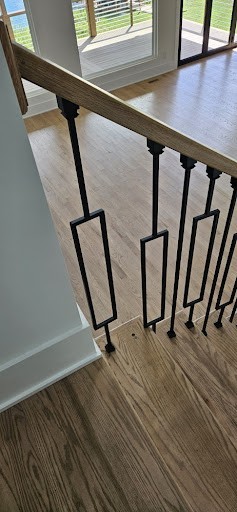
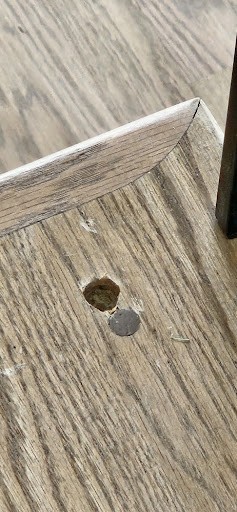
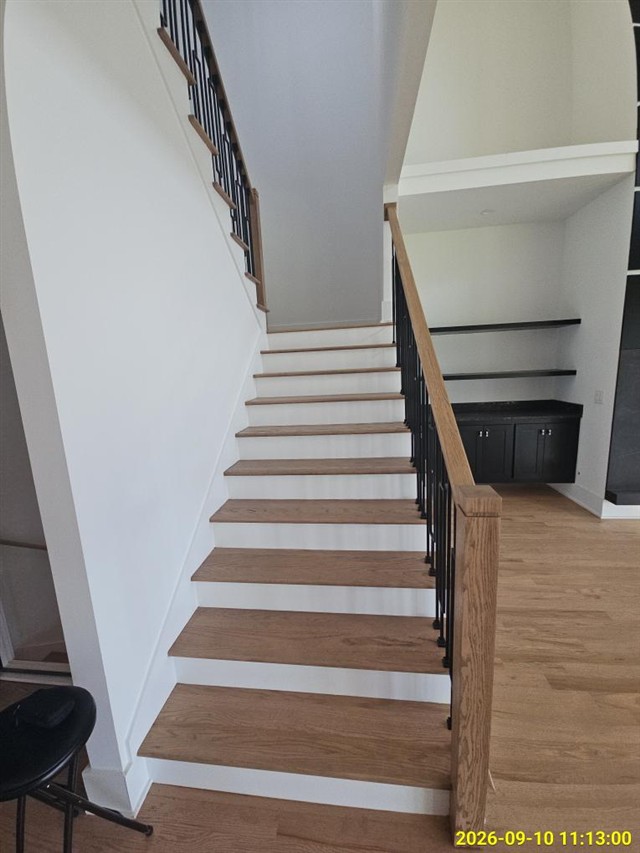
OBSERVATION: At the stairway guardrail, we found a missing metal baluster (spindle) right near the top edge. The open mounting hole and dowel anchor are drilled into the stair nosing, but the upright bar was never secured in place. The uninstalled spindle was located inside a nearby built-in lower cabinet. While the surrounding rail and floor finish look sharp, the gap left behind on the staircase does not provide continuous protection along the walking path.


WHAT THIS COULD MEAN: Guardrails are designed to keep everyone safe as they move through the home. A missing spindle creates an opening larger than four inches, which could allow a small child or pet to slip through or get stuck. Leaving the spindle out could also reduce the rigidity of the handrail system over time.


RECOMMENDATION: Have a qualified stair builder or finish carpentry specialist evaluate the guardrail assembly and properly install and anchor the missing spindle to ensure safe, continuous spacing.

(2)
4.3 Item 5 (Picture)
4.3 Item 6 (Picture)
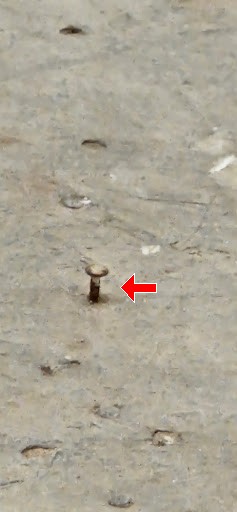
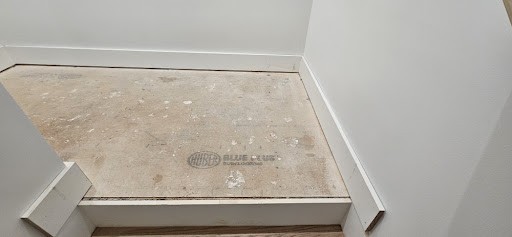
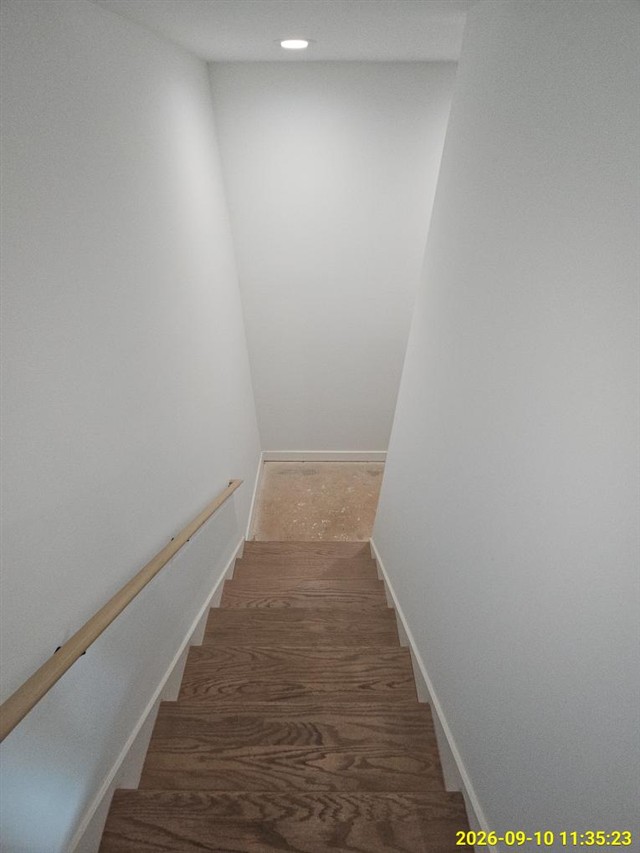
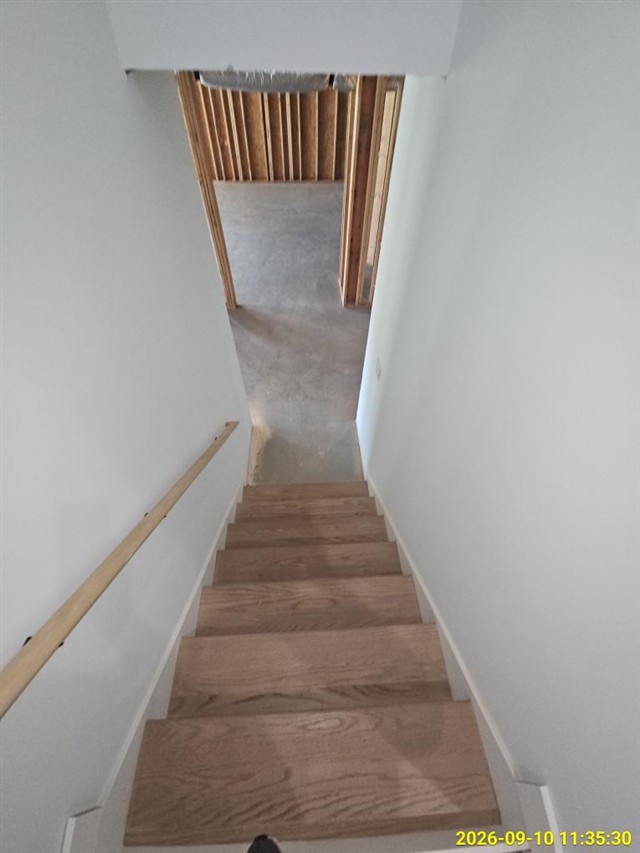
OBSERVATION: While walking the basement stairway landing, we checked the subfloor where the steps meet the intermediate platform. An exposed framing nail is sticking up above the surface of the subfloor panel. The surrounding subfloor panels and base trim are securely in place, but this fastener was not driven flush or removed after the carpentry work was done. On an unfinished walking surface, raised fasteners like this easily stand out underfoot.


WHAT THIS COULD MEAN: Stepping directly on a raised nail head could cause a foot injury or puncture footwear. If finished flooring or carpet padding is installed over this nail later on, the raised head could create a noticeable bump, puncture the new underlayment, or cause premature wear on your flooring.


RECOMMENDATION: Have a qualified flooring or framing specialist evaluate the landing surface to pull or countersink the exposed fastener flush before finished flooring is installed.

4.4 Counters and Cabinets (representative number)  
inspection
4.4 Item 1 (Picture)
4.4 Item 2 (Picture)
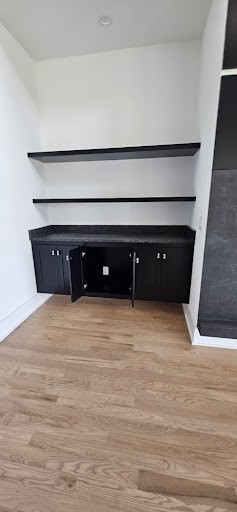
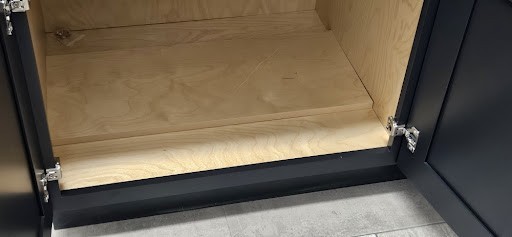
OBSERVATION: Inside the lower base cabinet, we found a loose shelf board resting flat on the cabinet floor rather than mounted in its proper upright position. The small bag of shelf support pegs is sitting in the back left corner, but the shelf has not been set up. The cabinetry itself is in clean condition with good hardware, but this storage area was simply left unfinished during the final stages of installation. It is a very common detail that gets overlooked when a home is being finished up.


WHAT THIS COULD MEAN: Leaving the shelf uninstalled reduces your usable storage space and could allow items stored inside to scratch the loose board or cabinet base. While this does not affect the safety or structure of the home, completing the installation ensures you have the full, intended storage capacity ready for daily use.


RECOMMENDATION: Have a qualified cabinet specialist or trim carpenter evaluate and properly mount the interior shelf using the supplied hardware pins.

4.5 Doors (representative number)  
inspection
(1)
4.5 Item 1 (Picture)
4.5 Item 2 (Picture)
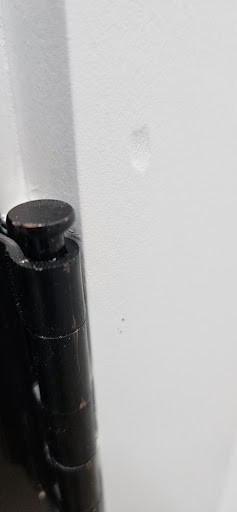
OBSERVATION: While examining the bedroom closet door, we checked the door hardware and hinges along the frame. We noticed that a hinge pin is not fully seated into the hinge barrel, leaving the pin head sticking up above the top knuckle. The door panel and dark finish look sharp, and the hinge plates are screwed tightly into the jamb. However, the hinge pin was never tapped all the way down into its locked position when the door was hung.


WHAT THIS COULD MEAN: Hinge pins hold the full weight of the door and keep it swinging evenly. When a pin sits partially out of its sleeve, the door could begin to sag over time as you open and close it. This extra movement may cause the door latch to rub against the strike plate or scratch the door frame.


RECOMMENDATION: Have a qualified carpenter or handyman evaluate the door hinges and seat the hinge pin fully flush into the barrel assembly.

(2)
4.5 Item 3 (Picture)
4.5 Item 4 (Picture)
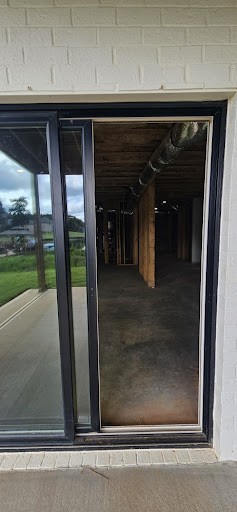
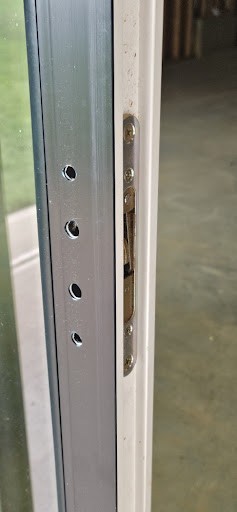
OBSERVATION: During our check of the exterior doors leading into the unfinished basement, we inspected the sliding glass patio door assembly. We found that the operating door handle and thumb-turn lock mechanism are missing. The internal latch mortise is installed in the door edge, and the pre-drilled holes are present in the frame, but the interior and exterior hardware handles have not been mounted. The glass panels, outer brickwork, and track are in clean condition, but this door unit was left incomplete before final turnover.


WHAT THIS COULD MEAN: An exterior sliding door without a handle and lock cannot be secured from the inside or outside. This could allow unauthorized entry into the home and presents a home security concern. Additionally, without a proper latching mechanism to pull the door snugly against the weatherstripping, wind and outdoor air could leak into the space.


RECOMMENDATION: Have a qualified door specialist or general contractor evaluate the sliding door assembly and install the proper matching handle set and locking mechanism to ensure the door can be securely locked.

5. Structural Components
5.3 Floors (Structural)  
inspection
(1)
5.3 Item 1 (Picture)
5.3 Item 2 (Picture)
5.3 Item 3 (Picture)
5.3 Item 4 (Picture)
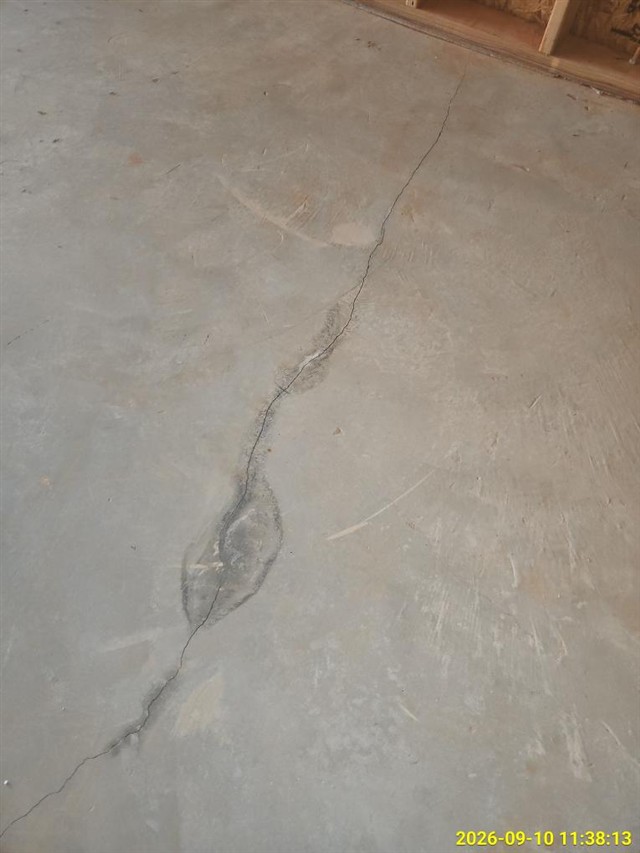
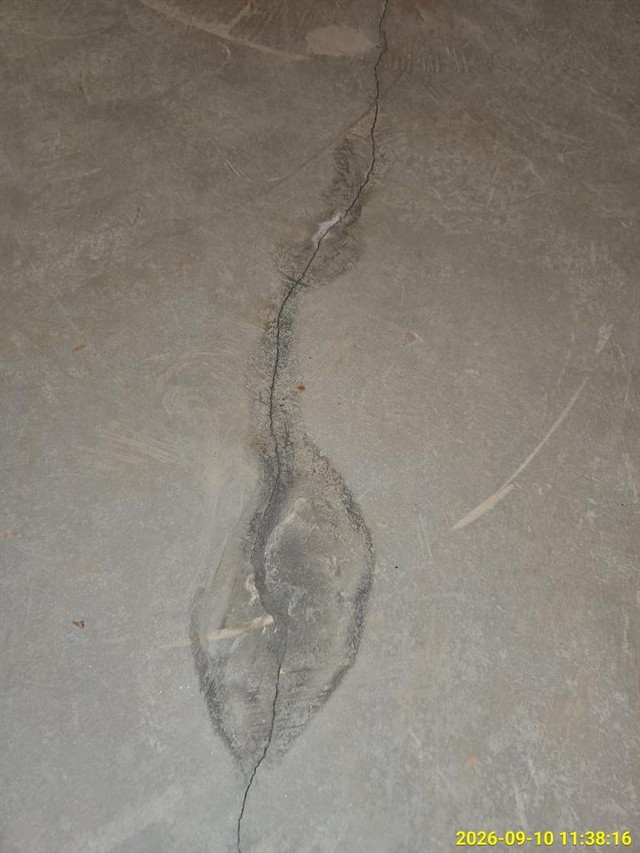
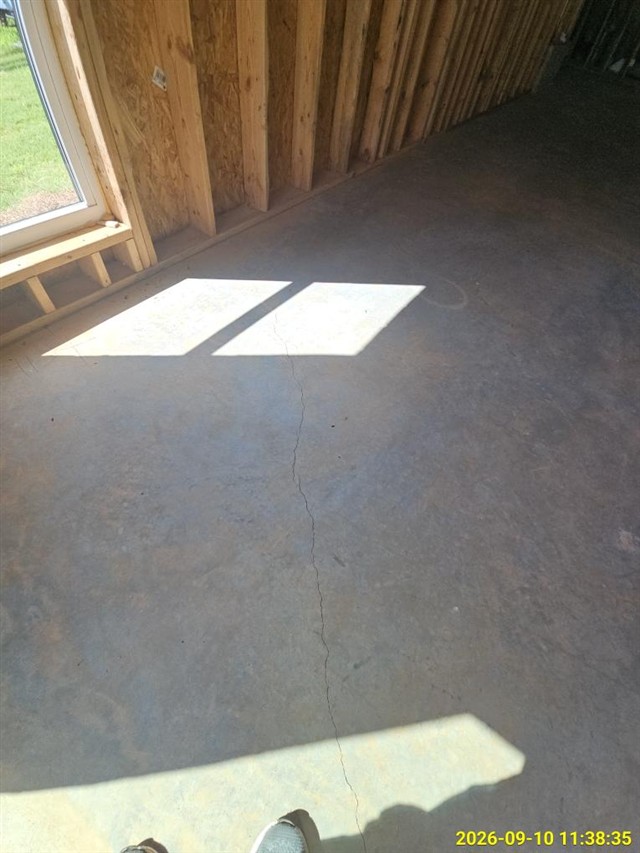
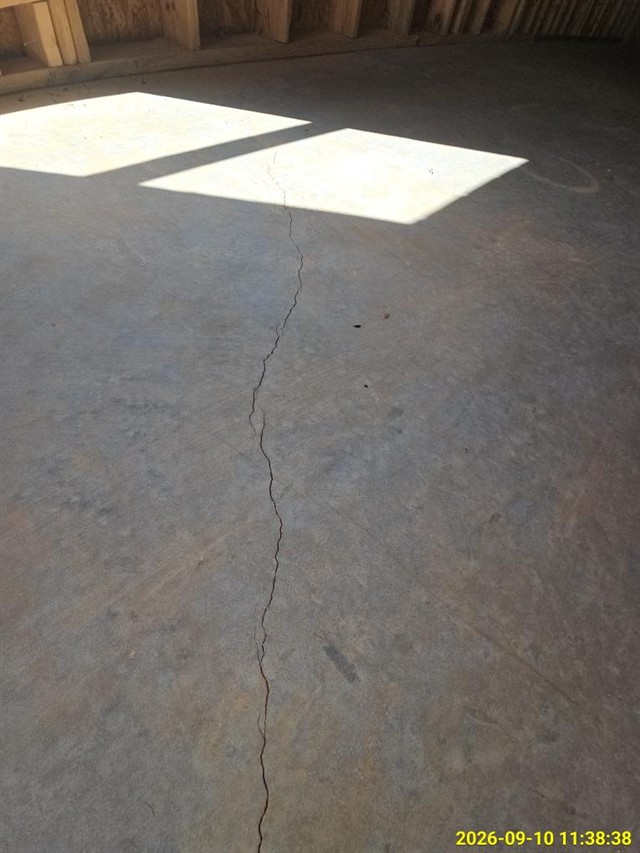
OBSERVATION: While walking the concrete slab floor near the stud wall framing, we looked closely at the concrete surface. A continuous hairline crack runs across the floor. Near one section of the crack, there is an area of localized grinding, past patch material, or moisture discoloration along the fracture line. Concrete naturally shrinks as it cures and dries, which frequently leads to hairline cracks. The concrete surfaces on either side of the crack appear level, with no significant vertical displacement or tripping ledge observed.

WHAT THIS COULD MEAN: Small shrinkage cracks in a concrete slab are very common and typically cosmetic rather than structural. However, open cracks in a ground-contact floor could allow moisture vapor or soil gases to enter the living space. If moisture passes through the slab, it could also cause problems for flooring adhesives or finished materials installed over the concrete later on.

RECOMMENDATION: Have a qualified concrete or waterproofing specialist evaluate the floor crack and seal it with an appropriate flexible polyurethane concrete joint sealant.

(2)
5.3 Item 5 (Picture)
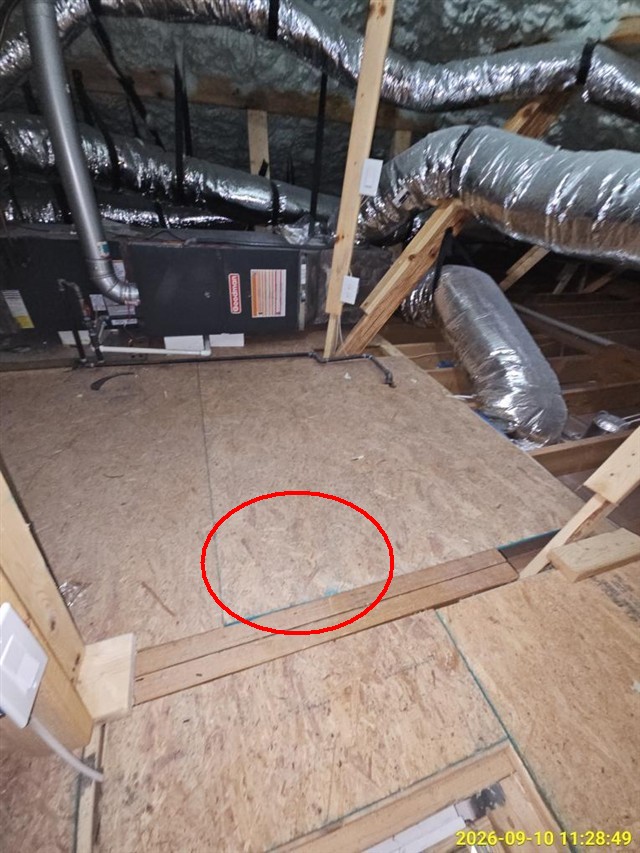
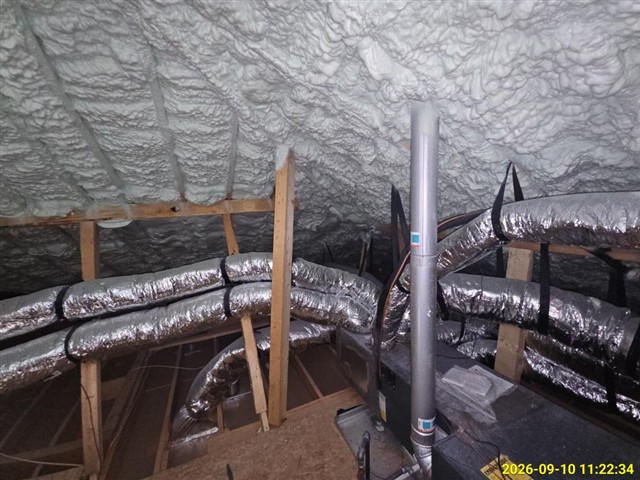
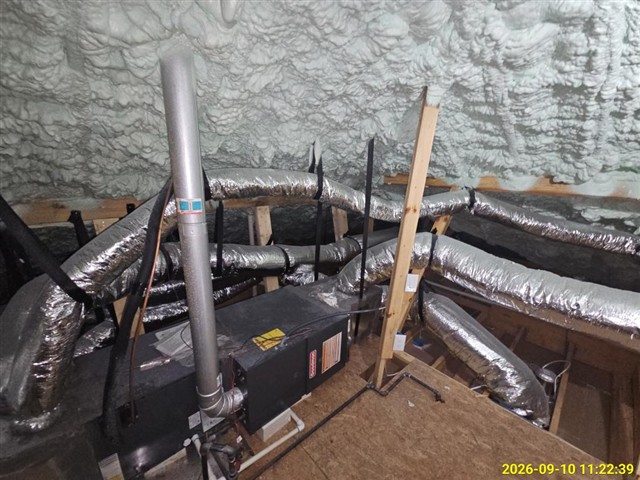
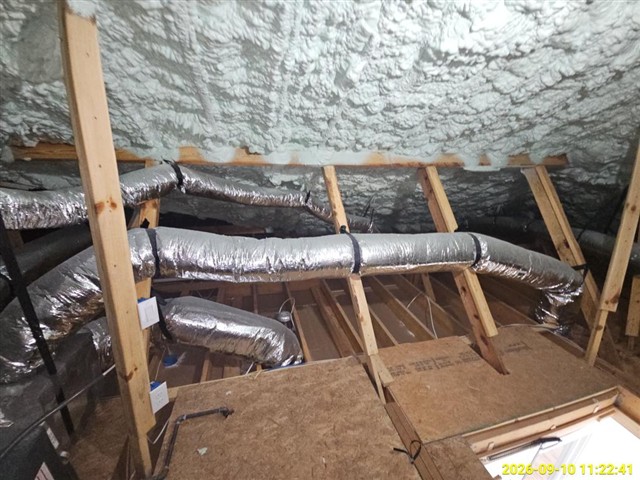
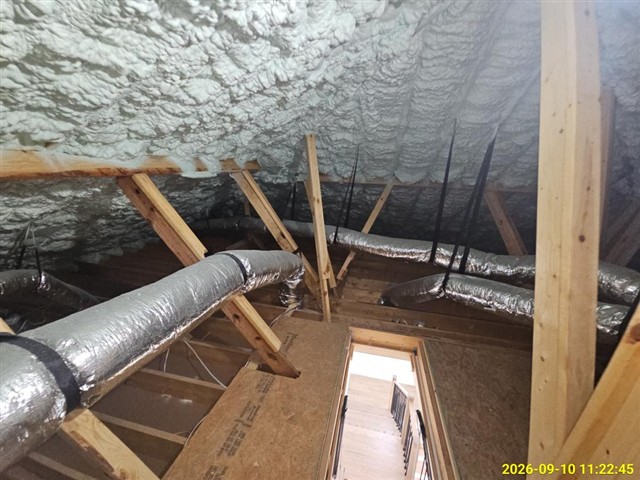
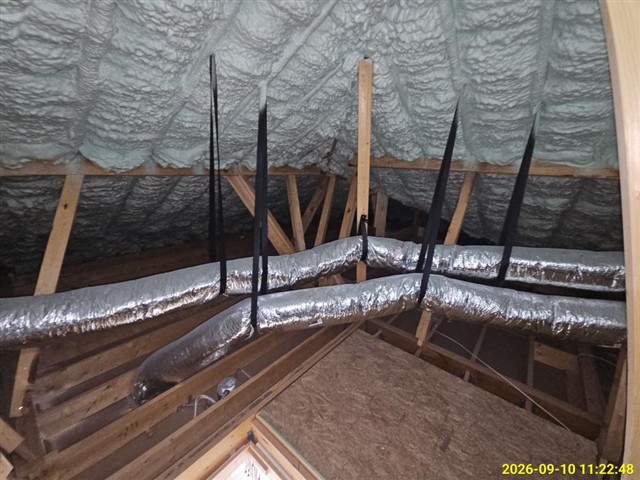
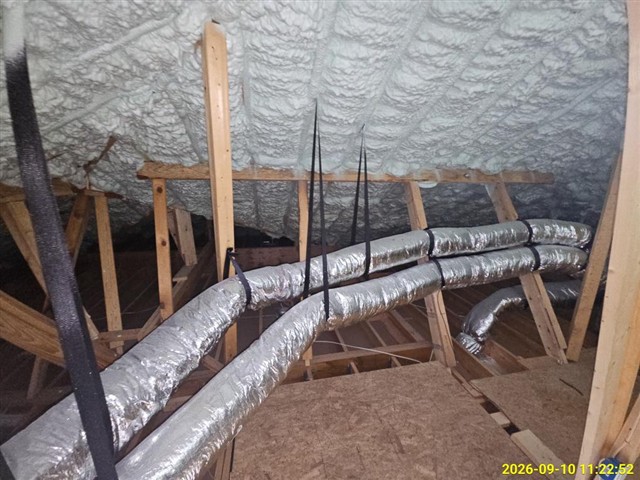
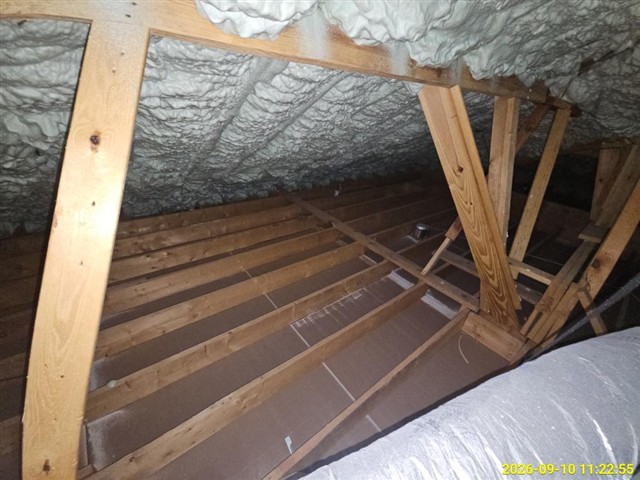
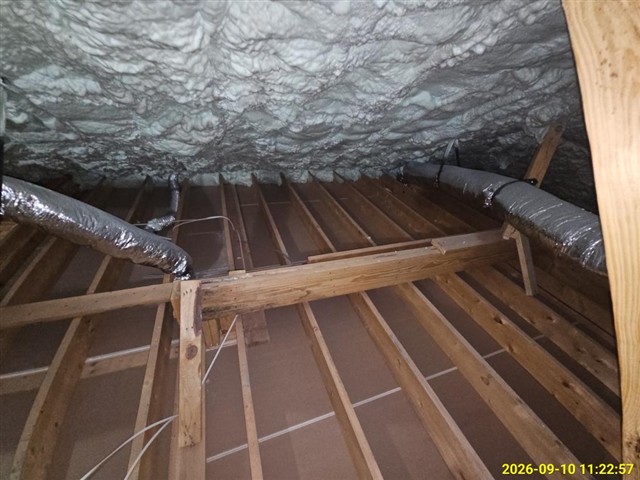
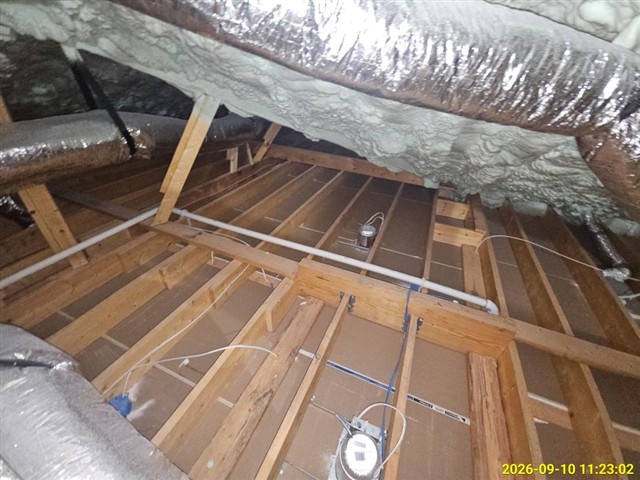
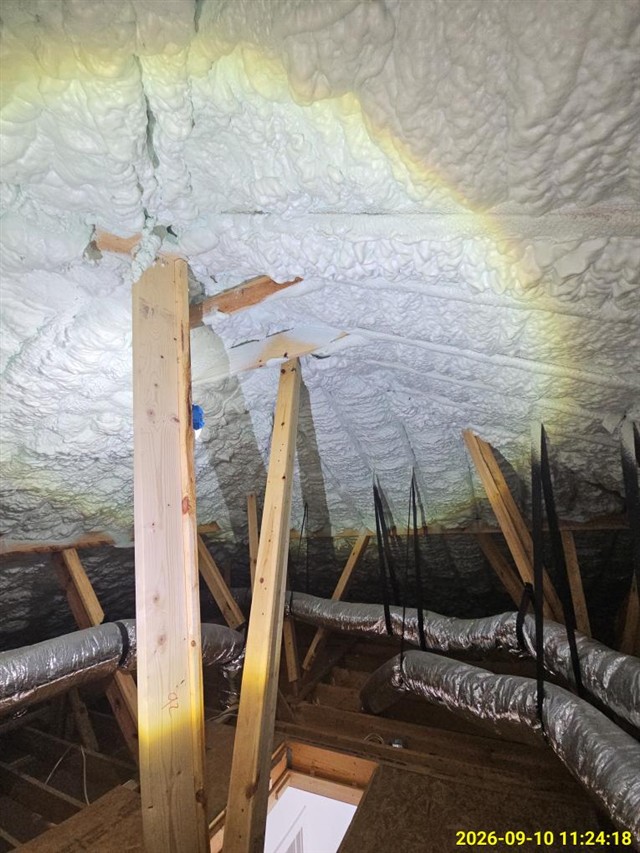
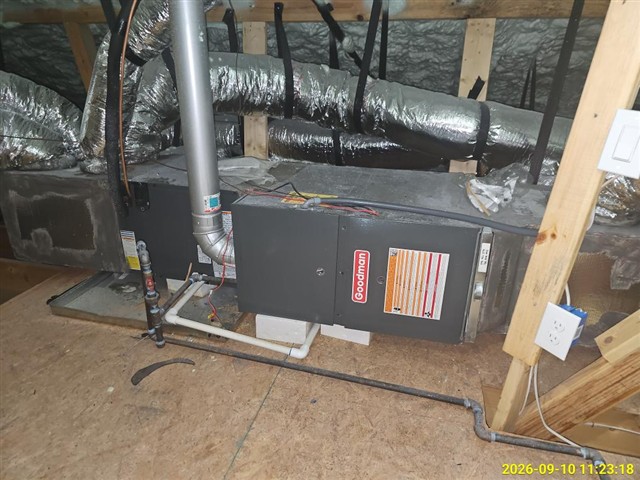
OBSERVATION: Up in the attic, we walked the OSB wood decking platform that provides access to the heating and cooling air handler. As you step across these floor panels, the wood feels distinctly bouncy and spongy underfoot. The attic space itself features spray foam insulation along the roof rafters, neatly routed flexible ductwork, and clean mechanical equipment. However, the plywood panels across this service walkway lack adequate framing support or solid wood blocking beneath the seams. Without proper bracing across the ceiling joists, the decking flexes easily when walked on.


WHAT THIS COULD MEAN: An attic platform is designed to provide a solid, secure walkway so technicians can safely service heating equipment and ductwork. When decking is bouncy or unsupported, it can bend under normal body weight. Over time, that flexing could loosen fasteners, crack the wood panels, or create a tripping and fall hazard, potentially damaging the finished drywall ceiling directly underneath.


RECOMMENDATION: Have a qualified framing contractor or licensed general contractor evaluate the attic service platform and install additional wood joists or blocking beneath the decking seams to make the walkway completely rigid and secure.

5.4 Ceilings (Structural)  
inspection
5.4 Item 1 (Picture)
5.4 Item 2 (Picture)
5.4 Item 3 (Picture)
5.4 Item 4 (Picture)
5.4 Item 5 (Picture)
5.4 Item 6 (Picture)
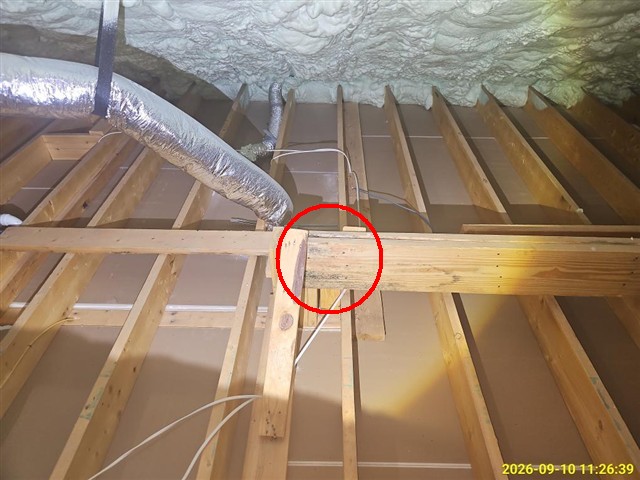
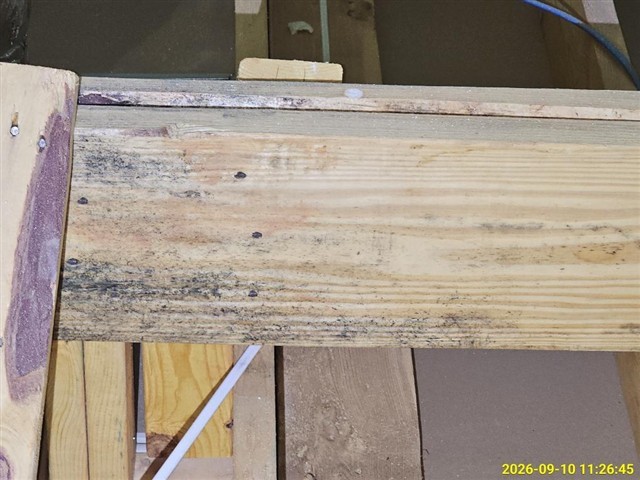
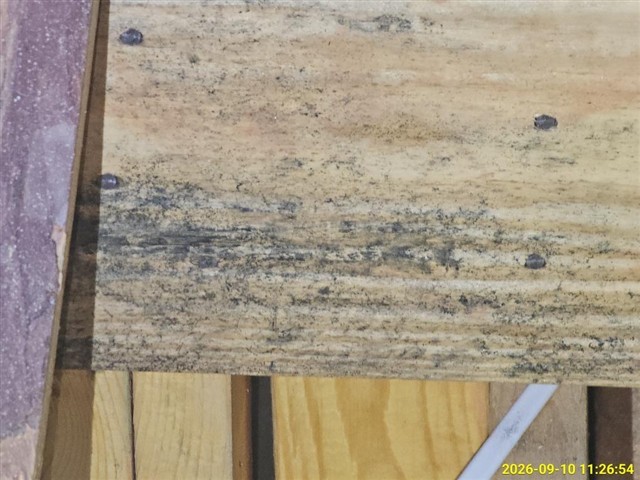
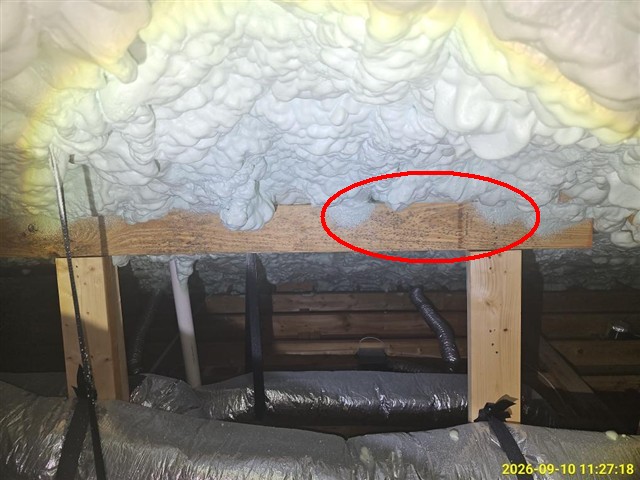
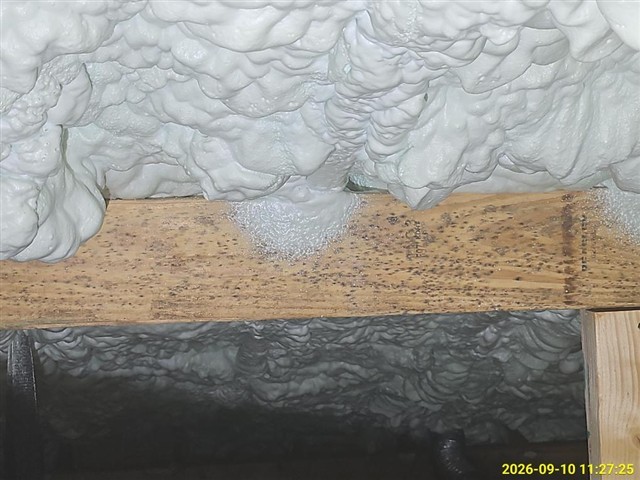
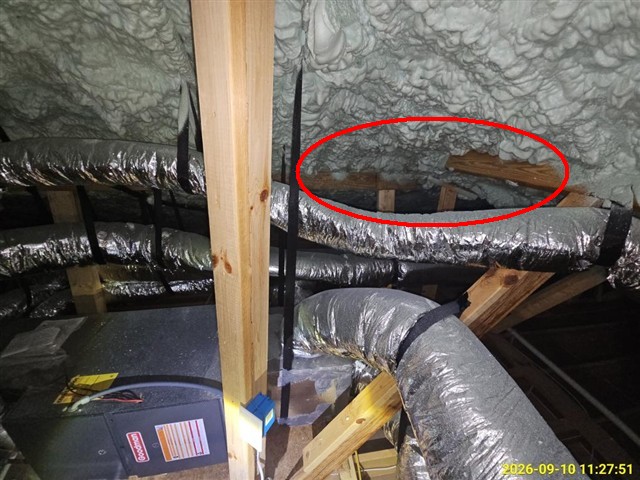
OBSERVATION: While examining the attic space, we checked the ceiling joists, roof framing, and spray foam insulation. Along one of the dimensional lumber framing members, we observed dark, blotchy fungal-like staining across the face of the wood. The surrounding roof rafters, joists, and mechanical ductwork appear structurally sound and properly positioned. However, this specific board has noticeable discoloration and spotting that often develops when construction lumber is exposed to rain or damp conditions before or during the building process.


WHAT THIS COULD MEAN: Wood that gets wet on a job site can develop surface mold or fungal growth if it does not dry out quickly. In an attic sealed with spray foam, trapped moisture or elevated humidity could allow organic growth to remain active or spread. While surface growth does not necessarily weaken the wood immediately, unaddressed moisture or mold could affect indoor air quality or lead to wood rot over time.


RECOMMENDATION: Have a qualified mold remediation specialist or environmental professional evaluate the discolored wood member, test the surface for active microbial growth, and clean or treat the lumber as needed.

6. Plumbing System
6.1 Plumbing Water Supply, Distribution System and Fixtures  
inspection
(1)
6.1 Item 1 (Picture)
6.1 Item 2 (Picture)
X
6.1 Item 3 (Video)
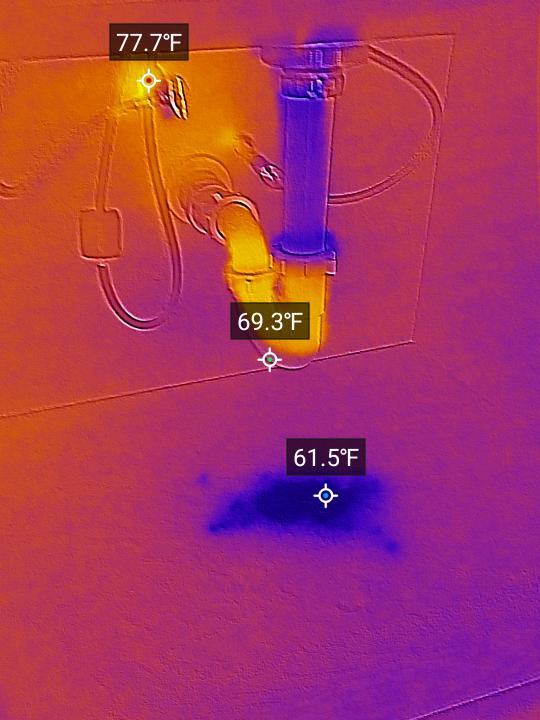
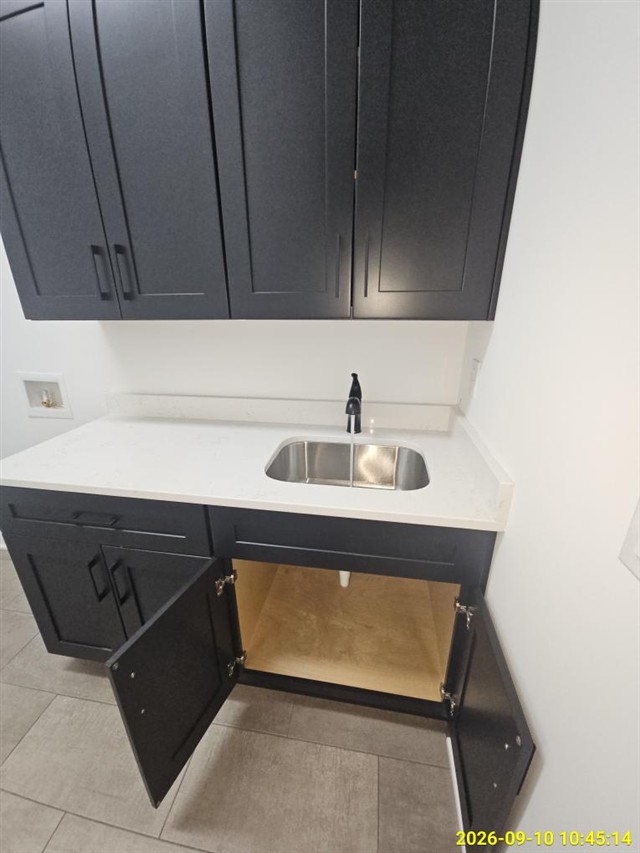
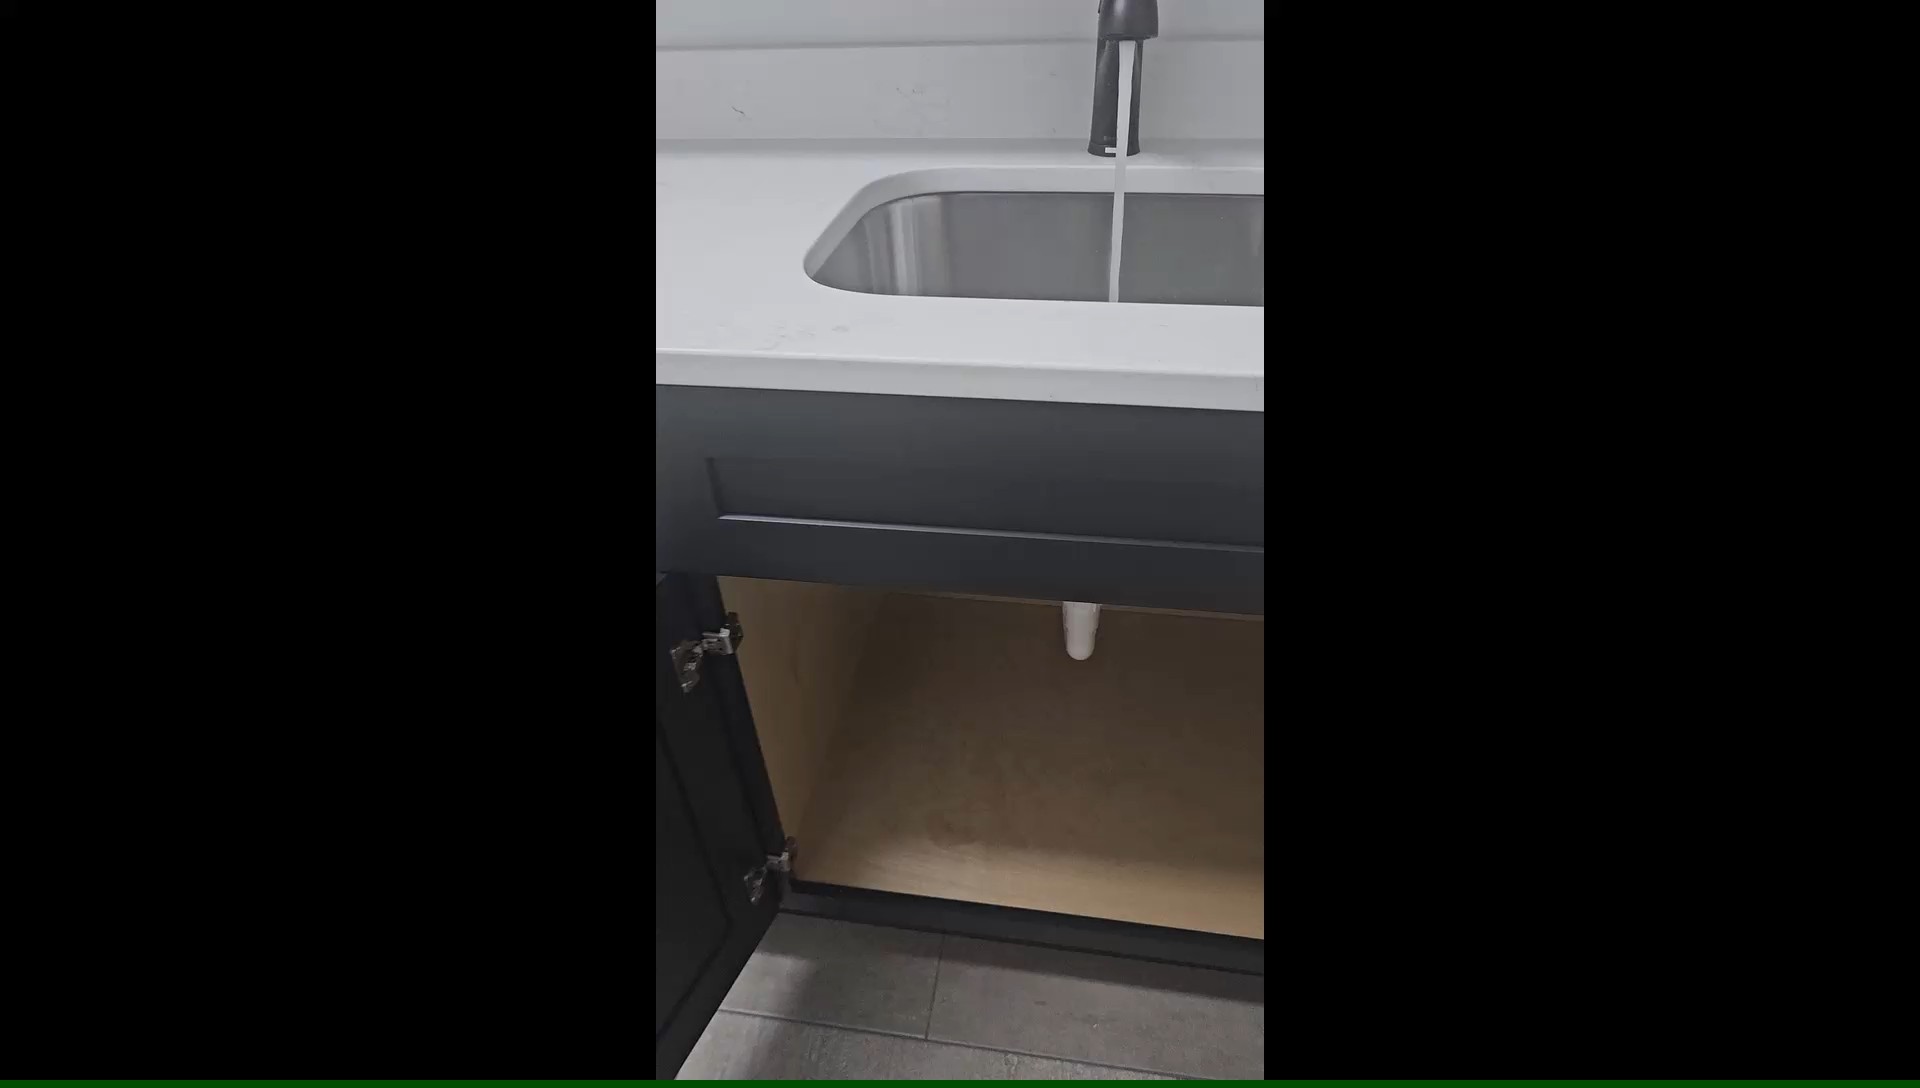
OBSERVATION: Underneath the sink basin, we checked the drain piping and supply connections both visually and with a thermal imaging camera. The drain pipes are connected with standard slip joints, and the supply lines are hooked up securely. However, the thermal scan shows a distinct, cold thermal pattern reading 61.5°F right on the floor of the cabinet directly beneath the drain trap assembly. This cooler temperature signature indicates standing water or active moisture leaking down onto the cabinet floor when water flows through the sink drain.


WHAT THIS COULD MEAN: A slow drip from a drain pipe or slip joint can quietly soak the wooden base of your cabinet. Over time, that trapped moisture could warp or soften the wood, cause dark water stains, or lead to mold growth in an enclosed cabinet space. Catching and sealing a small drain leak early keeps the cabinet floor solid and dry.


RECOMMENDATION: Have a qualified licensed plumbing contractor evaluate the sink drain pipe fittings, trap assembly, and tailpiece connections, and make necessary repairs to eliminate leaks.

(2)
6.1 Item 4 (Picture)
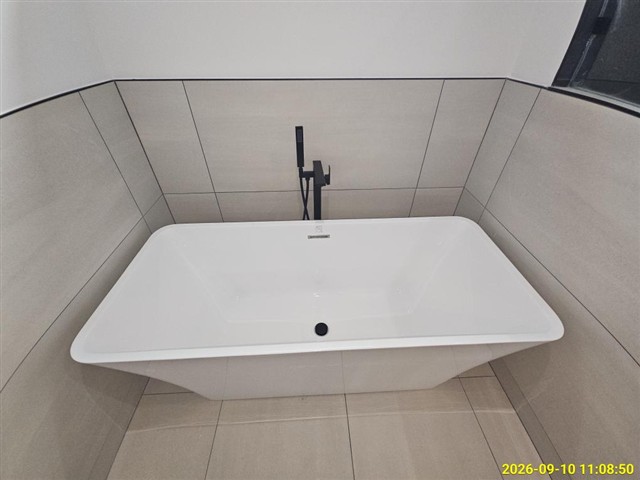
OBSERVATION: During our check of the primary bathroom, we tested the freestanding soaking tub and its wall-mounted faucet assembly. When we operated the handles using normal controls, no water flowed from the spout or hand shower attachment. The tub basin, wall tile, and matte black fixtures look beautifully installed and show no visual cracks or damage. However, the plumbing control valves did not deliver water during testing, which typically indicates that the water supply shut-off valves remain closed or the internal faucet cartridges are not yet engaged.


WHAT THIS COULD MEAN: If the water lines are turned off or the fixture is not connected properly behind the wall, you cannot use the tub. Additionally, running water through the system is necessary to confirm that the drain pipes, supply lines, and overflow connections are completely watertight and free of leaks.


RECOMMENDATION: Have a qualified licensed plumbing contractor evaluate the bathtub water supply valves, faucet controls, and drainage assembly to restore full water operation and confirm there are no active leaks.

(3)
6.1 Item 5 (Picture)
6.1 Item 6 (Picture)
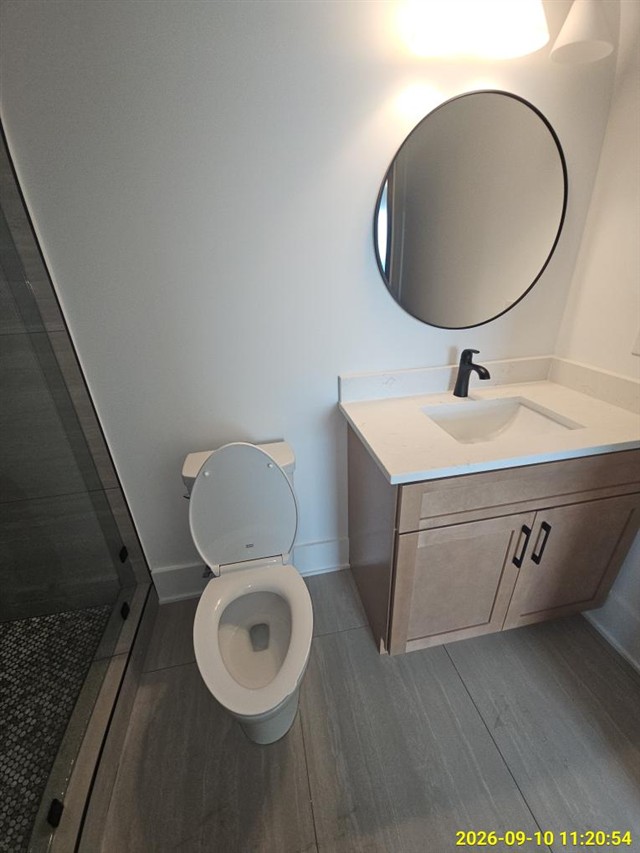
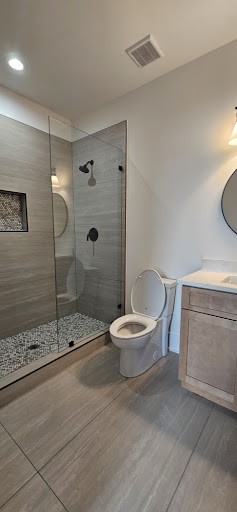
OBSERVATION: During our walk through this bathroom, we checked the toilet to make sure it was firmly secured to the floor. When tested by hand, the toilet moved from side to side. We also observed that the base where the porcelain meets the tile floor has not been sealed with caulk. The toilet fixture itself looks brand-new and the surrounding floor tile is in clean condition, but the mounting bolts underneath the side covers are either loose or need adjustment to hold the bowl firmly in place.


WHAT THIS COULD MEAN: A toilet relies on a soft wax ring underneath to seal the drain pipe. When the toilet wobbles, that movement could break the wax seal and allow water or sewer gases to seep out beneath the bowl. Over time, hidden leaks under the base could damage the subfloor below. Sealing around the base also prevents mop water or spills from getting trapped underneath.


RECOMMENDATION: Have a qualified licensed plumbing contractor evaluate the toilet mounting assembly, reset or secure the bowl with a fresh wax ring if needed, and apply a neat bead of waterproof caulk around the base while leaving a small weep gap at the back.

7. Electrical System
7.0 Service and Grounding Equipment, Main Overcurrent Device, Main and Distribution Panels  
inspection
7.0 Item 1 (Picture)
7.0 Item 2 (Picture)
7.0 Item 3 (Picture)
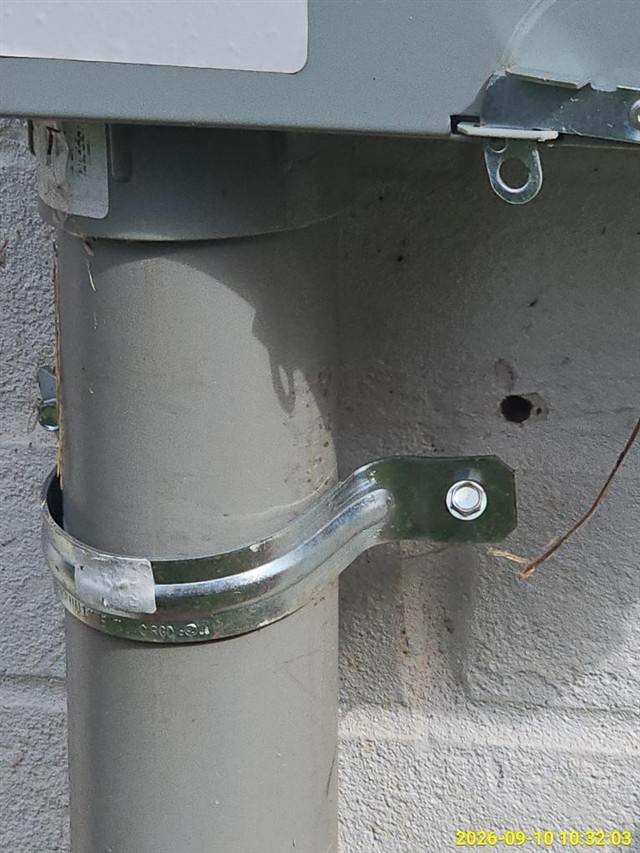
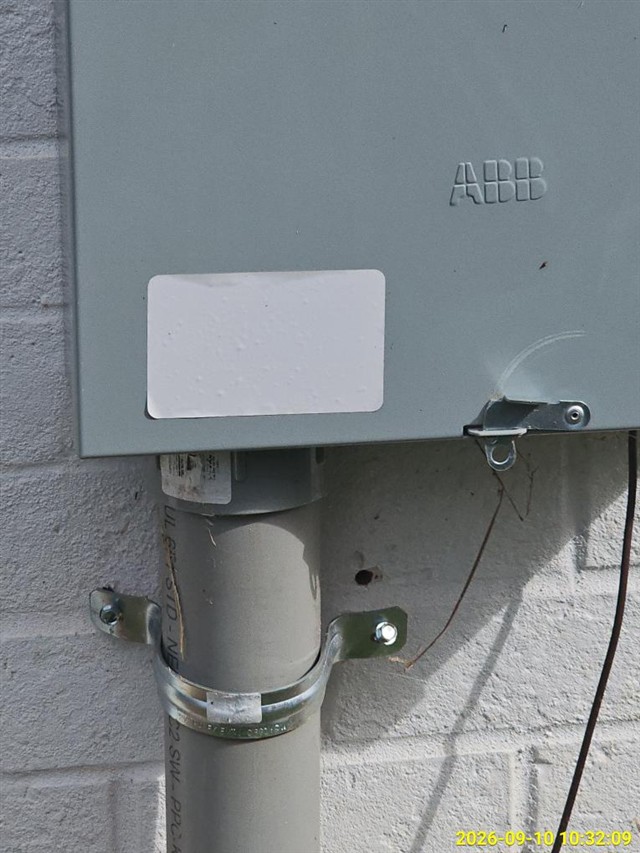
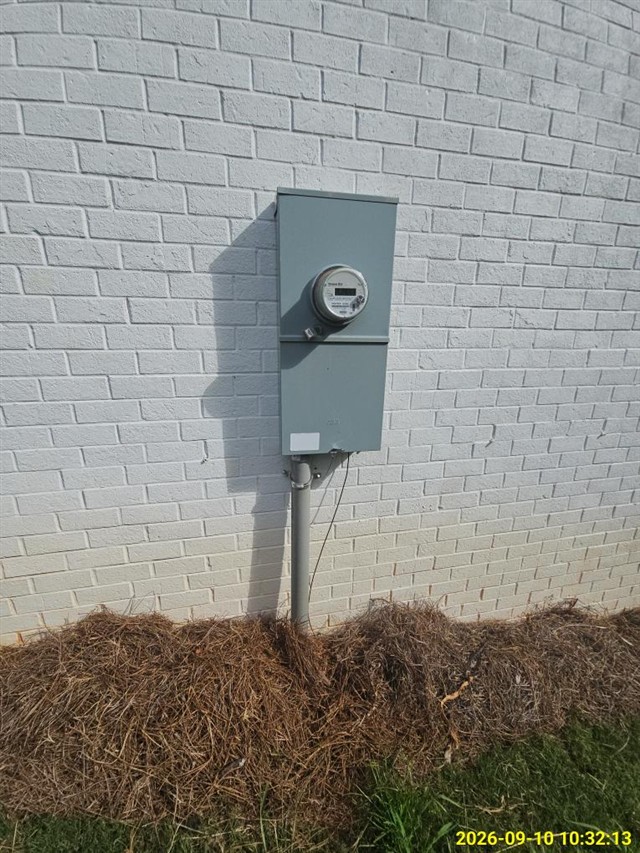
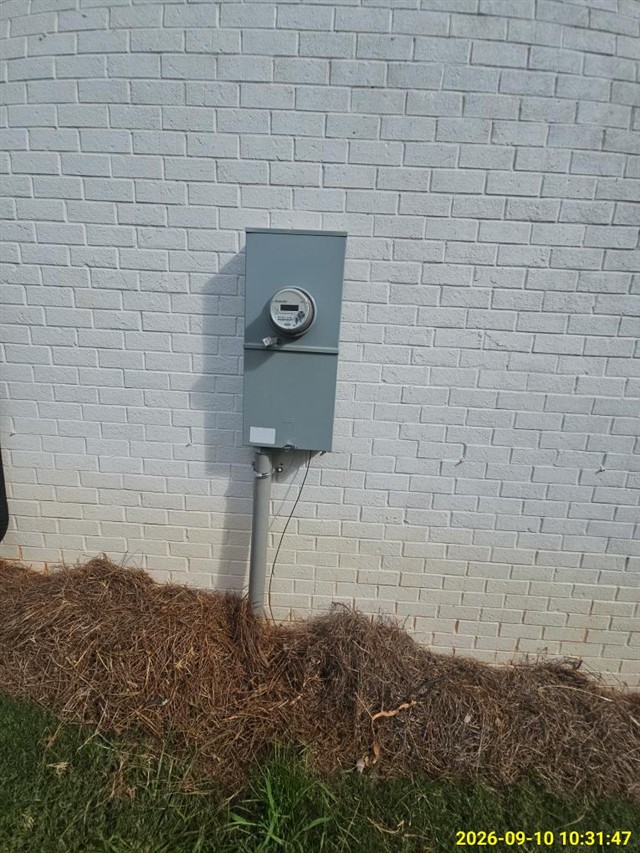
OBSERVATION: Outside on the exterior brick wall, we evaluated the electric meter enclosure and service conduit. The metal cabinet and meter glass appear clean and properly mounted to the brick. However, looking at the underside of the enclosure, we observed a bare copper grounding wire extending out from the bottom and running down the wall without protective conduit or secure fastening clips. Directly beside the conduit strap, an open, unsealed drill hole remains in the brick masonry. Additionally, the vertical PVC conduit entering from the ground lacks a visible slip-joint expansion fitting where it enters the base to allow for natural soil settling around the foundation.


WHAT THIS COULD MEAN: Grounding wires are essential for redirecting electrical surges safely into the earth. When a bare grounding wire is left loose and unprotected on an outside wall, everyday yard maintenance could accidentally snag, loosen, or damage the wire, which could compromise the grounding protection of your electrical system. Furthermore, unsealed holes in exterior masonry could allow moisture or pests to enter behind the brick. Without an expansion sleeve, settling soil around the foundation may pull downward on the conduit and place physical stress on the meter base.


RECOMMENDATION: Have a qualified licensed electrical contractor evaluate the grounding conductor, secure and protect the wire against physical damage, seal the open masonry hole, and verify the service conduit riser assembly.

7.1 Connected Devices and Fixtures (Observed from a representative number operation of ceiling fans, lighting fixtures, switches and receptacles located inside the house, garage, and on the dwelling's exterior walls)  
inspection
(1)
7.1 Item 1 (Picture)
7.1 Item 2 (Picture)
7.1 Item 3 (Picture)
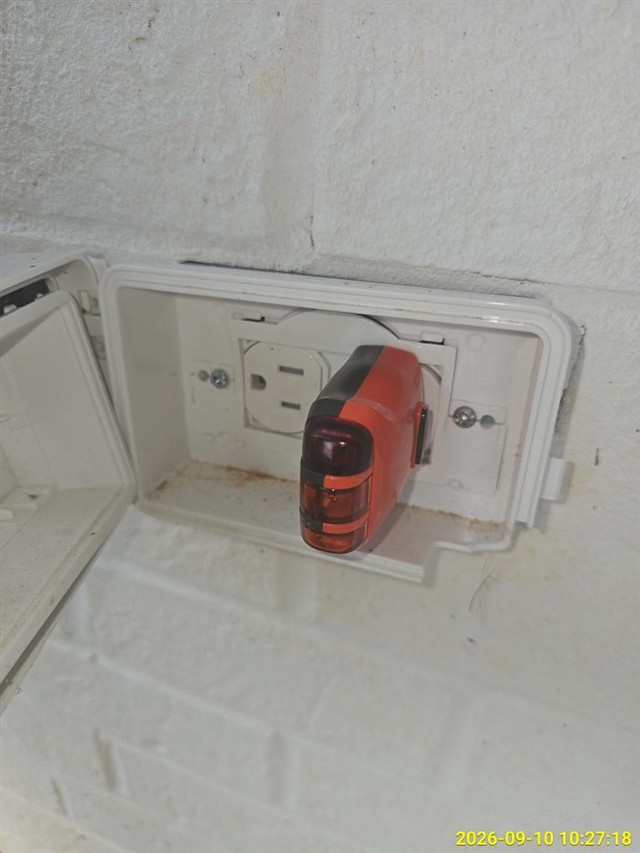
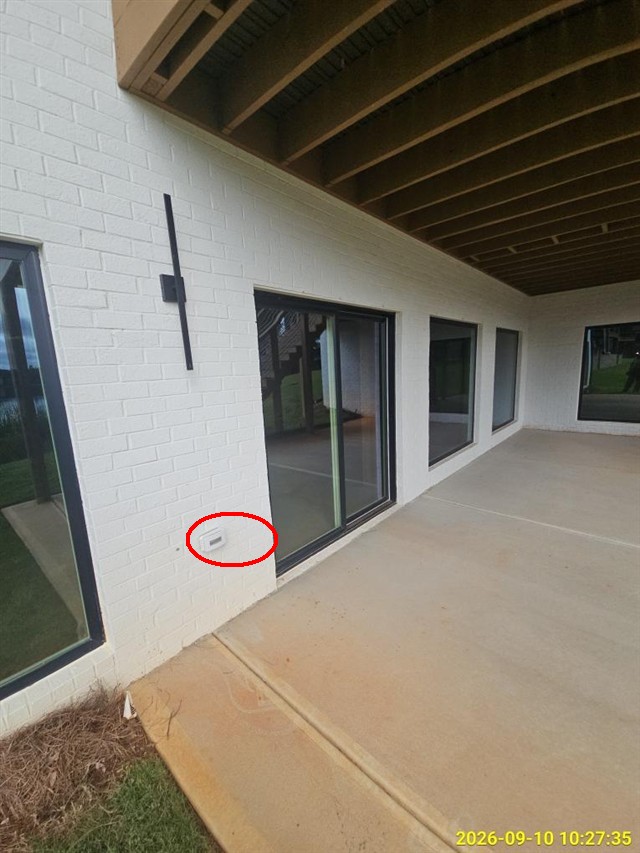
OBSERVATION: Outside on the covered patio wall, we plugged our circuit analyzer into the exterior electrical receptacle. The tester confirmed the outlet has power and correct wiring, but when we pressed the test button to simulate a ground fault, the receptacle did not trip or shut off power. The outlet is set inside a weatherproof bubble cover, but it is a standard duplex style rather than an outlet with its own built-in "Test" and "Reset" buttons. While it may be wired downline from an upstream GFCI outlet or breaker, the required ground-fault protection failed to respond during testing.


WHAT THIS COULD MEAN: GFCI protection is designed to act like a fast-acting safety net. It quickly cuts off electricity if it senses current leaking where it shouldn't, such as through water or a person. When an outdoor outlet near moisture and concrete doesn't trip, that safety net is missing. This could leave you without essential protection against electrical shocks when using tools, appliances, or outdoor cords.


RECOMMENDATION: Have a qualified licensed electrical contractor evaluate the patio receptacle and its supply circuit to restore proper GFCI protection.

(2)
7.1 Item 4 (Picture)
X
7.1 Item 5 (Video)
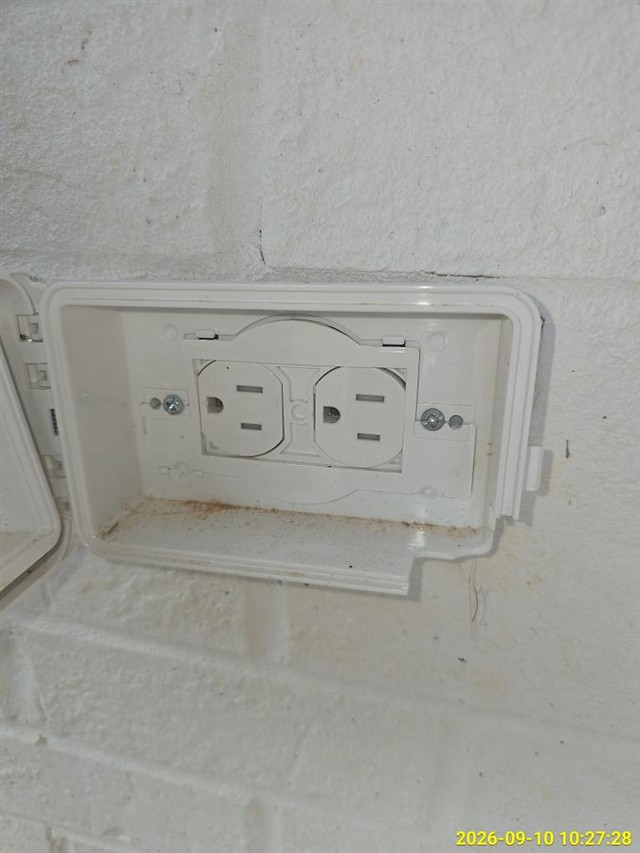
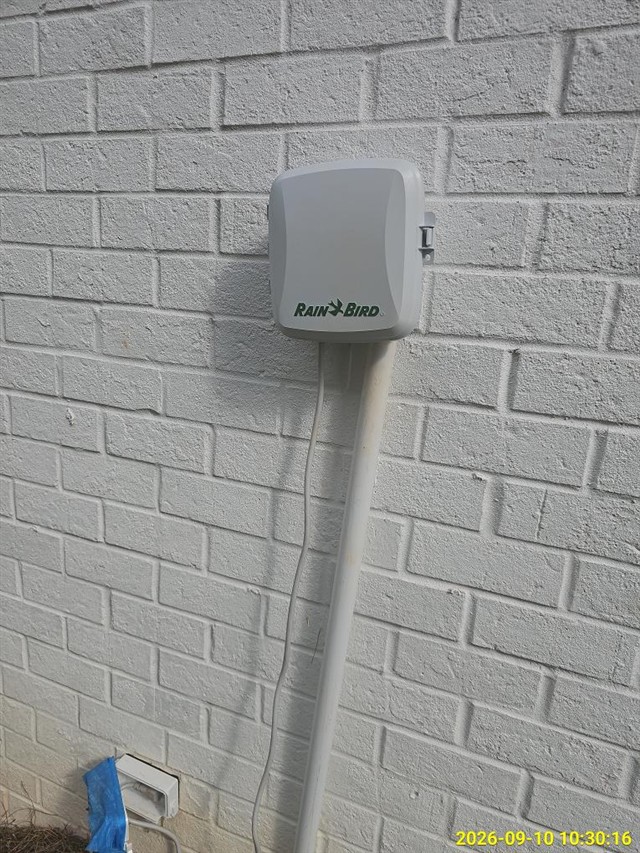
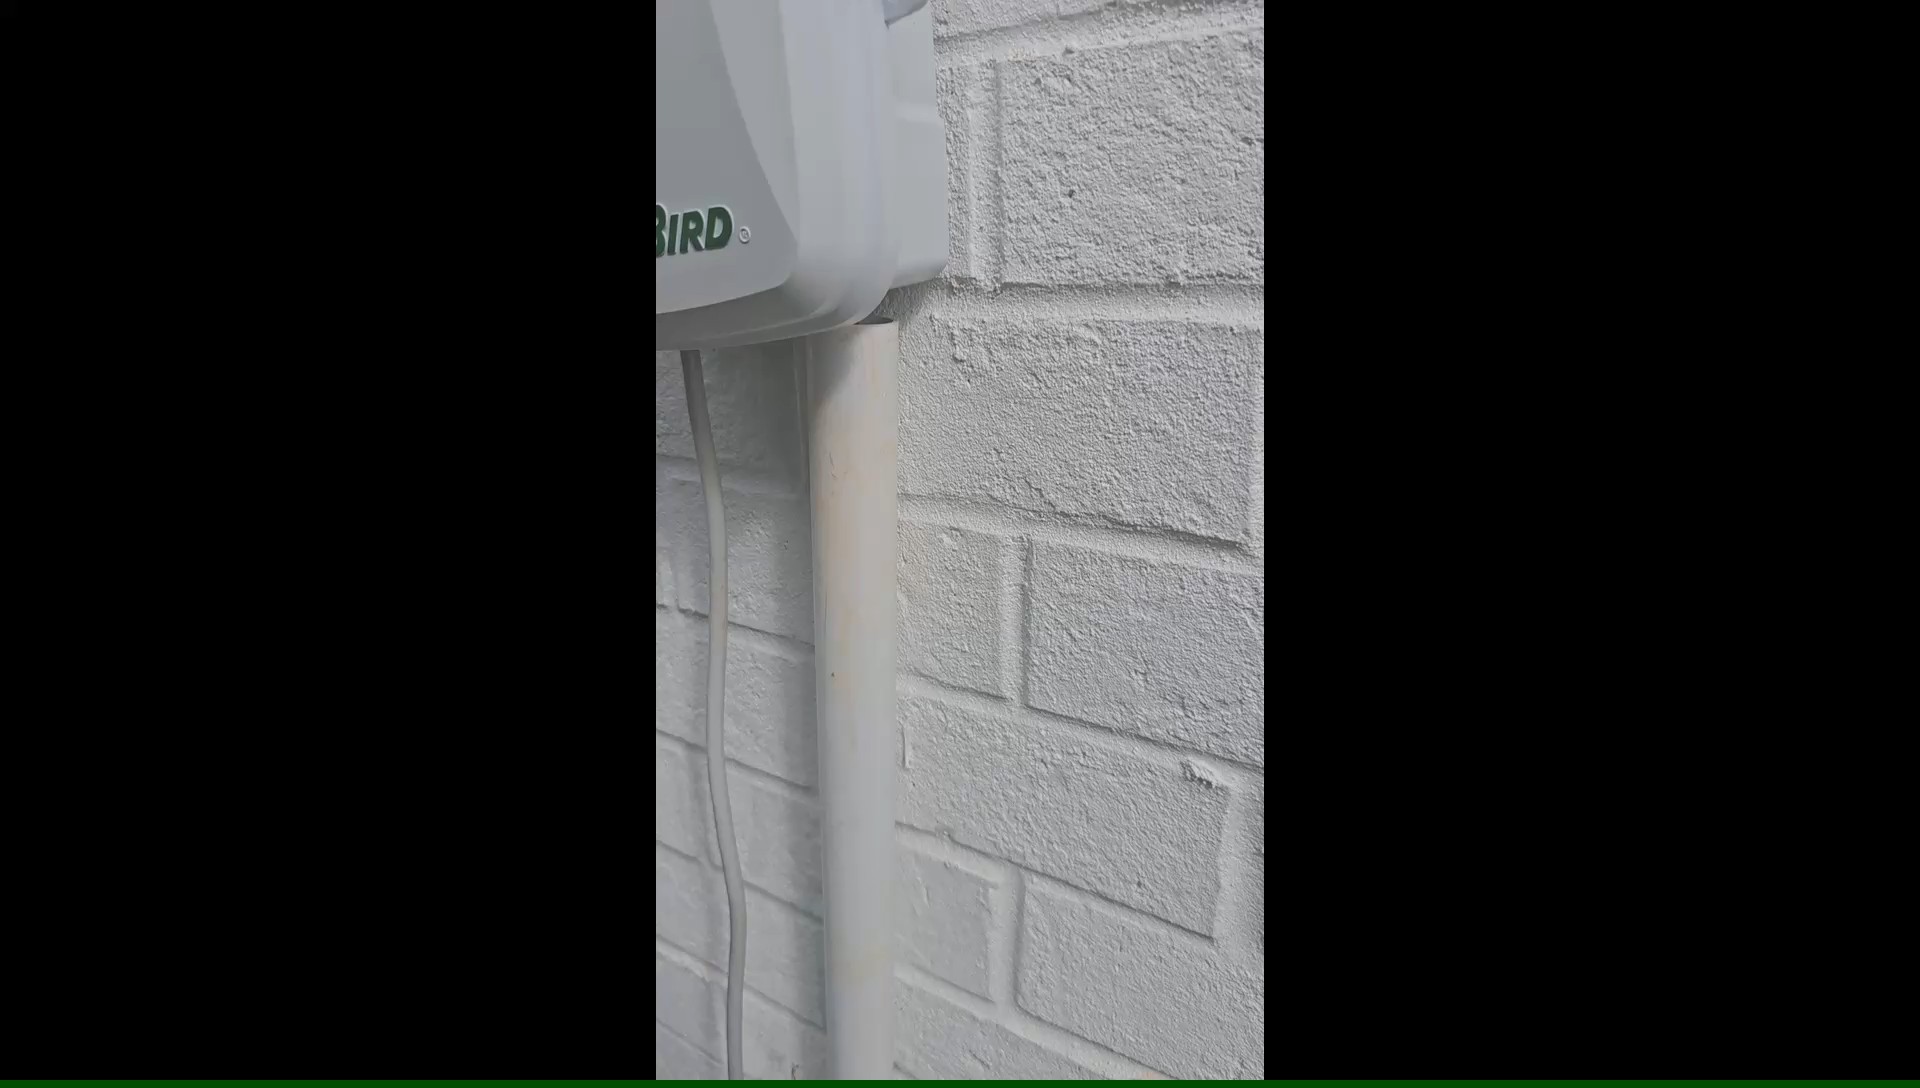
OBSERVATION: On the exterior brick wall, we evaluated an automated Rain Bird irrigation controller enclosure and its low-voltage wiring setup. The gray controller box is mounted to the masonry with a white PVC conduit pipe protecting the underground zone wires. However, the flexible power supply cord drops loosely out of the bottom of the enclosure and hangs exposed against the brick face without secure fastening clips or protective conduit. Additionally, the weatherproof outdoor outlet located directly beneath the controller is missing its cover door, leaving the internal electrical receptacle open to the outdoor elements.


WHAT THIS COULD MEAN: Outdoor power cords need proper protection and anchoring to prevent physical damage. A loose, hanging power cord could be snagged, pulled, or damaged during routine yard maintenance or by small pests. Furthermore, an open outdoor receptacle without a sealed weatherproof cover allows wind-driven rain, dirt, and insects inside the outlet box. This moisture could cause electrical short circuits, trip upstream breakers, or create a shock hazard when plugging in equipment.


RECOMMENDATION: Have a qualified licensed electrical contractor evaluate the irrigation controller power supply cord and the exterior outlet, secure or sleeve the power cord, and install a functional while-in-use weatherproof cover on the receptacle box.

(3)
7.1 Item 6 (Picture)
7.1 Item 7 (Picture)
X
7.1 Item 8 (Video)
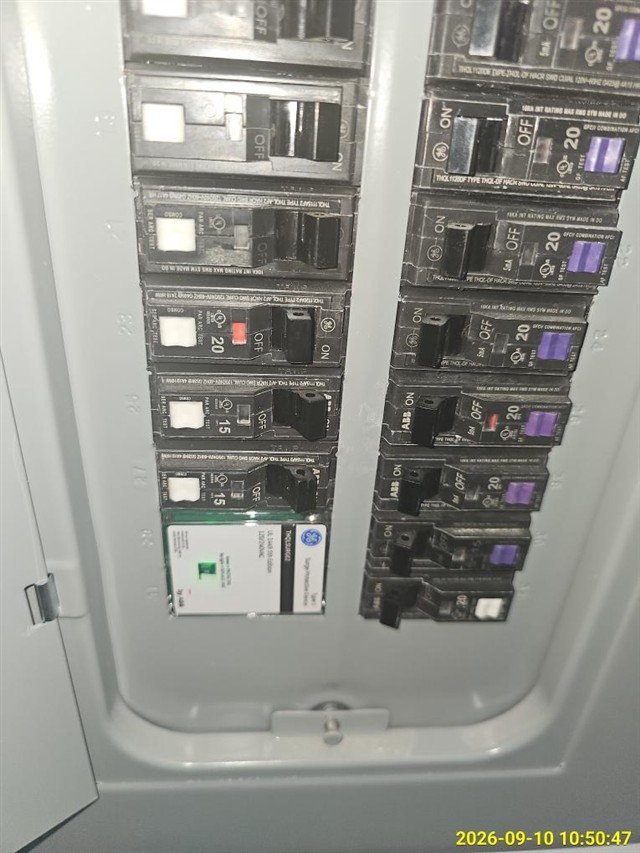
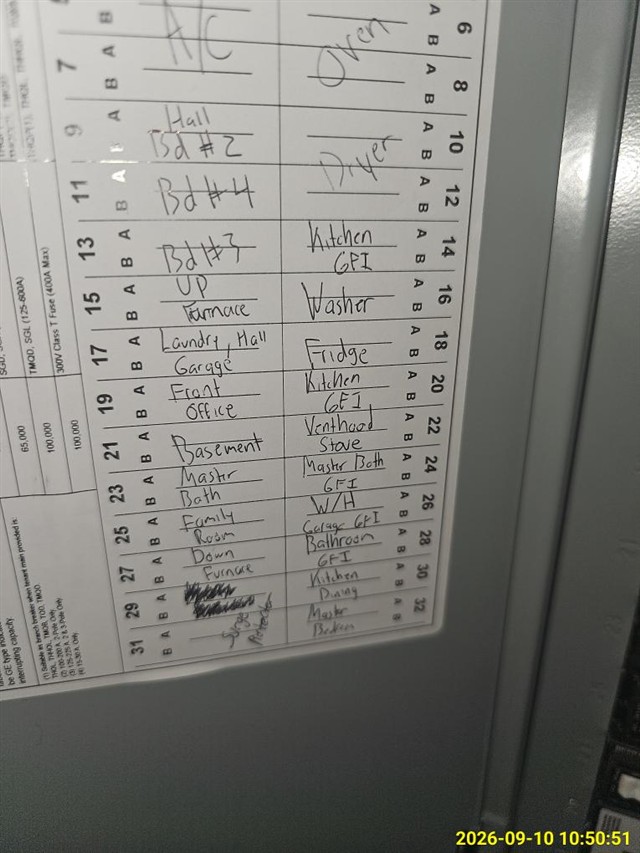
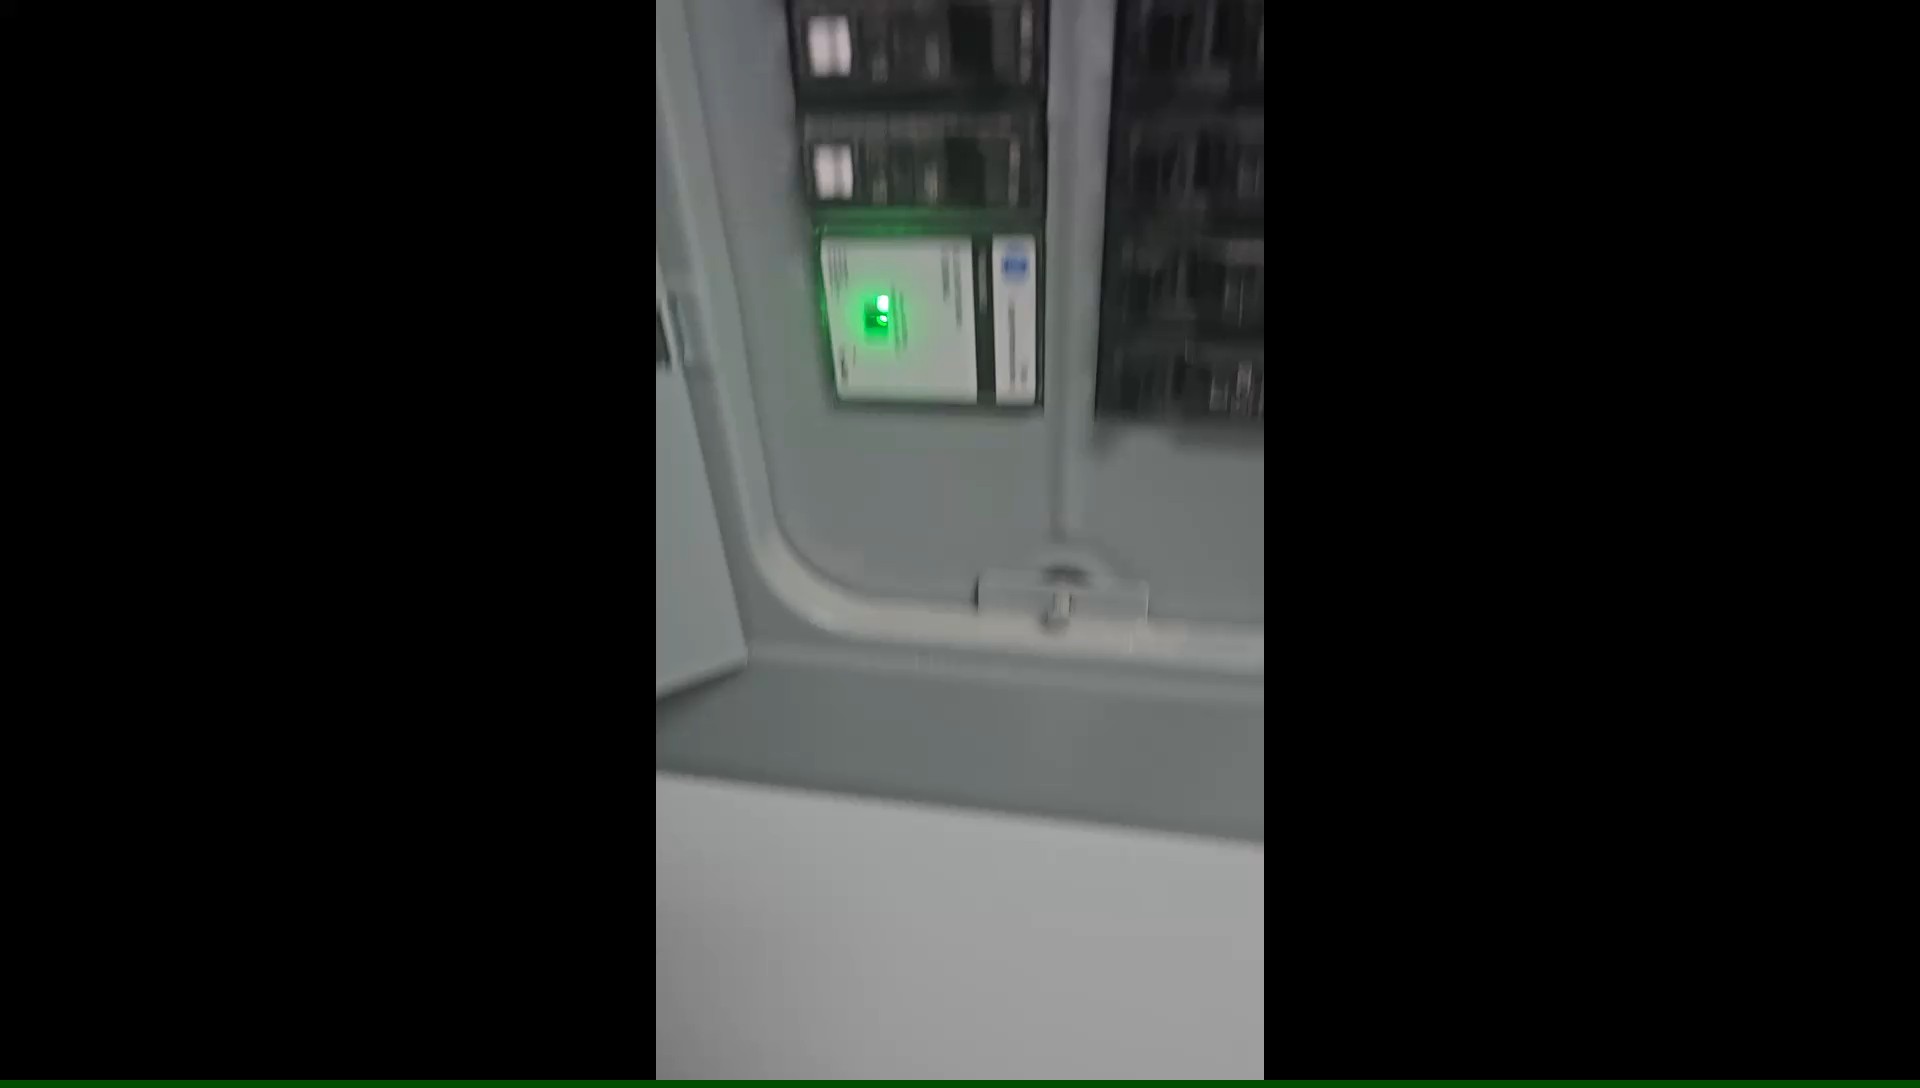
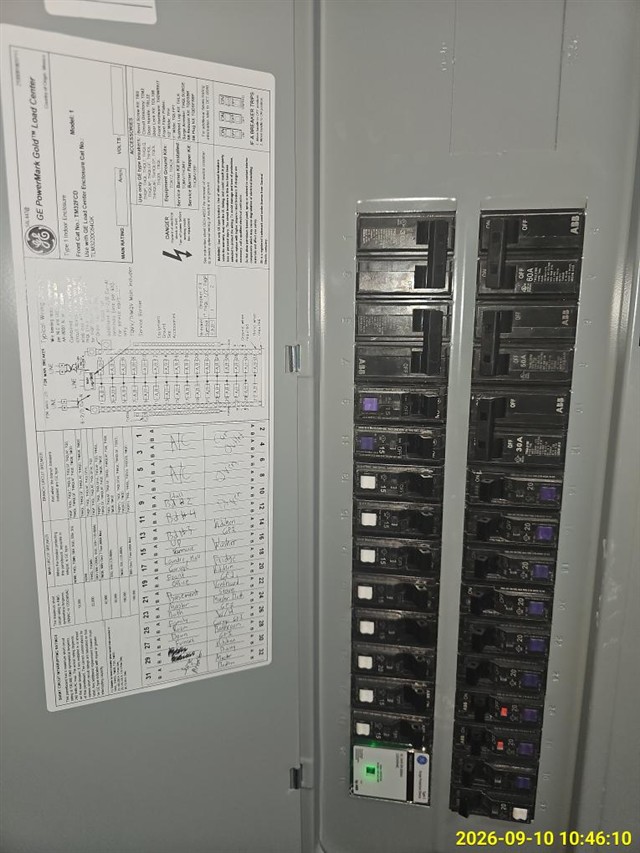
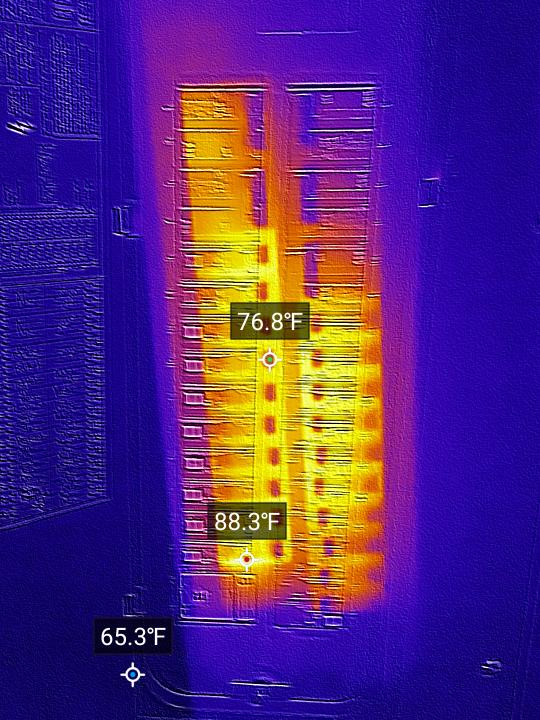
OBSERVATION: Inside the main electrical service panel, we examined the circuit breakers and the panel schedule directory. Several single-pole and double-pole circuit breakers are currently switched to the "OFF" position. The electrical panel features modern arc-fault and ground-fault combination breakers equipped with purple test buttons, along with a whole-home surge protection device showing an active green status light. While the interior dead-front cover and breakers are clean and neatly organized, multiple branch circuits remain de-energized. Additionally, some circuit descriptions on the panel door index card have been scratched out or rewritten, making a few circuit pathways uncertain until tested.


WHAT THIS COULD MEAN: When circuit breakers are left switched off, the outlets, lighting circuits, or dedicated appliances connected to those lines will not receive electrical power. In newly built homes, trades often leave circuits turned off until appliances or fixtures are fully installed. Leaving breakers off prevents testing those specific circuits during the walkthrough. Unclear or scribbled-out panel labels could also make it difficult to locate the proper shutoff switch during everyday maintenance or an emergency.


RECOMMENDATION: Have a qualified licensed electrical contractor evaluate the de-energized circuit breakers, confirm all connected branch wiring and fixtures are safely installed, and update the panel directory labels with clear, accurate markings.

(4)
7.1 Item 9 (Picture)
7.1 Item 10 (Picture)
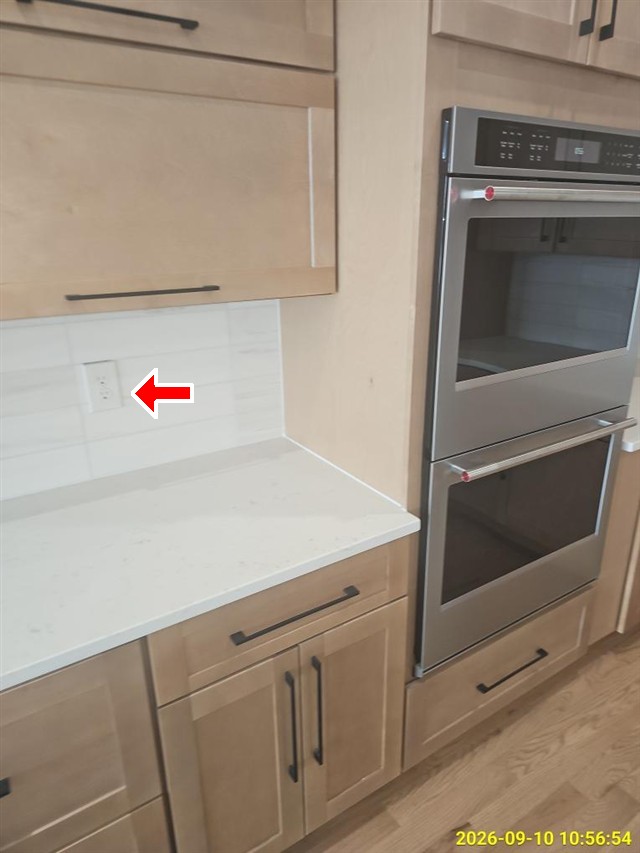
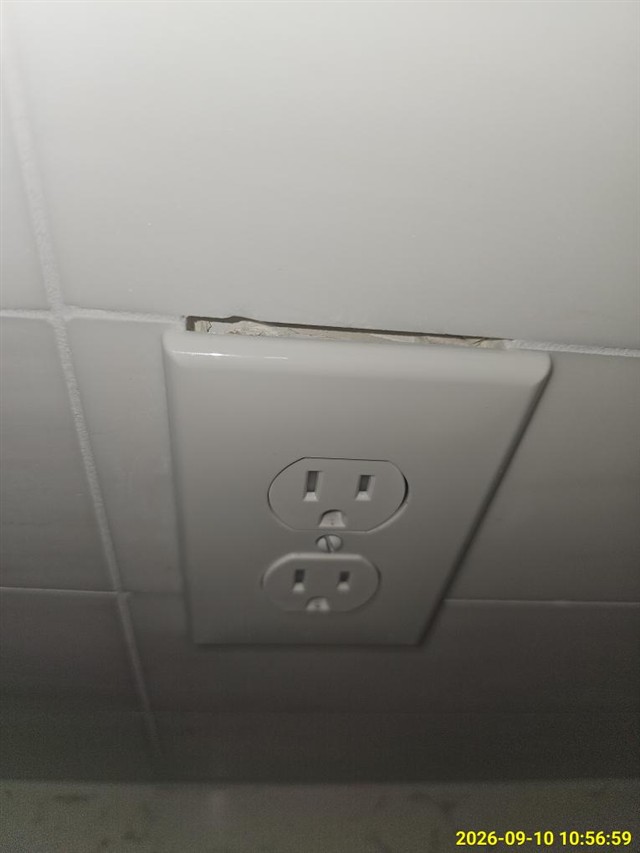
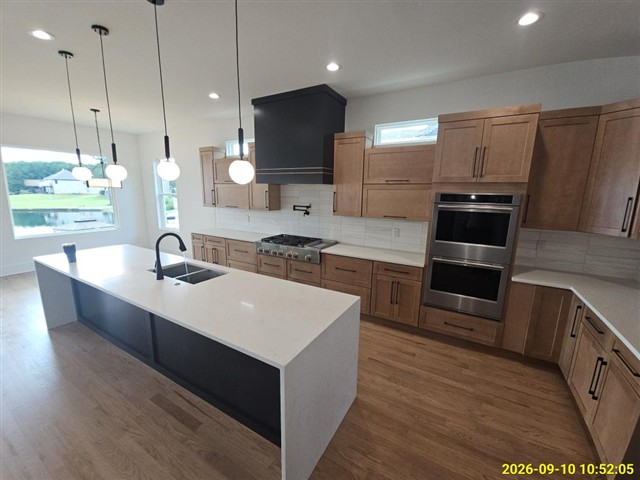
OBSERVATION: While checking the kitchen backsplash above the countertop, we inspected the electrical outlet next to the wall ovens. We found that the rectangular tile cutout was cut slightly too large or positioned too high for the outlet box, leaving an open gap visible above the top edge of the standard plastic wall plate. You can see the raw edge of the tile and the wall space behind it. While the surrounding tile and cabinetry are in clean condition, electrical wall plates are designed to completely cover the wall opening and enclose the electrical box.


WHAT THIS COULD MEAN: Faceplates act like a protective shield around electrical wiring. When an open gap is left at the top edge of an outlet on a kitchen counter, kitchen spills, cleaning sprays, crumbs, or dust could accidentally get behind the plate and enter the electrical junction box. Over time, moisture contacting electrical components can create a shock hazard or short out the circuit.


RECOMMENDATION: Have a qualified electrical contractor or tile specialist evaluate the outlet cover plate and install an oversized ("mid-way" or "jumbo") decorative wall plate to fully seal and conceal the wall opening.

(5)
7.1 Item 11 (Picture)
7.1 Item 12 (Picture)
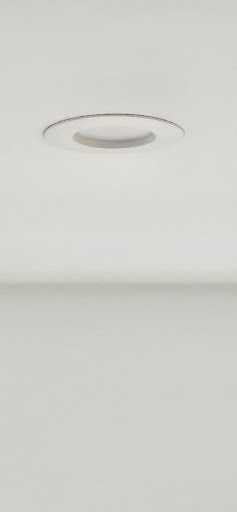
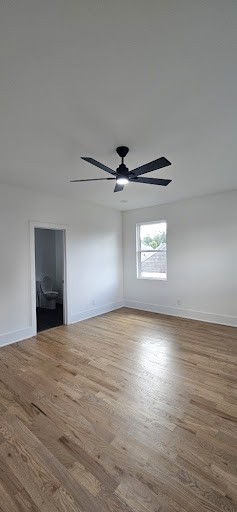
OBSERVATION: While testing the ceiling fixtures, we operated the wall switch for the recessed ceiling light. The light fixture did not turn on or illuminate. The surrounding ceiling drywall, trim ring, and ceiling fan light are in clean condition, but this specific recessed can light remained dark when tested with normal controls. In new construction, this can simply be an unseated LED driver, a disconnected quick-connect plug in the junction box, or a loose wire nut at the switch or fixture.


WHAT THIS COULD MEAN: A light that does not turn on could mean a loose wire connection, an unplugged LED module, or a faulty component. While this is a common issue during final punch-out work, unverified electrical wiring behind the ceiling should always be confirmed to make sure it is safe and connected properly.


RECOMMENDATION: Have a qualified licensed electrical contractor evaluate the recessed light fixture, switch wiring, and connections to ensure safe, proper illumination.

8. Heating / Central Air Conditioning
8.4 Gas/LP Firelogs and Fireplaces  
inspection
8.4 Item 1 (Picture)
8.4 Item 2 (Picture)
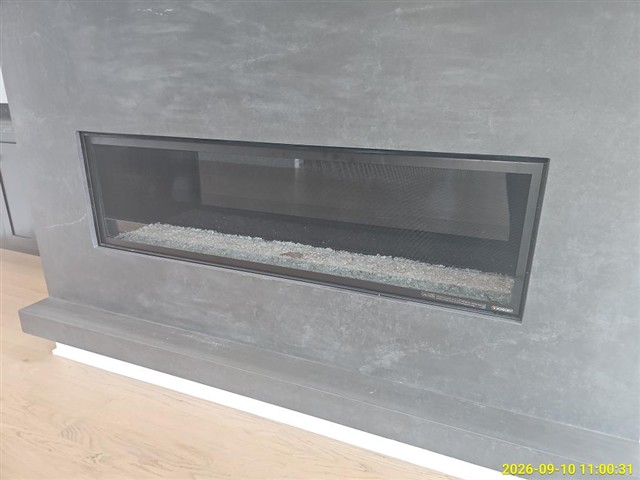
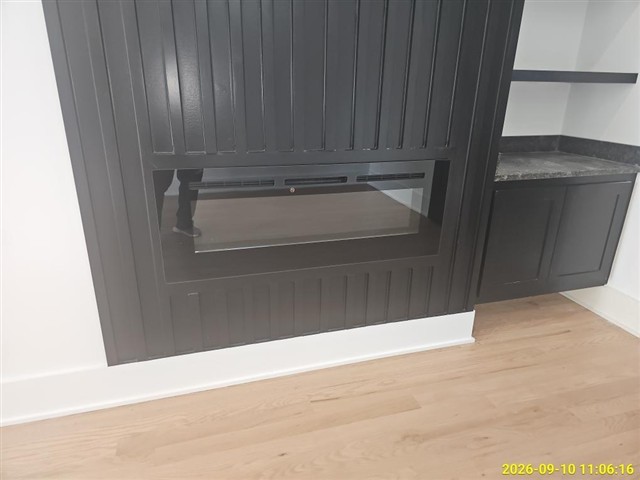
OBSERVATION: During our check of the living space, we evaluated the built-in linear electric fireplaces set into the feature walls. When we operated the units using normal operating controls and power switches, the fireplaces did not respond, turn on, or produce flame effects or heat. The front glass panels, surrounds, and lower bases are in clean, undamaged cosmetic condition. However, neither unit powered on during testing. In brand-new homes, this commonly occurs when a dedicated branch circuit breaker remains switched off in the panel, an internal connection plug is unhooked, or an inline power switch inside the maintenance hatch is turned off.

WHAT THIS COULD MEAN: When an electric fireplace does not respond, you cannot use it for supplemental heat or ambiance. An inoperative unit could mean an unpowered circuit, a loose electrical connection behind the wall, or a faulty control board that needs service before safe use.

RECOMMENDATION: Have a qualified electrical contractor or fireplace technician evaluate the electric fireplace units, power supply circuits, and controls to restore proper operation.

8.5 Cooling and Air Handler Equipment  
inspection
(1)
8.5 Item 1 (Picture)
8.5 Item 2 (Picture)
8.5 Item 3 (Picture)
8.5 Item 4 (Picture)
8.5 Item 5 (Picture)
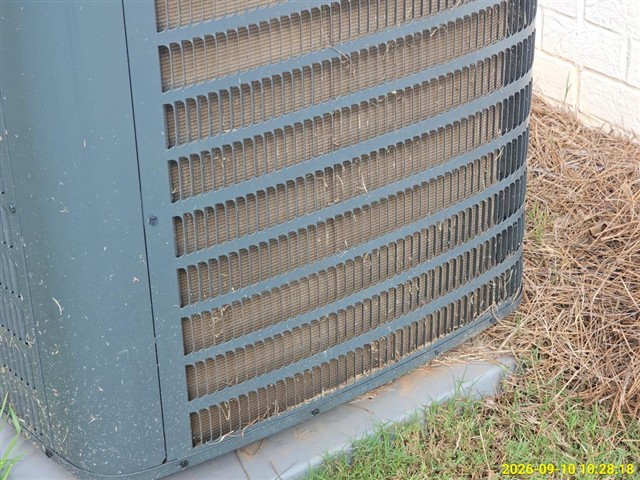
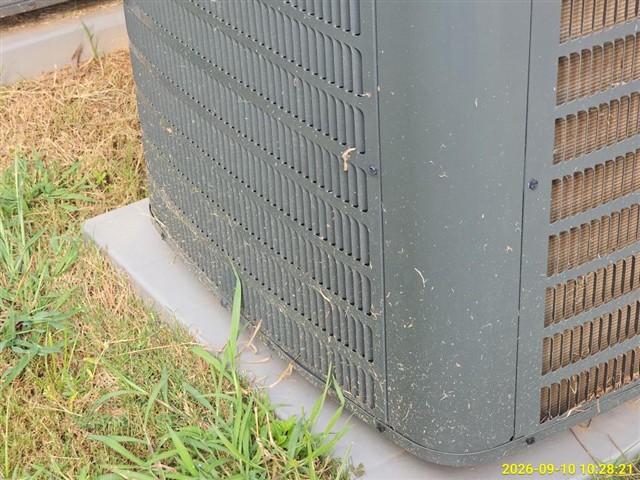
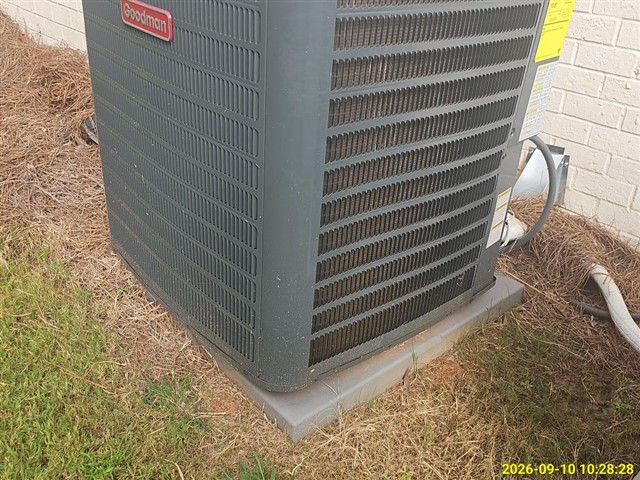
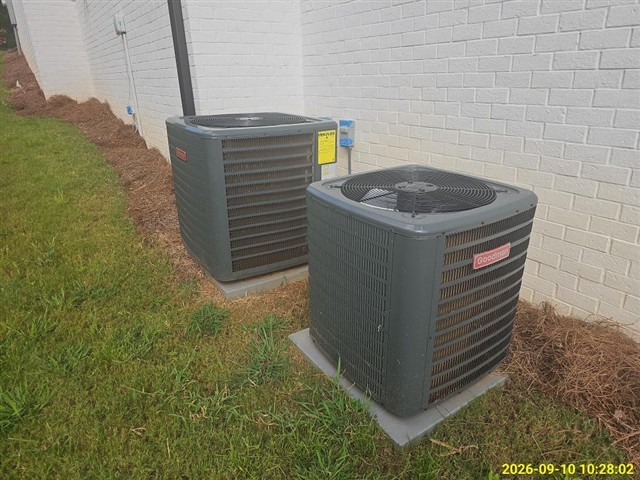
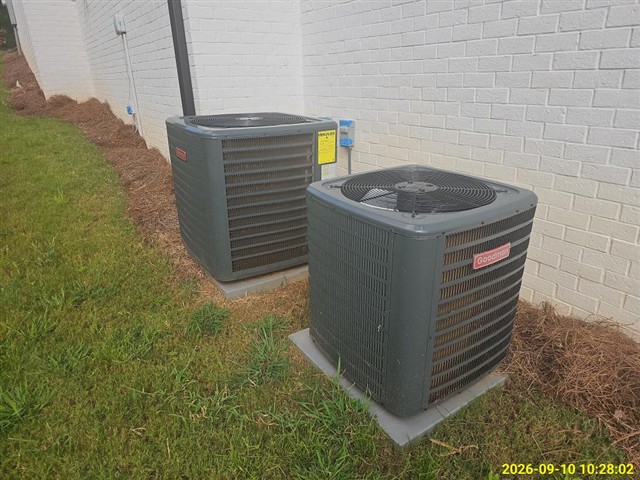
OBSERVATION: Outside by the exterior brick wall, we took a close look at the exterior heat pump or air conditioner condenser unit. The unit rests on a level plastic equipment pad, and the painted protective cabinet is in clean, undamaged condition. However, looking through the metal louvers, we observed that grass clippings, dried pine needles, and yard dirt have collected across the bottom section of the aluminum condenser coil fins. An outdoor HVAC unit relies on drawing clean outdoor air directly across these thin metal fins to release heat gathered from inside your home.


WHAT THIS COULD MEAN: When yard debris and dirt coat the coil fins, airflow into the unit is restricted. This could cause the compressor and fan motor to work harder and run longer, which may raise your monthly electric bills. Over time, restricted airflow could also increase wear on internal parts and reduce the overall cooling capacity of the system during hot summer days.


RECOMMENDATION: Have a qualified HVAC technician evaluate and gently clean the condenser coils, and establish a seasonal maintenance routine to keep grass and pine needles cleared at least two feet away from the unit.

(2)
8.5 Item 6 (Picture)
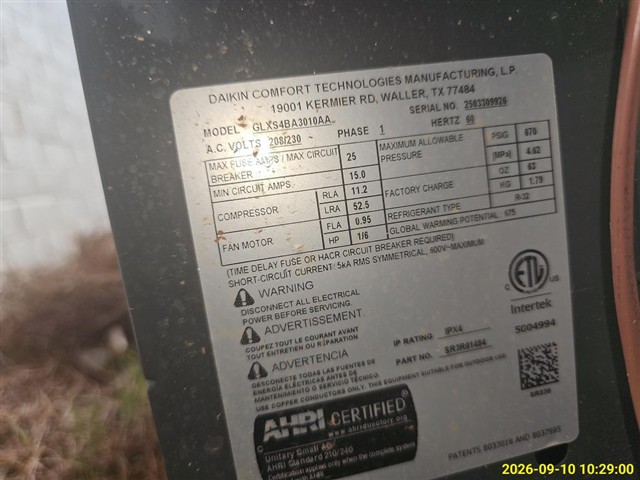
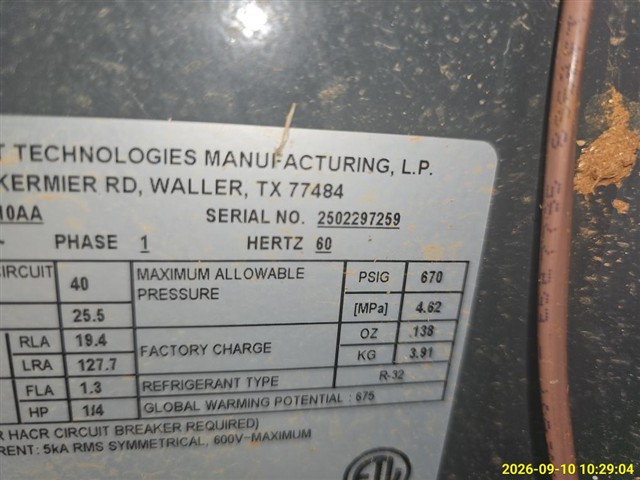
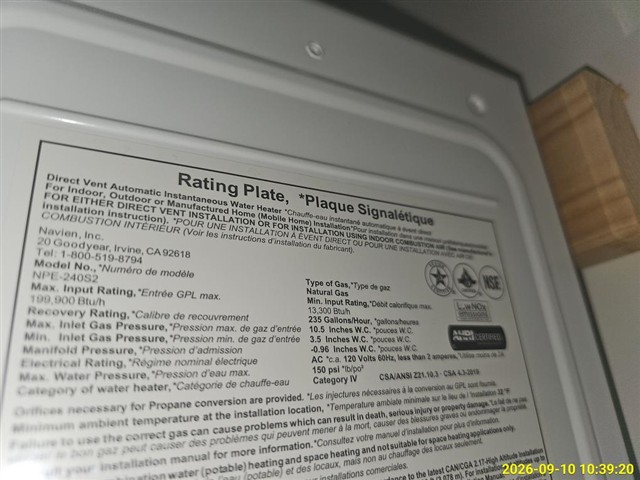
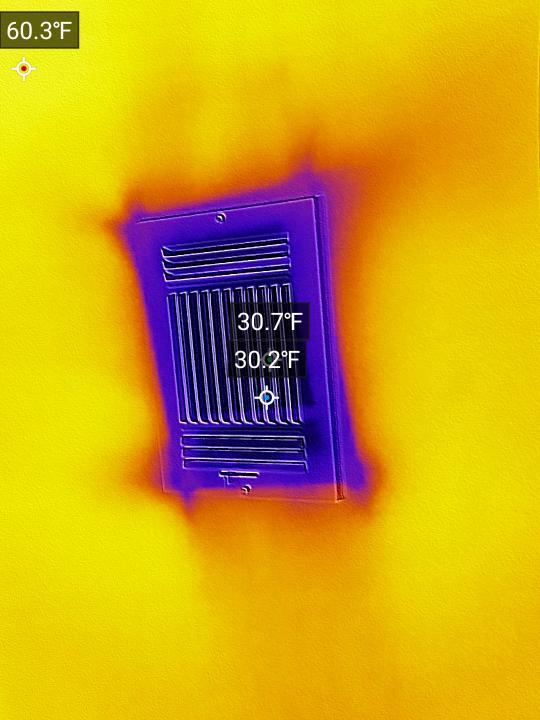
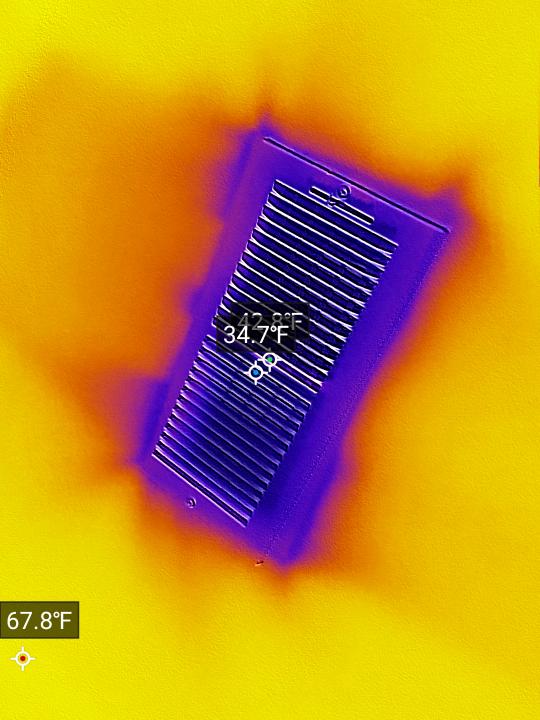
Unit 1: Daikin / Goodman; Model GLXS4BA3010AA; Serial No. 2503309926; 2.5 Ton (30,000 BTU) nominal capacity; 208/230V, Single Phase; Max breaker 25A / Min circuit amps 15.0A; Factory charge 63 oz R-32 refrigerant.


Unit 2: Daikin Comfort Technologies / Goodman; Serial No. 2502297259; Single Phase; Max breaker 40A / Min circuit amps 25.5A; Factory charge 138 oz R-32 refrigerant.


AGE / TYPICAL LIFESPAN:


Manufacture Date: 2025 (Decoded from serial numbers starting with "2502" and "2503" indicating early 2025 production).


Current Age: Approximately 1 year old (near-new condition).


Typical Lifespan: 12 to 17 years with regular annual servicing.


MAINTENANCE TIPS / BUDGET PLANNING:


Keep grass clippings, leaves, and pine straw cleared at least two feet away from all four sides of each cabinet to ensure plenty of fresh airflow.


Gently rinse down the exterior aluminum fins with a garden hose on a low-pressure spray setting once each spring (never use a high-pressure washer, as it bends the delicate metal fins).


Schedule a professional tune-up with a licensed HVAC technician once a year to check electrical connections, confirm proper refrigerant pressures, and keep your equipment running smoothly and efficiently.

9. Insulation and Ventilation
9.1 Insulation Under Floor System  
inspection
9.1 Item 1 (Picture)
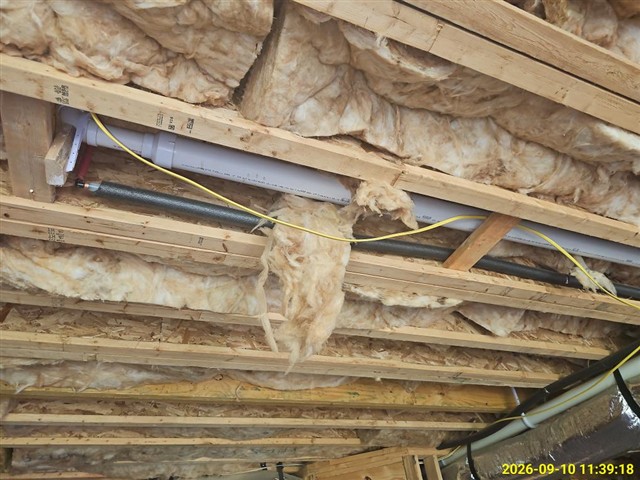
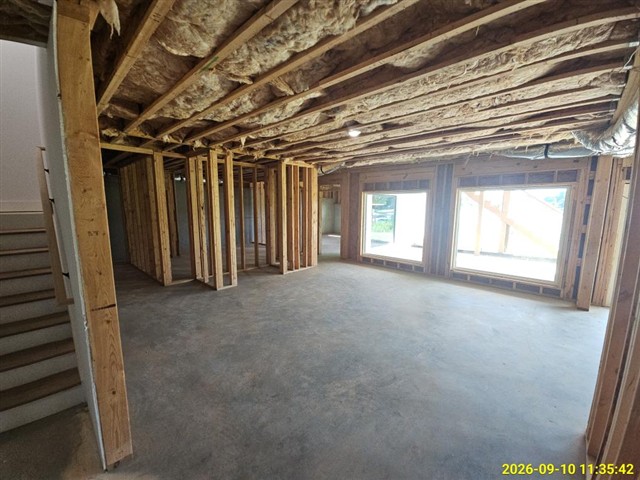
OBSERVATION: Looking up at the overhead floor joists, we checked the plumbing and insulation rough-ins. A white PVC drain pipe and an insulated water supply line are suspended between the framing members. Near the center, the fiberglass batt insulation has pulled loose and hangs down in a ragged clump, leaving the pipes exposed. Additionally, an unsupported yellow electrical cable drapes diagonally across the space. While the framing and ductwork throughout this area are clean and straight, the insulation here was disturbed and never secured back into place.


WHAT THIS COULD MEAN: Floor insulation works like a warm winter blanket. When it pulls loose, cold or warm air can circulate around the subfloor and pipes. This could make your floors above feel chilly and cause your heating system to work harder. Exposed water pipes in unheated spaces may also face higher risks of cold drafts during winter drops in temperature.


RECOMMENDATION: Have a qualified insulation contractor or handyman evaluate this ceiling bay to properly secure the fallen insulation batts and confirm the pipes and wiring are fully protected.

10. Built-In Kitchen Appliances
10.0 Dishwasher  
inspection
10.0 Item 1 (Picture)
10.0 Item 2 (Picture)
10.0 Item 3 (Picture)
10.0 Item 4 (Picture)
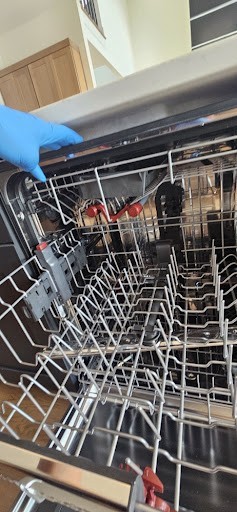
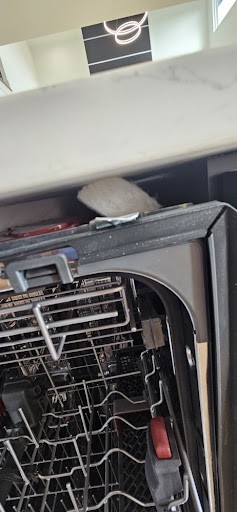
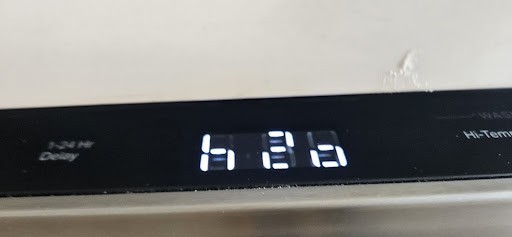
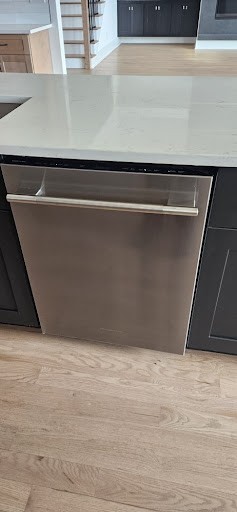
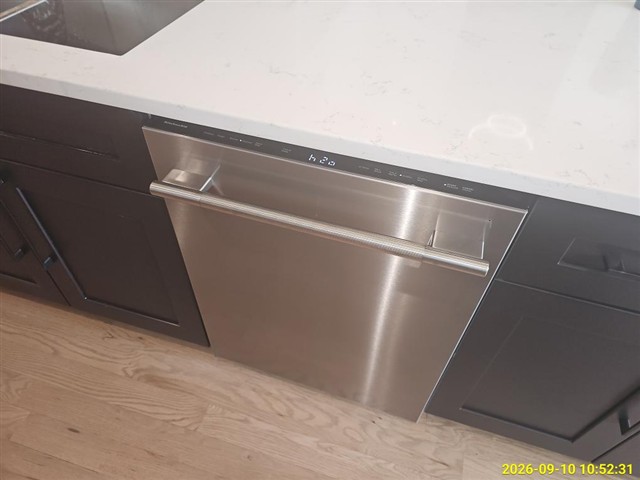
OBSERVATION: While evaluating the kitchen appliances, we took a close look at the built-in dishwasher installed under the counter. We found that the top mounting brackets are not fastened to the underside of the countertop or surrounding cabinetry, allowing the unit to shift and tilt forward when pulled. In addition, when we attempted to run the dishwasher using normal operating controls, the digital display illuminated showing an error code ("6 2b"), but the appliance did not start or complete a normal wash cycle.


WHAT THIS COULD MEAN: A dishwasher needs to be anchored securely so it does not tip forward when the racks are fully loaded with heavy dishes. Constant movement can also loosen or strain the water supply line, drain hose, and electrical wiring underneath. Furthermore, an appliance that shows an error code and will not run through a normal cycle indicates an internal electrical issue, a sensor communication fault, or an improper initial setup.


RECOMMENDATION: Have a qualified appliance technician or installation specialist evaluate the dishwasher, secure it properly with suitable mounting hardware, and diagnose the control panel error code to ensure full, normal operation.

10.4 Food Waste Disposer  
inspection
10.4 Item 1 (Picture)
10.4 Item 2 (Picture)
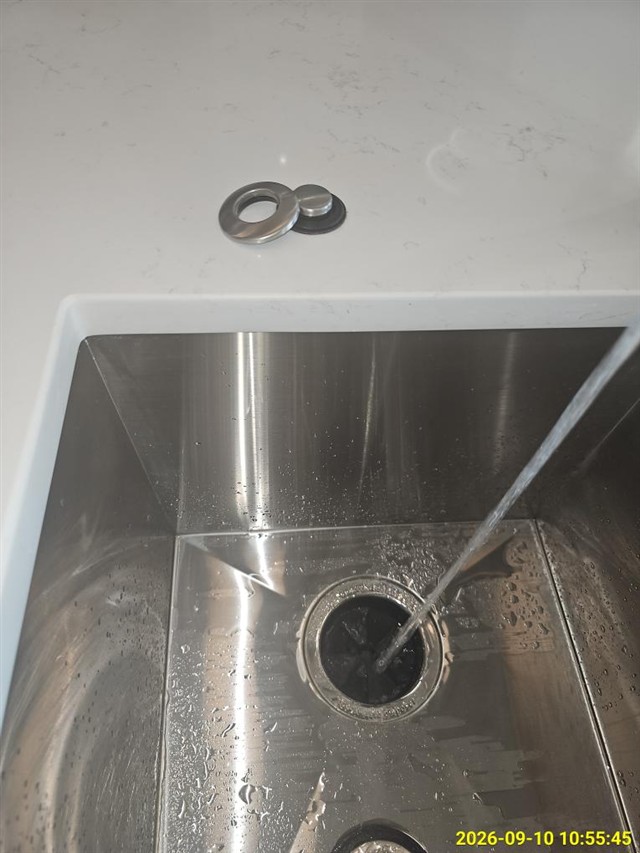
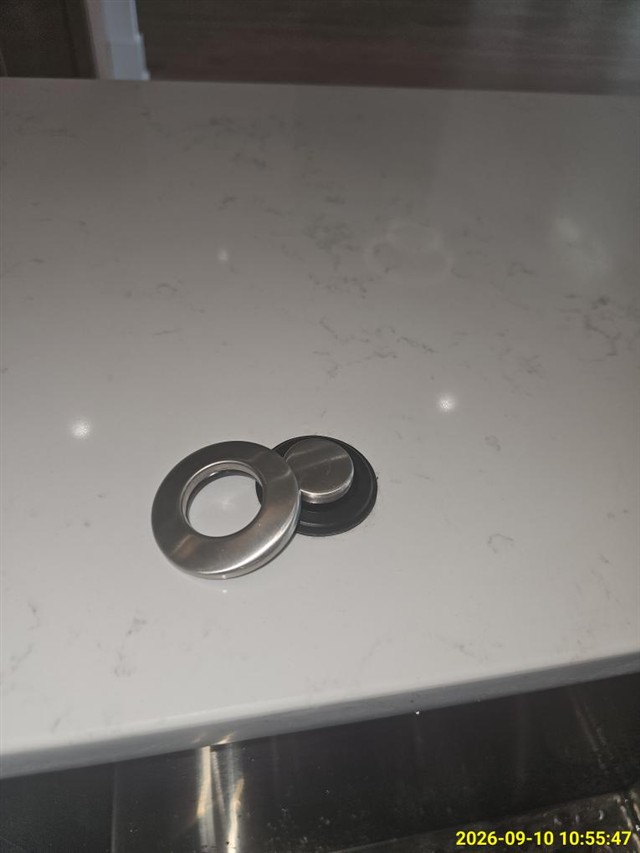
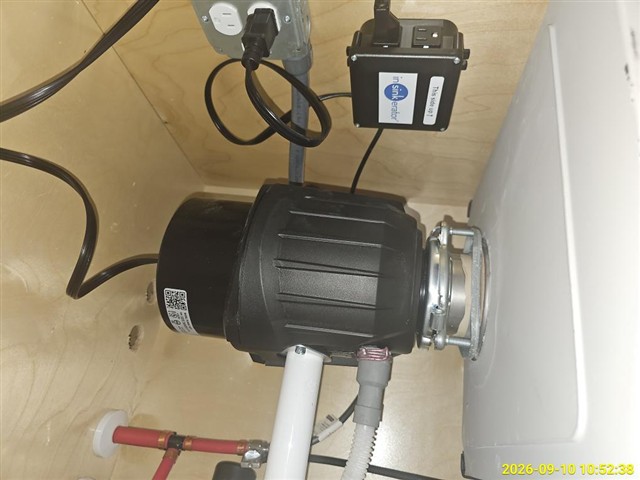
OBSERVATION: While checking the sink and countertop area, we observed that the garbage disposal air-switch button assembly is sitting loose on the solid surface countertop. The brushed metal trim ring, center push button, and rubber sealing gasket are disassembled and have not been mounted into the countertop deck. The stainless steel undermount sink basin, running water, and stone counter appear brand new and in clean condition. However, this push-button control was left uninstalled prior to final turnover, leaving the sink station without a secure countertop control to conveniently turn the food waste disposer on and off during daily kitchen use.


WHAT THIS COULD MEAN: An air switch uses a harmless pulse of air through a small tube to safely turn on the disposal without running electrical wiring near water. When the button is uninstalled, you cannot operate the disposer normally from the sink deck. If an unsealed hole is present in the countertop, water from dishwashing could also seep underneath the counter and slowly drip into the sink base cabinet.


RECOMMENDATION: Have a qualified licensed plumbing contractor or certified installer evaluate the garbage disposal switch assembly and properly mount, connect, and seal the air-switch button into the countertop deck.

10.5 Refridgerator  
inspection
10.5 Item 1 (Picture)
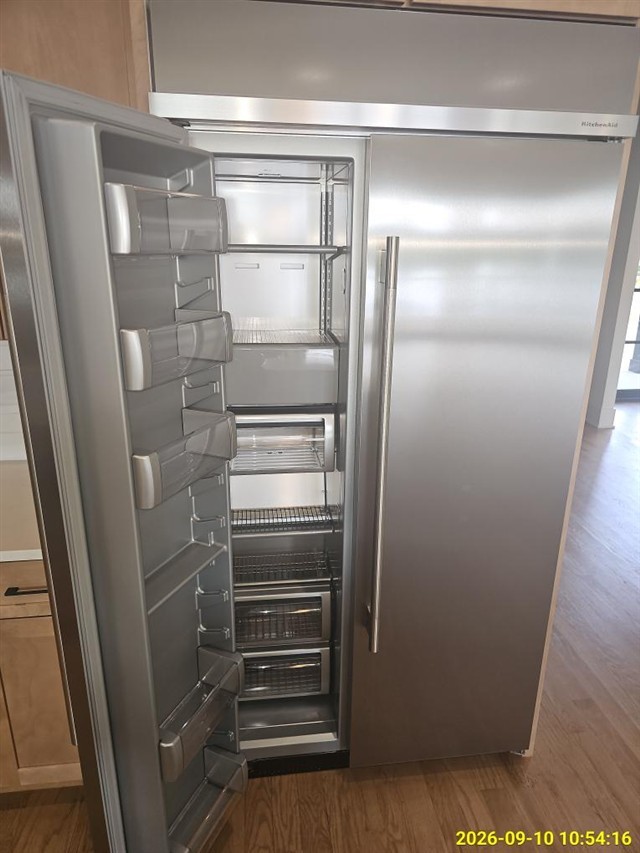
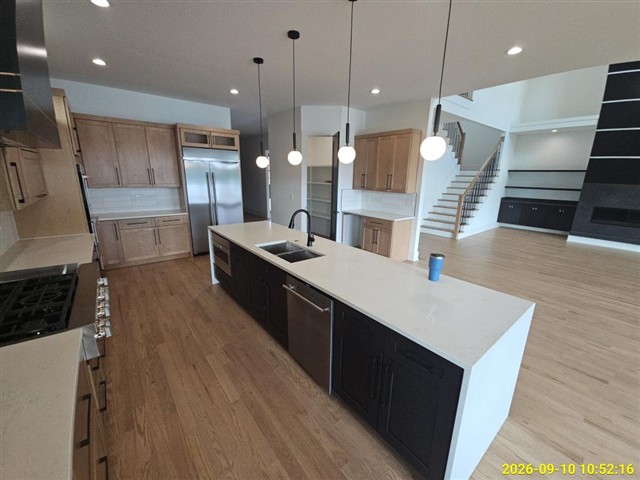
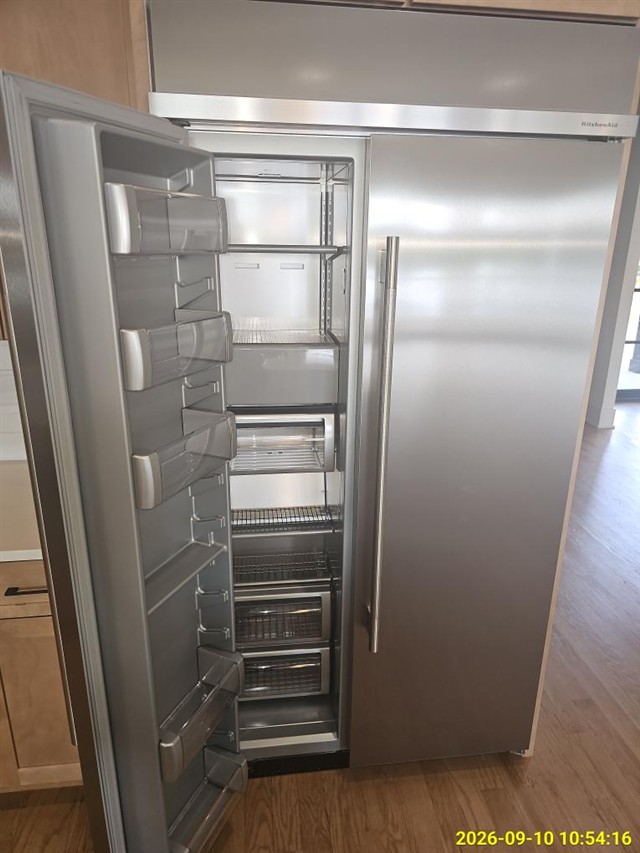
OBSERVATION: During our walkthrough of the kitchen area, we checked the built-in, stainless steel KitchenAid side-by-side refrigerator. When we opened the door, the internal lights did not turn on, and the cooling compressor and circulation fans were completely silent and inactive. The stainless steel exterior, door handles, internal glass shelves, and storage bins appear brand-new and in clean physical condition. However, the appliance did not receive power or function during our evaluation. In newly built homes, high-end built-in appliances are frequently left unplugged behind the custom cabinetry or have their dedicated circuit breaker turned off in the electrical panel until the homeowners move in.


WHAT THIS COULD MEAN: When a refrigerator has no power, it cannot cool down to keep food fresh and safe. An inoperative unit also prevents us from testing essential features, like the automatic ice maker, internal water dispenser, digital temperature settings, and water supply lines behind the unit to verify that there are no hidden plumbing leaks.


RECOMMENDATION: Have a qualified appliance technician or licensed electrical contractor evaluate the refrigerator's power supply outlet, breaker circuit, and control panel to restore normal operation.


Prepared Using HomeGauge http://www.HomeGauge.com : Licensed To Christopher Boykin
Top Table of Contents Bottom
General Info
Property Address
[Confidential Property Address]
Metro Atlanta, GA
Date of Inspection
9/10/2026
Report ID
SAMPLE-METRO-ATLANTA-REPORT
Customer(s)
[Client Name Withheld for Privacy]
Time of Inspection
10:00 AM
Real Estate Agent
[VIP Partner Realtor]
[Premier Partner Brokerage]

Inspection Details
Type of building:
Single Family (2 story)

Approximate age of building:
New Construction

Temperature:
Over 65 (F) = 18 (C)

Weather:
Clear

Ground/Soil surface condition:
Damp

Rain in last 3 days:
No

Radon Test Performed?:
Yes

Was water on at inspection?:
Yes

Was Air Conditioning on at inspection?:
Yes

Was electricity on at inspection?:
Yes

Was gas Service on at inspection?:
Yes

 
Comment Key & Definitions

 This report is the exclusive property of this inspection company and the client(s) listed in the report title. Use of this report by any unauthorized persons is prohibited. This property inspection report is warranted for seven (7) days from the occurrence date of the property.

STANDARD OF PRACTICE: INTERNACHI

Many areas and items at this property were obscured by furniture and/or stored items. This often includes but is not limited to walls, floors, windows, inside and under cabinets, under sinks, on counter tops, in closets, behind window coverings, under rugs or carpets, and under or behind furniture. Areas around the exterior, under the structure, in the garage and in the attic may also be obscured by stored items. The inspector in general does not move personal belongings, furnishings, carpets or appliances. When furnishings, stored items or debris are present, all areas or items that are obscured, concealed or not readily accessible are excluded from the inspection. The client should be aware that when furnishings, stored items or debris are eventually moved, damage or problems that were not noted during the inspection may be found.

Comment Key or Definitions

The following definitions of comment descriptions represent this inspection report. All comments by the inspector should be considered before purchasing this home. Any recommendations by the inspector to repair or replace suggests a second opinion or further inspection by a qualified contractor. All costs associated with further inspection fees and repair or replacement of item, component or unit should be considered before you purchase the property.

Inspected (IN) = I visually observed the item, component or unit and if no other comments were made then it appeared to be functioning as intended allowing for normal wear and tear.

Not inspected (NI)= I did not evaluate this item, component or unit and made no representations of whether or not it was functioning as intended and will state a reason for not inspecting.

Not Present (NP) = This item, component or unit is not in this home or building.

Repair or Replace (RR) = The item, component or unit is not functioning as intended, or needs further inspection by a qualified contractor. Items, components or units that can be repaired to satisfactory condition may not need replacement.

Limitations: The following items are not included in this inspection: security, intercom and sound systems; communications wiring; central vacuum systems; elevators and stair lifts; cosmetic deficiencies such as nail-pops, scuff marks, dents, dings, blemishes or issues due to normal wear and tear in wall, floor and ceiling surfaces and coverings, or in equipment; deficiencies relating to interior decorating; low voltage and gas lighting systems. Any comments made regarding these items are as a courtesy only. Note that the inspector does not evaluate any areas or items which require moving stored items, furnishings, debris, equipment, floor coverings, insulation or similar materials. The inspector does not test for asbestos, lead, radon, mold, hazardous waste, urea formaldehyde urethane, or any other toxic substance. Some items such as window, drawer, cabinet door or closet door operability are tested on a sampled basis. The client should be aware that paint may obscure wall and ceiling defects, floor coverings may obscure floor defects, and furnishings may obscure wall, floor and floor covering defects. If furnishings were present during the inspection, recommend a full inspection of walls, floors and ceilings that were previously obscured when possible. Carpeting and flooring, when installed over concrete slabs, may conceal moisture. If dampness wicks through a slab and is hidden by floor coverings that moisture can result in unhygienic conditions, odors or problems that will only be discovered when/if the flooring is removed. Determining the cause and/or source of odors is not within the scope of this inspection.

Top Table of Contents Bottom
Results at a glance

69

Items Inspected

Total number in report.

35

Summary Comments

Total number in report.

56

Styles & Materials

Total number in report.

5

Videos

Total number in report.

227

Photos

Total number in report.

1. Roofing
Description
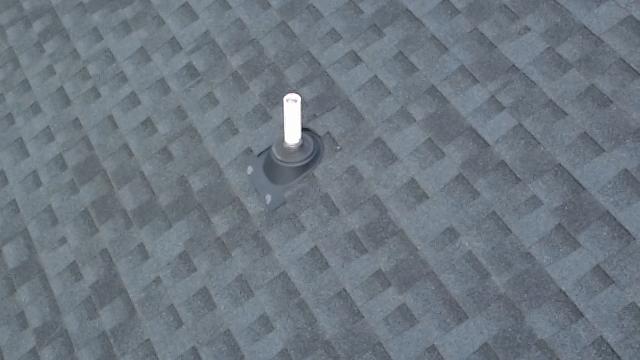
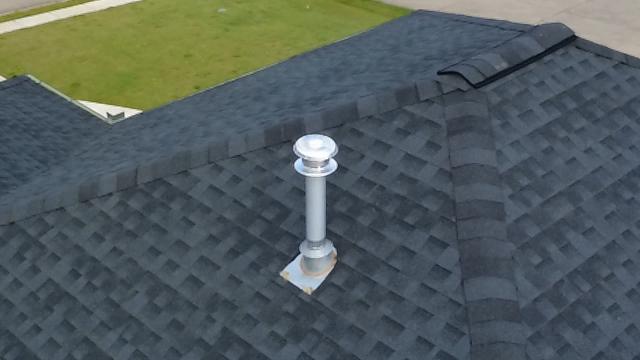
The inspector shall inspect from ground level or eaves: The roof covering. The gutters. The downspouts. The vents, flashings, skylights, chimney and other roof penetrations. The general structure of the roof from the readily accessible panels, doors or stairs.

The inspector is not required to: Walk on any roof surface, predict the service life expectancy, inspect underground downspout diverter drainage pipes, remove snow, ice, debris or other conditions that prohibit the observation of the roof surfaces, move insulation, inspect antennae, satellite dishes, lightning arresters, de-icing equipment, or similar attachments. Walk on any roof areas that appear, in the opinion of the inspector to be unsafe, and or cause damage. Perform a water test, warrant or certify the roof. Confirm proper fastening or installation of any roof material.

The roof inspection portion of the General Home Inspection will not be as comprehensive as an inspection performed by a qualified roofing contractor. Because of variations in installation requirements of the huge number of different roof-covering materials installed over the years, the General Home Inspection does not include confirmation of proper installation. Home Inspectors are trained to identify common deficiencies and to recognize conditions that require inspection by a specialist. Inspection of the roof typically includes visual inspection of the roof structure, roof-covering materials, flashing, and roof penetrations like chimneys, mounting hardware for roof-mounted equipment, attic ventilation devices, ducts for evaporative coolers, and combustion and plumbing vents. The roof inspection does not include leak-testing and will not certify or warranty the roof against future leakage. Other limitations may apply and will be included in the comments as necessary.

Styles & Materials: Roofing
Roof Covering:
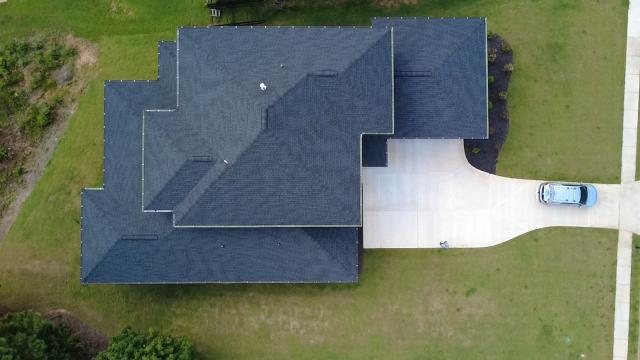
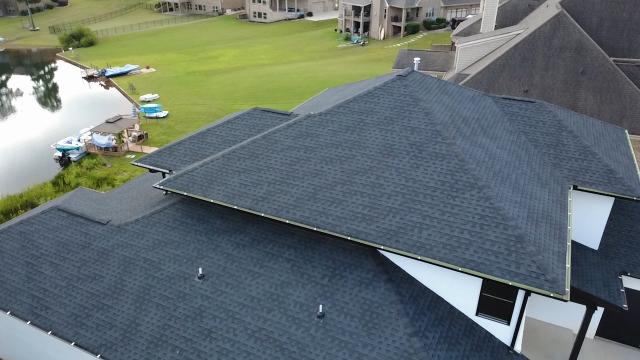
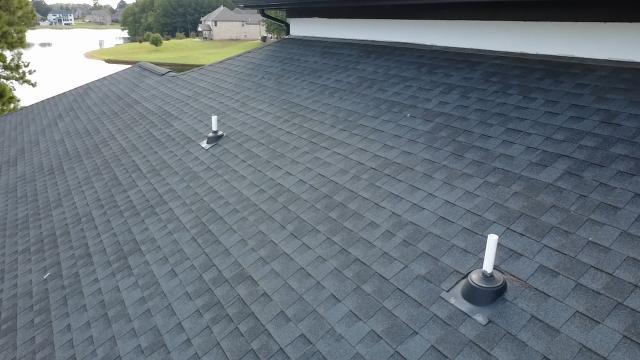
Architectural
Viewed roof covering from:
Drone
Chimney (exterior):
Metal Flue Pipe
Items: Roofing
1.0 Roof Coverings
Comments: inspection
1.0 Item 1 (Picture)
The average lifespan of a shingle roof is based on a number of factors. Longevity depends on the climate of an area, the way the original installation was handled, and whether ongoing care and maintenance have been part of a regular routine. More importantly, the lifespan of a shingle roof is greatly affected by the overall materials used. Below you’ll find the average of each of the most commonly used materials:

Asphalt Shingles (3-tab) : 15 to 18 years

Asphalt Shingles (Architectural) : 24 to 30 years

Metal : 30 to 45 years

8 Tips to Maintain Your Roof

1. Keep Your Gutters Clean. ...

2. Trim Back Trees and Landscaping. ...

3. Remove Snow From Your Roof. ...

4. Check for Cracked or Missing Shingles. ...

5. Remove Moss and Mold. ...

6. Look for Leaks in the Attic and Ceiling. ...

7. Ensure Strong Insulation. ...

8. Get a Roof Inspection.

For your information only

1.1 Skylights, Chimneys and Roof Penetrations
Comments: inspection
1.2 Flashings
Comments: inspection
1.2 Item 1 (Picture)
1.2 Item 2 (Picture)
1.2 Item 3 (Picture)
1.2 Item 4 (Picture)
OBSERVATION: From our roof-level and exterior views, we focused closely on the areas where the upper exterior walls meet the lower shingle roof planes. In several locations where the roofline intersects the vertical stucco walls and along the gutter terminations, kick-out flashings and proper sidewall step flashings appear missing, buried, or terminating directly against the wall cladding. In addition, an upper downspout drains directly onto the lower shingle surface near a wall return without a splash diverter. While the architectural shingles and black gutters appear newly installed, roof-to-wall intersections require dedicated metal flashings properly integrated behind the cladding to kick runoff away from the home.

 WHAT THIS COULD MEAN: Flashing acts like an umbrella for the seams of your home. When rainwater runs down a roof valley or off an eave next to an exterior wall, missing kick-out or step flashings can direct high volumes of water straight into the wall assembly. Over time, this water could seep behind the stucco and siding, causing hidden wood rot, structural framing damage, or mold growth inside the wall cavities.

RECOMMENDATION: Have a qualified licensed roofing contractor evaluate all roof-to-wall transitions, headwall junctions, and gutter ends, and install proper step flashings and kick-out diverters integrated correctly with the exterior wall cladding.

1.3 Roof Drainage Systems
Comments: inspection
1.3 Item 1 (Picture)
1.3 Item 2 (Picture)
1.3 Item 3 (Picture)
OBSERVATION: Along the exterior corner of the home, we looked closely at the gutter downspout and its ground drainage setup. The vertical metal downspout connects to a low-profile plastic ground extender designed to carry rainwater away from the house. However, the metal elbow at the bottom is pulled apart from the plastic tray opening. Instead of sliding fully inside the receiver slot, the downspout sits crooked and detached above it. The painted brick wall and black downspout materials look clean and new, but this joint was left misaligned and disconnected.


WHAT THIS COULD MEAN: Gutters and downspouts work together to move thousands of gallons of rainwater safely away from your foundation. When an elbow disconnects right at ground level, roof runoff pours directly onto the soil next to the brick wall instead of flowing out through the extender. Over time, ponding water near the foundation could cause soil erosion, ground settling, or moisture seeping into lower foundation walls.


RECOMMENDATION: Have a qualified gutter specialist or licensed general contractor evaluate the downspout termination, realign the metal elbow fully into the plastic ground extender, and secure the joint with appropriate sheet metal screws.

The roof of the home was inspected and reported on with the above information. While the inspector makes every effort to find all areas of concern, some areas can go unnoticed. Roof coverings and skylights can appear to be leak proof during inspection and weather conditions. Our inspection makes an attempt to find a leak but sometimes cannot. Please be aware that the inspector has your best interest in mind. Any repair items mentioned in this report should be considered before purchase. It is recommended that qualified contractors be used in your further inspection or repair issues as it relates to the comments in this inspection report.
2. Exterior
Description
The inspector shall inspect: The siding, flashing and trim. All exterior doors, decks, stoops, steps, stairs, porches, railings, eaves, soffits and fascias. And report as in need of repair any spacing between intermediate balusters, spindles, or rails for steps, stairways, balconies, and railings that permit the passage of an object greater than four inches in diameter. A representative number of windows. The vegetation, surface drainage and retaining walls when these are likely to adversely affect the structure. And describe the exterior wall covering.

The inspector is not required to: Inspect or operate screens, storm windows, shutters, awnings, fences, outbuildings, or exterior accent lighting, Inspect items, including window and door flashings, which are not visible or readily accessible from the ground, Inspect geological, geotechnical, hydrological and/or soil conditions, Inspect recreational facilities, playground equipment. Inspect seawalls, break-walls and docks, Inspect erosion control and earth stabilization measures, Inspect for safety type glass, Inspect underground utilities, Inspect underground items, Inspect wells or springs, Inspect solar, wind or geo-thermal systems, Inspect swimming pools or spas, Inspect wastewater treatment systems septic systems or cesspools, Inspect irrigation or sprinkler systems, Inspect drain fields or drywells, Determine the integrity of multi-pane window glazing or the thermal window seals.

Styles & Materials: Exterior
Siding Style:
Brick
Cement stucco
Siding Material:
Metal
Exterior Entry Doors:
Steel
Appurtenance:
Deck with steps
Driveway:
Concrete
 
Items: Exterior
2.0 Wall Cladding Flashing and Trim
Comments: inspection
2.0 Item 1 (Picture)
2.0 Item 2 (Picture)
2.0 Item 3 (Picture)
(1) OBSERVATION: While examining the exterior wall, we looked closely at the outdoor hose bibb (sillcock) assembly. The metal mounting flange is pulled loose from the brick masonry, leaving the plastic wall anchors and screws exposed. Additionally, the oversized hole drilled through the masonry around the pipe is completely unsealed, creating an open gap into the wall cavity behind the loose valve body. An outdoor spigot should be anchored tight to the wall so it does not twist when a garden hose is pulled or operated.


WHAT THIS COULD MEAN: When a hose bibb is loose, pulling on a garden hose could stress, bend, or break the internal plumbing supply line inside the wall cavity, potentially causing a hidden water leak. An unsealed opening around the pipe also allows outdoor drafts, rainwater, and pests like rodents or insects to enter the wall cavity, while increasing the risk of cold winter air freezing the pipe.


RECOMMENDATION: Have a qualified licensed plumbing contractor evaluate the exterior hose bibb assembly, fasten the mounting flange firmly to the brick masonry, and properly seal the wall penetration with exterior-grade silicone or masonry sealant.

2.0 Item 4 (Picture)
2.0 Item 5 (Picture)
2.0 Item 6 (Picture)
(2) OBSERVATION: Outside on the exterior brick wall, we evaluated the wall penetrations and exhaust vent hood. The white plastic vent hood cover is loose and pulling away from the masonry. It is missing mounting fasteners at the corner screw holes, and the perimeter has not been sealed with exterior-grade caulk. As a result, a large, dark opening is visible directly beneath the hood where it enters the wall. Nearby drain pipes penetrate the brick cleanly, but this vent termination was left unfastened and unsealed against the building envelope.


WHAT THIS COULD MEAN: The exterior walls of your home keep the outside elements from getting indoors. When an exterior vent hood is loose and unsealed, wind-driven rain could enter the brick opening and soak the wall framing or insulation. The unsealed gap also creates an easy path for mice, insects, or wasps to enter the wall cavity or ductwork.


RECOMMENDATION: Have a qualified general contractor or siding specialist evaluate the exterior vent hood, anchor the mounting flange securely to the brick masonry, and seal the perimeter with exterior-grade silicone or polyurethane sealant.

2.0 Item 7 (Picture)
2.0 Item 8 (Picture)
(3) OBSERVATION: Right where the dark front porch roof overhang meets the exterior wall, we took a close look at the stucco finish. We found a visible crack and a chipped, broken section of stucco right at the joint line. The painted brick below and the porch trim look clean and sharp, but this transition area where the roofline intersects the wall shows damaged material and an unsealed gap. In home construction, intersections between roof returns and exterior walls need to be tightly sealed and properly flashed so rainwater shedding off the roof cannot find a path behind the cladding.


WHAT THIS COULD MEAN: The exterior finish of your home acts like a raincoat. When cracks or damaged gaps open up right along a roofline, wind-driven rain running down the wall or off the overhang could seep behind the stucco. Over time, trapped moisture behind the wall covering could cause damage to the wood framing, rot out the wall sheathing, or lead to hidden cosmetic deterioration behind the stucco surface.


RECOMMENDATION: Have a qualified stucco and siding contractor evaluate the damaged stucco, verify that appropriate kickout and sidewall flashing are installed behind the roof-to-wall intersection, and make proper repairs using exterior-grade patching compound and sealant.

2.1 Doors (Exterior)
Comments: inspection
2.2 Windows
Comments: inspection
2.3 Decks, Balconies, Stoops, Steps, Areaways, Porches, Patio/Cover and Applicable Railings
Comments: inspection
2.3 Item 1 (Picture)
2.3 Item 2 (Picture)
2.3 Item 3 (Picture)
X
2.3 Item 4 (Video)
2.3 Item 5 (Picture)
2.3 Item 6 (Picture)
X
2.3 Item 7 (Video)
OBSERVATION: During our evaluation of the exterior deck structure, we inspected the vertical support posts holding up the upper deck level and stair landing. Along the faces of these large dimensional wood posts, we observed deep, continuous vertical cracks running straight through the grain. While solid wood posts naturally develop surface cracks as they dry out in the open air, these particular fissures are exceptionally long, wide, and deep. The deck framing, horizontal metal guardrails, and stair stringers are otherwise clean and neatly aligned, but the severe depth of these separations warrants a closer look to confirm the internal strength of the posts.


WHAT THIS COULD MEAN: Large timber posts support the downward weight of the entire deck, stairs, and anyone walking above. Minor surface checks are normal, but when cracks run deep into the core, moisture from rain can get trapped inside the post. Over time, trapped water could accelerate internal rot or weaken the load-bearing capacity of the wood. Deep fissures may also compromise the integrity of fasteners securing the post to the overhead beam or foundation.


RECOMMENDATION: Have a qualified deck builder or licensed structural engineer evaluate the cracked vertical support posts to determine if reinforcement or post replacement is necessary for safe, long-term support.

2.4 Vegetation, Grading, Drainage, Driveways, Patio Floor, Walkways and Retaining Walls (With respect to their effect on the condition of the building)
Comments: inspection
2.4 Item 1 (Picture)
2.4 Item 2 (Picture)
OBSERVATION: While walking the front entry area, we looked closely at the poured concrete walkway right in front of the porch steps. We found a visible hairline settlement crack running diagonally across the concrete slab. The surrounding brick facade, porch support post, and steps look sturdy and square. Concrete naturally shrinks slightly as it cures, and the ground underneath settles as soil compacts after construction. The concrete panels remain flush with no vertical trip ledge, but the surface shows this open separation across the walkway.


WHAT THIS COULD MEAN: When small cracks open up in outdoor concrete, rainwater can seep inside. During cold winter months, trapped water can freeze and expand, which may widen the crack over time or cause small pieces of the concrete surface to chip. Sealing the crack keeps water from washing away the soil underneath the slab.


RECOMMENDATION: Have a qualified concrete specialist evaluate the walkway and seal the crack using a flexible, exterior-grade polyurethane concrete sealant to prevent water entry.

The exterior of the home was inspected and reported on with the above information. While the inspector makes every effort to find all areas of concern, some areas can go unnoticed. Please be aware that the inspector has your best interest in mind. Any repair items mentioned in this report should be considered before purchase. It is recommended that qualified contractors be used in your further inspection or repair issues as it relates to the comments in this inspection report.
3. Garage
Styles & Materials: Garage
Garage Door Type:
Two automatic
Garage Door Material:
Fiberglass
Auto-opener Manufacturer:
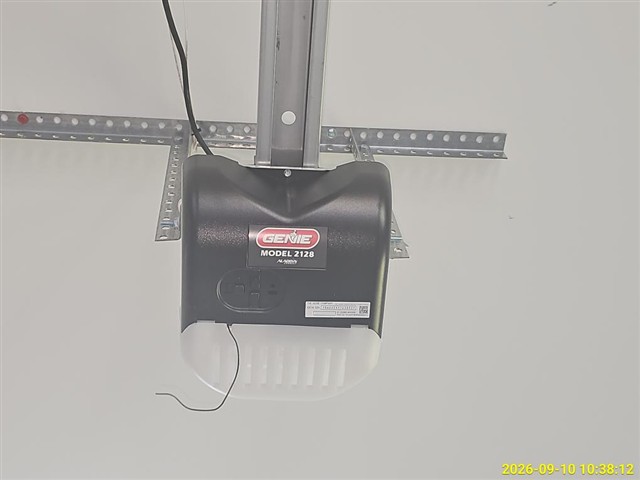
GENIE
Items: Garage
3.0 Garage Ceilings
Comments: inspection
3.1 Garage Walls (including Firewall Separation)
Comments: inspection
3.2 Garage Floor
Comments: inspection
3.2 Item 1 (Picture)
3.2 Item 2 (Picture)
3.2 Item 3 (Picture)
OBSERVATION: While walking the concrete slab floor inside the garage, we took a close look at the surface near the vehicle bays. We found a continuous hairline crack running across the floor, branching out into a Y-shaped pattern in one section. Concrete naturally shrinks slightly as the water inside it evaporates during the curing process, and ground settlement can also cause fine surface separations. The concrete on both sides of the fracture line remains completely flush and level, with no vertical height difference, heaving, or tripping edges observed.


WHAT THIS COULD MEAN: Fine hairline cracks in garage floors are very common and are usually cosmetic rather than structural. However, when cracks remain unsealed, water from rain, wet tires, or washdowns can soak into the opening. During freezing temperatures, trapped moisture could expand and cause the crack edges to chip or widen over time. Sealing the surface keeps water and automotive fluids from soaking into the concrete.


RECOMMENDATION: Have a qualified concrete repair contractor or handyman evaluate the garage floor crack and seal it with an exterior-grade, flexible polyurethane concrete joint sealant.

3.3 Garage Door (s)
Comments: inspection
3.4 Occupant Door (from garage to inside of home)
Comments: inspection
3.5 Garage Door Operators (Report whether or not doors will reverse when met with resistance)
Comments: inspection
3.6 Garage window (s)
Comments: inspection
4. Interiors
Description
The inspector shall: Open and close a representative number of doors and windows. Inspect the walls, ceilings, steps, stairways, and railings. Inspect garage doors and garage door openers by operating first by remote (if available) and then by the installed automatic door control. And report as in need of repair any installed electronic sensors that are not operable or not installed at proper heights above the garage door. And report as in need of repair any door locks or side ropes that have not been removed or disabled when garage door opener is in use. And report as in need of repair any windows that are obviously fogged or display other evidence of broken seals.

The inspector is not required to: Inspect paint, wallpaper, window treatments or finish treatments. Inspect central vacuum systems. Inspect safety glazing. Inspect security systems or components. Evaluate the fastening of countertops, cabinets, sink tops and fixtures, or firewall compromises. Move furniture, stored items, or any coverings like carpets or rugs in order to inspect the concealed floor structure. Move drop ceiling tiles. Inspect or move any household appliances. Inspect or operate equipment housed in the garage except as otherwise noted. Verify or certify safe operation of any auto reverse or related safety function of a garage door. Operate or evaluate security bar release and opening mechanisms, whether interior or exterior, including compliance with local, state, or federal standards. Operate any system, appliance or component that requires the use of special keys, codes, combinations, or devices. Operate or evaluate self-cleaning oven cycles, tilt guards/latches or signal lights. Inspect microwave ovens or test leakage from microwave ovens. Operate or examine any sauna, steam-jenny, kiln, toaster, ice-maker, coffee-maker, can-opener, bread-warmer, blender, instant hot water dispenser, or other small, ancillary devices. Inspect elevators. Inspect remote controls. Inspect appliances. Inspect items not permanently installed. Examine or operate any above-ground, movable, freestanding, or otherwise non-permanently installed pool/spa, recreational equipment or self-contained equipment. Come into contact with any pool or spa water in order to determine the system structure or components. Determine the adequacy of spa jet water force or bubble effect. Determine the structural integrity or leakage of a pool or spa.

Styles & Materials: Interiors
Ceiling Materials:
Gypsum Board
Wall Material:
Gypsum Board
Floor Covering(s):
Hardwood T&G
Interior Doors:
Hollow core
Window Types:
Thermal/Insulated
Window Manufacturer:
UNKNOWN
Cabinetry:
Wood
Countertop:
Corian
 
Items: Interiors
4.0 Ceilings
Comments: inspection
4.1 Walls
Comments: inspection
4.1 Item 1 (Picture)
4.1 Item 2 (Picture)
4.1 Item 3 (Picture)
4.1 Item 4 (Picture)
4.1 Item 5 (Picture)
4.1 Item 6 (Picture)
4.1 Item 7 (Picture)
(1) OBSERVATION: At the primary bathroom doorway, we took a close look at the sliding door and the surrounding trim. We found that the paint work is incomplete on both sides of the entrance. The upper head casing and the inner jamb face are unpainted or only primed. The vertical leading edge of the dark door slab shows bare, unpainted wood where it was planed or sanded. Additionally, the baseboard trim and wall return corner show unsealed seams and patched areas that are missing their finish paint coat.

 WHAT THIS COULD MEAN: Paint and primer do more than make a room look good. In a bathroom where showers create steam and humidity, raw wood and unsealed trim joints can absorb moisture from the air. Over time, that moisture could cause the wood trim or door edges to swell, stick, or peel. Sealing these surfaces protects the materials and keeps your doorway looking sharp for years to come.

RECOMMENDATION: Have a qualified painting and trim contractor evaluate the doorway, complete the prep work, and apply a durable, moisture-resistant finish paint to all unpainted door edges and trim surfaces.

4.1 Item 8 (Picture)
4.1 Item 9 (Picture)
(2) OBSERVATION: During our walk through the laundry area, we took a close look right above the sink countertop where the wall meets the backsplash. We noticed a small area of cracked and broken drywall with an open gap right along the edge. In a brand-new setup, you want these joints tight, clean, and well-sealed. While the cabinetry and countertop look great, this spot has exposed paper and plaster core material that is missing its finished surface and paint coat. It appears to be impact or installation stress damage that was not patched before the final turnover.


WHAT THIS COULD MEAN: Laundry sinks see plenty of splashes and daily use. When drywall is cracked or left open next to a countertop, water droplets and moisture may seep into the wall cavity over time. While this is not an emergency, moisture inside the wall could soften the gypsum board or lead to hidden cosmetic deterioration down the road. Keeping this area sealed tight helps protect your framing and keeps water where it belongs.


RECOMMENDATION: Have a qualified drywall and paint specialist evaluate and repair this damaged section. The area should be patched, textured, painted, and properly sealed along the countertop edge with a flexible, waterproof silicone caulk.

4.2 Floors
Comments: inspection
4.2 Item 1 (Picture)
4.2 Item 2 (Picture)
OBSERVATION: At the doorway transition between the wood flooring and the bathroom tile, we observed an open expansion gap that has not been sealed. Both the tile and wood flooring materials look great, but the line where they meet currently shows exposed subflooring and mortar. In home construction, different materials naturally expand and contract at different rates as seasons and indoor temperatures change. Leaving this seam open without a flexible seal or transition strip leaves the floor edge unprotected during daily use.


WHAT THIS COULD MEAN: In an area right outside a bathroom, water droplets from wet feet or splashes could easily seep into this open gap. Over time, trapped moisture could cause the edges of the hardwood to swell, cup, or darken. An unsealed seam could also collect dirt and debris that is difficult to sweep out.


RECOMMENDATION: Have a qualified flooring contractor evaluate this floor transition and install a color-matched, flexible silicone sealant or appropriate transition trim strip.

4.3 Steps, Stairways, Balconies and Railings
Comments: inspection
4.3 Item 1 (Picture)
4.3 Item 2 (Picture)
4.3 Item 3 (Picture)
4.3 Item 4 (Picture)
(1) OBSERVATION: At the stairway guardrail, we found a missing metal baluster (spindle) right near the top edge. The open mounting hole and dowel anchor are drilled into the stair nosing, but the upright bar was never secured in place. The uninstalled spindle was located inside a nearby built-in lower cabinet. While the surrounding rail and floor finish look sharp, the gap left behind on the staircase does not provide continuous protection along the walking path.


WHAT THIS COULD MEAN: Guardrails are designed to keep everyone safe as they move through the home. A missing spindle creates an opening larger than four inches, which could allow a small child or pet to slip through or get stuck. Leaving the spindle out could also reduce the rigidity of the handrail system over time.


RECOMMENDATION: Have a qualified stair builder or finish carpentry specialist evaluate the guardrail assembly and properly install and anchor the missing spindle to ensure safe, continuous spacing.

4.3 Item 5 (Picture)
4.3 Item 6 (Picture)
(2) OBSERVATION: While walking the basement stairway landing, we checked the subfloor where the steps meet the intermediate platform. An exposed framing nail is sticking up above the surface of the subfloor panel. The surrounding subfloor panels and base trim are securely in place, but this fastener was not driven flush or removed after the carpentry work was done. On an unfinished walking surface, raised fasteners like this easily stand out underfoot.


WHAT THIS COULD MEAN: Stepping directly on a raised nail head could cause a foot injury or puncture footwear. If finished flooring or carpet padding is installed over this nail later on, the raised head could create a noticeable bump, puncture the new underlayment, or cause premature wear on your flooring.


RECOMMENDATION: Have a qualified flooring or framing specialist evaluate the landing surface to pull or countersink the exposed fastener flush before finished flooring is installed.

4.4 Counters and Cabinets (representative number)
Comments: inspection
4.4 Item 1 (Picture)
4.4 Item 2 (Picture)
OBSERVATION: Inside the lower base cabinet, we found a loose shelf board resting flat on the cabinet floor rather than mounted in its proper upright position. The small bag of shelf support pegs is sitting in the back left corner, but the shelf has not been set up. The cabinetry itself is in clean condition with good hardware, but this storage area was simply left unfinished during the final stages of installation. It is a very common detail that gets overlooked when a home is being finished up.


WHAT THIS COULD MEAN: Leaving the shelf uninstalled reduces your usable storage space and could allow items stored inside to scratch the loose board or cabinet base. While this does not affect the safety or structure of the home, completing the installation ensures you have the full, intended storage capacity ready for daily use.


RECOMMENDATION: Have a qualified cabinet specialist or trim carpenter evaluate and properly mount the interior shelf using the supplied hardware pins.

4.5 Doors (representative number)
Comments: inspection
4.5 Item 1 (Picture)
4.5 Item 2 (Picture)
(1) OBSERVATION: While examining the bedroom closet door, we checked the door hardware and hinges along the frame. We noticed that a hinge pin is not fully seated into the hinge barrel, leaving the pin head sticking up above the top knuckle. The door panel and dark finish look sharp, and the hinge plates are screwed tightly into the jamb. However, the hinge pin was never tapped all the way down into its locked position when the door was hung.


WHAT THIS COULD MEAN: Hinge pins hold the full weight of the door and keep it swinging evenly. When a pin sits partially out of its sleeve, the door could begin to sag over time as you open and close it. This extra movement may cause the door latch to rub against the strike plate or scratch the door frame.


RECOMMENDATION: Have a qualified carpenter or handyman evaluate the door hinges and seat the hinge pin fully flush into the barrel assembly.

4.5 Item 3 (Picture)
4.5 Item 4 (Picture)
(2) OBSERVATION: During our check of the exterior doors leading into the unfinished basement, we inspected the sliding glass patio door assembly. We found that the operating door handle and thumb-turn lock mechanism are missing. The internal latch mortise is installed in the door edge, and the pre-drilled holes are present in the frame, but the interior and exterior hardware handles have not been mounted. The glass panels, outer brickwork, and track are in clean condition, but this door unit was left incomplete before final turnover.


WHAT THIS COULD MEAN: An exterior sliding door without a handle and lock cannot be secured from the inside or outside. This could allow unauthorized entry into the home and presents a home security concern. Additionally, without a proper latching mechanism to pull the door snugly against the weatherstripping, wind and outdoor air could leak into the space.


RECOMMENDATION: Have a qualified door specialist or general contractor evaluate the sliding door assembly and install the proper matching handle set and locking mechanism to ensure the door can be securely locked.

4.6 Windows (representative number)
Comments: inspection
The interior of the home was inspected and reported on with the above information. While the inspector makes every effort to find all areas of concern, some areas can go unnoticed. The inspection did not involve moving furniture and inspecting behind furniture, area rugs or areas obstructed from view. Please be aware that the inspector has your best interest in mind. Any repair items mentioned in this report should be considered before purchase. It is recommended that qualified contractors be used in your further inspection or repair issues as it relates to the comments in this inspection report.
5. Structural Components
Description
The inspector shall inspect: The basement. The foundation. The crawlspace. The visible structural components. Any present conditions or clear indications of active water penetration observed by the inspector. And report any general indications of foundation movement that are observed by the inspector, such as but not limited to sheetrock cracks, brick cracks, out-of-square door frames or floor slopes.

The inspector is not required to: Enter any crawlspaces that are not readily accessible or where entry could cause damage or pose a hazard to the inspector, Move stored items or debris, Operate sump pumps with inaccessible floats, Identify size, spacing, span, location or determine adequacy of foundation bolting, bracing, joists, joist spans or support systems, Provide any engineering or architectural service, Report on the adequacy of any structural system or component.

The General Home Inspection includes inspection of the home structural elements that were readily visible at the time of the inspection. This may include the: foundation; walls; floor structure; and/or roof structure. Soils vary in their stability and ability to support the weight of a structure. Minor cracking is normal with some common foundation materials, is typically limited to the material surface, is not a structural concern, and may not be commented on. Cracking related to soil/foundation movement indicates the potential for present or future structural concerns and will be commented on to the best of the inspector's ability.

Much of the home structure is hidden behind exterior and interior roof, floor, wall, and ceiling coverings, or is buried underground. Because the General Home Inspection is limited to visual and non-invasive methods, this report may not identify all structural deficiencies. Identification of portions of the wall structure not directly visible requires logical assumptions on the part of the Inspector that are based on the Inspectors past experience and knowledge of common building practices.

Upon observing indications that structural problems may exist that are not readily visible, or the inspection of which lies beyond the Inspector's expertise, the inspector may recommend inspection or testing  by a specialist that may include invasive measures, which would require homeowner permission.

Styles & Materials: Structural Components
Foundation:
Poured concrete
Floor Structure:
2 X 6
Wall Structure:
Wood
Ceiling Structure:
2X4
Roof-Type:
Gable
Attic info:
Scuttle hole
Pull Down stairs
Items: Structural Components
5.0 Foundations, Basement and Crawlspace (Report signs of abnormal or harmful water penetration into the building or signs of abnormal or harmful condensation on building components.)
Comments: inspection
5.1 Walls (Structural)
Comments: inspection
5.2 Columns or Piers
Comments: inspection
5.3 Floors (Structural)
Comments: inspection
5.3 Item 1 (Picture)
5.3 Item 2 (Picture)
5.3 Item 3 (Picture)
5.3 Item 4 (Picture)
(1) OBSERVATION: While walking the concrete slab floor near the stud wall framing, we looked closely at the concrete surface. A continuous hairline crack runs across the floor. Near one section of the crack, there is an area of localized grinding, past patch material, or moisture discoloration along the fracture line. Concrete naturally shrinks as it cures and dries, which frequently leads to hairline cracks. The concrete surfaces on either side of the crack appear level, with no significant vertical displacement or tripping ledge observed.

WHAT THIS COULD MEAN: Small shrinkage cracks in a concrete slab are very common and typically cosmetic rather than structural. However, open cracks in a ground-contact floor could allow moisture vapor or soil gases to enter the living space. If moisture passes through the slab, it could also cause problems for flooring adhesives or finished materials installed over the concrete later on.

RECOMMENDATION: Have a qualified concrete or waterproofing specialist evaluate the floor crack and seal it with an appropriate flexible polyurethane concrete joint sealant.

5.3 Item 5 (Picture)
(2) OBSERVATION: Up in the attic, we walked the OSB wood decking platform that provides access to the heating and cooling air handler. As you step across these floor panels, the wood feels distinctly bouncy and spongy underfoot. The attic space itself features spray foam insulation along the roof rafters, neatly routed flexible ductwork, and clean mechanical equipment. However, the plywood panels across this service walkway lack adequate framing support or solid wood blocking beneath the seams. Without proper bracing across the ceiling joists, the decking flexes easily when walked on.


WHAT THIS COULD MEAN: An attic platform is designed to provide a solid, secure walkway so technicians can safely service heating equipment and ductwork. When decking is bouncy or unsupported, it can bend under normal body weight. Over time, that flexing could loosen fasteners, crack the wood panels, or create a tripping and fall hazard, potentially damaging the finished drywall ceiling directly underneath.


RECOMMENDATION: Have a qualified framing contractor or licensed general contractor evaluate the attic service platform and install additional wood joists or blocking beneath the decking seams to make the walkway completely rigid and secure.

5.4 Ceilings (Structural)
Comments: inspection
5.4 Item 1 (Picture)
5.4 Item 2 (Picture)
5.4 Item 3 (Picture)
5.4 Item 4 (Picture)
5.4 Item 5 (Picture)
5.4 Item 6 (Picture)
OBSERVATION: While examining the attic space, we checked the ceiling joists, roof framing, and spray foam insulation. Along one of the dimensional lumber framing members, we observed dark, blotchy fungal-like staining across the face of the wood. The surrounding roof rafters, joists, and mechanical ductwork appear structurally sound and properly positioned. However, this specific board has noticeable discoloration and spotting that often develops when construction lumber is exposed to rain or damp conditions before or during the building process.


WHAT THIS COULD MEAN: Wood that gets wet on a job site can develop surface mold or fungal growth if it does not dry out quickly. In an attic sealed with spray foam, trapped moisture or elevated humidity could allow organic growth to remain active or spread. While surface growth does not necessarily weaken the wood immediately, unaddressed moisture or mold could affect indoor air quality or lead to wood rot over time.


RECOMMENDATION: Have a qualified mold remediation specialist or environmental professional evaluate the discolored wood member, test the surface for active microbial growth, and clean or treat the lumber as needed.

5.5 Roof Structure and Attic
Comments: inspection
The structure of the home was inspected and reported on with the above information. While the inspector makes every effort to find all areas of concern, some areas can go unnoticed. Please be aware that the inspector has your best interest in mind. Any repair items mentioned in this report should be considered before purchase. It is recommended that qualified contractors be used in your further inspection or repair issues as it relates to the comments in this inspection report.
6. Plumbing System
Description
The inspector shall: Verify the presence of and identify the location of the main water shutoff valve. Inspect the water heating equipment, including combustion air, venting, connections, energy sources, seismic bracing, and verify the presence or absence of temperature-pressure relief valves and/or Watts 210 valves. Flush toilets. Run water in sinks, tubs, and showers. Inspect the interior water supply including all fixtures and faucets. Inspect the drain, waste and vent systems, including all fixtures. Describe any visible fuel storage systems. Inspect the drainage sump pumps testing sumps with accessible floats. Inspect and describe the water supply, drain, waste and main fuel shut-off valves, as well as the location of the water main and main fuel shut-off valves. Inspect and determine if the water supply is public or private. Inspect and report as in need of repair deficiencies in the water supply by viewing the functional flow in two fixtures operated simultaneously. Inspect and report as in need of repair deficiencies in installation and identification of hot and cold faucets. Inspect and report as in need of repair mechanical drain-stops that are missing or do not operate if installed in sinks, lavatories and tubs. Inspect and report as in need of repair commodes that have cracks in the ceramic material, are improperly mounted on the floor, leak, or have tank components which do not operate.

The inspector is not required to: Light or ignite pilot flames. Determine the size, temperature, age, life expectancy or adequacy of the water heater. Inspect interiors of flues or chimneys, water softening or filtering systems, well pumps or tanks, safety or shut-of valves, floor drains, lawn sprinkler systems or fire sprinkler systems. Determine the exact flow rate, volume, pressure, temperature, or adequacy of the water supply. Determine the water quality or potability or the reliability of the water supply or source. Open sealed plumbing access panels. Inspect clothes washing machines or their connections. Operate any main, branch or fixture valve. Test shower pans, tub and shower surrounds or enclosures for leakage. Evaluate the compliance with local or state conservation or energy standards, or the proper design or sizing of any water, waste or venting components, fixtures or piping. Determine the effectiveness of anti-siphon, back-flow prevention or drain-stop devices. Determine whether there are sufficient clean-outs for effective cleaning of drains. Evaluate gas, liquid propane or oil storage tanks. Inspect any private sewage waste disposal system or component of. Inspect water treatment systems or water filters. Inspect water storage tanks, pressure pumps or bladder tanks. Evaluate time to obtain hot water at fixtures, or perform testing of any kind to water heater elements. Evaluate or determine the adequacy of combustion air. Test, operate, open or close safety controls, manual stop valves and/or temperature or pressure relief valves. Examine ancillary systems or components, such as, but not limited to, those relating to solar water heating, hot water circulation.

Inspection of the plumbing system typically includes (limited) operation and visual inspection of: water supply source (identification as public or private); sewage disposal system (identification as public or private); water supply/distribution pipes; drain, waste and vent (DWV) system; water heater (type, condition and operation); gas system; and sump pump (confirmation of installation/operation). 

Styles & Materials: Plumbing System
Water Source:
Public
Water Heater Power Source:
Gas (quick recovery)
Water Heater Capacity:
Tankless
Water Heater Location:
Garage
WH Manufacturer:
UNKNOWN
 
Items: Plumbing System
6.0 Plumbing Drain, Waste and Vent Systems
Comments: inspection
6.1 Plumbing Water Supply, Distribution System and Fixtures
Comments: inspection
6.1 Item 1 (Picture)
6.1 Item 2 (Picture)
X
6.1 Item 3 (Video)
(1) OBSERVATION: Underneath the sink basin, we checked the drain piping and supply connections both visually and with a thermal imaging camera. The drain pipes are connected with standard slip joints, and the supply lines are hooked up securely. However, the thermal scan shows a distinct, cold thermal pattern reading 61.5°F right on the floor of the cabinet directly beneath the drain trap assembly. This cooler temperature signature indicates standing water or active moisture leaking down onto the cabinet floor when water flows through the sink drain.


WHAT THIS COULD MEAN: A slow drip from a drain pipe or slip joint can quietly soak the wooden base of your cabinet. Over time, that trapped moisture could warp or soften the wood, cause dark water stains, or lead to mold growth in an enclosed cabinet space. Catching and sealing a small drain leak early keeps the cabinet floor solid and dry.


RECOMMENDATION: Have a qualified licensed plumbing contractor evaluate the sink drain pipe fittings, trap assembly, and tailpiece connections, and make necessary repairs to eliminate leaks.

6.1 Item 4 (Picture)
(2) OBSERVATION: During our check of the primary bathroom, we tested the freestanding soaking tub and its wall-mounted faucet assembly. When we operated the handles using normal controls, no water flowed from the spout or hand shower attachment. The tub basin, wall tile, and matte black fixtures look beautifully installed and show no visual cracks or damage. However, the plumbing control valves did not deliver water during testing, which typically indicates that the water supply shut-off valves remain closed or the internal faucet cartridges are not yet engaged.


WHAT THIS COULD MEAN: If the water lines are turned off or the fixture is not connected properly behind the wall, you cannot use the tub. Additionally, running water through the system is necessary to confirm that the drain pipes, supply lines, and overflow connections are completely watertight and free of leaks.


RECOMMENDATION: Have a qualified licensed plumbing contractor evaluate the bathtub water supply valves, faucet controls, and drainage assembly to restore full water operation and confirm there are no active leaks.

6.1 Item 5 (Picture)
6.1 Item 6 (Picture)
(3) OBSERVATION: During our walk through this bathroom, we checked the toilet to make sure it was firmly secured to the floor. When tested by hand, the toilet moved from side to side. We also observed that the base where the porcelain meets the tile floor has not been sealed with caulk. The toilet fixture itself looks brand-new and the surrounding floor tile is in clean condition, but the mounting bolts underneath the side covers are either loose or need adjustment to hold the bowl firmly in place.


WHAT THIS COULD MEAN: A toilet relies on a soft wax ring underneath to seal the drain pipe. When the toilet wobbles, that movement could break the wax seal and allow water or sewer gases to seep out beneath the bowl. Over time, hidden leaks under the base could damage the subfloor below. Sealing around the base also prevents mop water or spills from getting trapped underneath.


RECOMMENDATION: Have a qualified licensed plumbing contractor evaluate the toilet mounting assembly, reset or secure the bowl with a fresh wax ring if needed, and apply a neat bead of waterproof caulk around the base while leaving a small weep gap at the back.

6.2 Hot Water Systems, Controls, Chimneys, Flues and Vents
Comments: inspection
6.2 Item 1 (Picture)
6.2 Item 2 (Picture)
Brand: Navien, Inc.


Model Number: NPE-240S2


Serial Number: Not visible on the rating plate section photographed (located on the lower serial barcode label)


Fuel Type: Natural Gas (convertible to Propane)


Heating Capacity: 13,300 to 199,900 BTU/hr input; 235 Gallons/Hour recovery rating


Electrical: 120 Volts, 60 Hz, less than 2 Amps


Current Setting: Set to 120°F (the recommended standard setpoint to prevent accidental scalding)


AGE / TYPICAL LIFESPAN:


Manufacture Era: Current Navien NPE-2 series generation (NPE-S2 standard-efficiency condensing unit).


Typical Lifespan: 15 to 20+ years when regularly serviced and flushed.


MAINTENANCE TIPS / BUDGET PLANNING:


Annual Descaling / Flush: Tankless units heat water rapidly through compact internal heat exchangers. Hard water minerals can build up inside the copper/stainless components over time. Have a licensed plumber flush the unit with a vinegar solution or descaling agent once a year to keep it heating efficiently.


Inlet Water Filter: Check and clean the cold water inlet screen filter every 6 to 12 months to prevent sediment from restricting water flow.


Temperature Setting: Keep the digital display set at 120°F to provide plenty of hot water while protecting young children or family members from burns and keeping energy bills low.

6.3 Main Water Shut-off Device (Describe location)
Comments: inspection
6.3 Item 1 (Picture)
The main water shut off is located here.

For your information only

The plumbing in the home was inspected and reported on with the above information. While the inspector makes every effort to find all areas of concern, some areas can go unnoticed. Washing machine drain line for example cannot be checked for leaks or the ability to handle the volume during drain cycle. Older homes with galvanized supply lines or cast iron drain lines can be obstructed and barely working during an inspection but then fails under heavy use. If the water is turned off or not used for periods of time (like a vacant home waiting for closing) rust or deposits within the pipes can further clog the piping system. Please be aware that the inspector has your best interest in mind. Any repair items mentioned in this report should be considered before purchase. It is recommended that qualified contractors be used in your further inspection or repair issues as it relates to the comments in this inspection report.
7. Electrical System
Description
The inspector shall inspect: The service line. The meter box. The main disconnect. And determine the rating of the service amperage. Panels, breakers and fuses. The service grounding and bonding. A representative sampling of switches, receptacles, light fixtures, AFCI receptacles and test all GFCI receptacles and GFCI circuit breakers observed and deemed to be GFCI's during the inspection. And report the presence of solid conductor aluminum branch circuit wiring if readily visible. And report on any GFCI-tested receptacles in which power is not present, polarity is incorrect, the receptacle is not grounded, is not secured to the wall, the cover is not in place, the ground fault circuit interrupter devices are not properly installed or do not operate properly, or evidence of arcing or excessive heat is present. The service entrance conductors and the condition of their sheathing. The ground fault circuit interrupters observed and deemed to be GFCI's during the inspection with a GFCI tester. And describe the amperage rating of the service. And report the absence of smoke detectors. Service entrance cables and report as in need of repair deficiencies in the integrity of the insulation, drip loop, or separation of conductors at weatherheads and clearances.

The inspector is not required to: Insert any tool, probe or device into the main panel, sub-panels, downstream panel, or electrical fixtures. Operate electrical systems that are shut down. Remove panel covers or dead front covers if not readily accessible. Operate over current protection devices. Operate non-accessible smoke detectors. Measure or determine the amperage or voltage of the main service if not visibly labeled. Inspect the alarm system and components. Inspect the ancillary wiring or remote control devices. Activate any electrical systems or branch circuits which are not energized. Operate overload devices. Inspect low voltage systems, electrical de-icing tapes, swimming pool wiring or any time-controlled devices. Verify the continuity of the connected service ground. Inspect private or emergency electrical supply sources, including but not limited to generators, windmills, photovoltaic solar collectors, or battery or electrical storage facility. Inspect spark or lightning arrestors. Conduct voltage drop calculations. Determine the accuracy of breaker labeling. Inspect exterior lighting.

Over the years, many different types and brands of electrical components have been installed in homes. Electrical components and standards have changed and continue to change. Homes electrical systems are not required to be updated to meet newly enacted electrical codes or standards. Full and accurate inspection of electrical systems requires contractor-level experience. For this reason, full inspection of home electrical systems lies beyond the scope of the General Home Inspection.

The General Home Inspection is limited to identifying common electrical requirements and deficiencies. Conditions indicating the need for a more comprehensive inspection will be referred to a qualified electrical contractor.Inspection of the home electrical system typically includes visual inspection of the following:service drop: conductors, weatherhead, and service mast; electric meter exterior; service panel and sub-panels; service and equipment grounding; system and component bonding; and visible branch wiring: receptacles (representative number), switches, lighting.

Limitations: The following items are not included in this inspection: generator systems, transfer switches, surge suppressors, inaccessible or concealed wiring; underground utilities and systems; low-voltage lighting or lighting on timers or sensors. Any comments made regarding these items are as a courtesy only. Note that the inspector does not determine the adequacy of grounding or bonding, if this system has an adequate capacity for the client's specific or anticipated needs, or if this system has any reserve capacity for additions or expansion. The inspector does not operate circuit breakers as part of the inspection, and does not install or change light bulbs. The inspector does not evaluate every wall switch or receptacle, but instead tests a representative number of them per various standards of practice. When furnishings, stored items or child-protective caps are present some receptacles are usually inaccessible and are not tested; these are excluded from this inspection. Receptacles that are not of standard 110 volt configuration, including 240-volt dryer receptacles, are not tested and are excluded. The functionality of, power source for and placement of smoke and carbon monoxide alarms is not determined as part of this inspection. Upon taking occupancy, proper operating and placement of smoke and carbon monoxide alarms should be verified and batteries should be changed. These devices have a limited lifespan and should be replaced every 10 years. The inspector attempts to locate and evaluate all main and sub-panels. However, panels are often concealed. If panels are found after the inspection, a qualified electrician should evaluate and repair if necessary. The inspector attempts to determine the overall electrical service size, but such estimates are not guaranteed because the overall capacity may be diminished by lesser-rated components in the system. Any repairs recommended should be made by a licensed electrician.

Styles & Materials: Electrical System
Electrical Service Conductors:
Below ground
Panel Capacity:
Adequate
Panel Type:
Circuit breakers
GFCI Breakers
AFCI Breakers
Electric Panel Manufacturer:
Unknown
Wiring Methods:
Conduit
 
Items: Electrical System
7.0 Service and Grounding Equipment, Main Overcurrent Device, Main and Distribution Panels
Comments: inspection
7.0 Item 1 (Picture)
7.0 Item 2 (Picture)
7.0 Item 3 (Picture)
OBSERVATION: Outside on the exterior brick wall, we evaluated the electric meter enclosure and service conduit. The metal cabinet and meter glass appear clean and properly mounted to the brick. However, looking at the underside of the enclosure, we observed a bare copper grounding wire extending out from the bottom and running down the wall without protective conduit or secure fastening clips. Directly beside the conduit strap, an open, unsealed drill hole remains in the brick masonry. Additionally, the vertical PVC conduit entering from the ground lacks a visible slip-joint expansion fitting where it enters the base to allow for natural soil settling around the foundation.


WHAT THIS COULD MEAN: Grounding wires are essential for redirecting electrical surges safely into the earth. When a bare grounding wire is left loose and unprotected on an outside wall, everyday yard maintenance could accidentally snag, loosen, or damage the wire, which could compromise the grounding protection of your electrical system. Furthermore, unsealed holes in exterior masonry could allow moisture or pests to enter behind the brick. Without an expansion sleeve, settling soil around the foundation may pull downward on the conduit and place physical stress on the meter base.


RECOMMENDATION: Have a qualified licensed electrical contractor evaluate the grounding conductor, secure and protect the wire against physical damage, seal the open masonry hole, and verify the service conduit riser assembly.

7.1 Connected Devices and Fixtures (Observed from a representative number operation of ceiling fans, lighting fixtures, switches and receptacles located inside the house, garage, and on the dwelling's exterior walls)
Comments: inspection
7.1 Item 1 (Picture)
7.1 Item 2 (Picture)
7.1 Item 3 (Picture)
(1) OBSERVATION: Outside on the covered patio wall, we plugged our circuit analyzer into the exterior electrical receptacle. The tester confirmed the outlet has power and correct wiring, but when we pressed the test button to simulate a ground fault, the receptacle did not trip or shut off power. The outlet is set inside a weatherproof bubble cover, but it is a standard duplex style rather than an outlet with its own built-in "Test" and "Reset" buttons. While it may be wired downline from an upstream GFCI outlet or breaker, the required ground-fault protection failed to respond during testing.


WHAT THIS COULD MEAN: GFCI protection is designed to act like a fast-acting safety net. It quickly cuts off electricity if it senses current leaking where it shouldn't, such as through water or a person. When an outdoor outlet near moisture and concrete doesn't trip, that safety net is missing. This could leave you without essential protection against electrical shocks when using tools, appliances, or outdoor cords.


RECOMMENDATION: Have a qualified licensed electrical contractor evaluate the patio receptacle and its supply circuit to restore proper GFCI protection.

7.1 Item 4 (Picture)
X
7.1 Item 5 (Video)
(2) OBSERVATION: On the exterior brick wall, we evaluated an automated Rain Bird irrigation controller enclosure and its low-voltage wiring setup. The gray controller box is mounted to the masonry with a white PVC conduit pipe protecting the underground zone wires. However, the flexible power supply cord drops loosely out of the bottom of the enclosure and hangs exposed against the brick face without secure fastening clips or protective conduit. Additionally, the weatherproof outdoor outlet located directly beneath the controller is missing its cover door, leaving the internal electrical receptacle open to the outdoor elements.


WHAT THIS COULD MEAN: Outdoor power cords need proper protection and anchoring to prevent physical damage. A loose, hanging power cord could be snagged, pulled, or damaged during routine yard maintenance or by small pests. Furthermore, an open outdoor receptacle without a sealed weatherproof cover allows wind-driven rain, dirt, and insects inside the outlet box. This moisture could cause electrical short circuits, trip upstream breakers, or create a shock hazard when plugging in equipment.


RECOMMENDATION: Have a qualified licensed electrical contractor evaluate the irrigation controller power supply cord and the exterior outlet, secure or sleeve the power cord, and install a functional while-in-use weatherproof cover on the receptacle box.

7.1 Item 6 (Picture)
7.1 Item 7 (Picture)
X
7.1 Item 8 (Video)
(3) OBSERVATION: Inside the main electrical service panel, we examined the circuit breakers and the panel schedule directory. Several single-pole and double-pole circuit breakers are currently switched to the "OFF" position. The electrical panel features modern arc-fault and ground-fault combination breakers equipped with purple test buttons, along with a whole-home surge protection device showing an active green status light. While the interior dead-front cover and breakers are clean and neatly organized, multiple branch circuits remain de-energized. Additionally, some circuit descriptions on the panel door index card have been scratched out or rewritten, making a few circuit pathways uncertain until tested.


WHAT THIS COULD MEAN: When circuit breakers are left switched off, the outlets, lighting circuits, or dedicated appliances connected to those lines will not receive electrical power. In newly built homes, trades often leave circuits turned off until appliances or fixtures are fully installed. Leaving breakers off prevents testing those specific circuits during the walkthrough. Unclear or scribbled-out panel labels could also make it difficult to locate the proper shutoff switch during everyday maintenance or an emergency.


RECOMMENDATION: Have a qualified licensed electrical contractor evaluate the de-energized circuit breakers, confirm all connected branch wiring and fixtures are safely installed, and update the panel directory labels with clear, accurate markings.

7.1 Item 9 (Picture)
7.1 Item 10 (Picture)
(4) OBSERVATION: While checking the kitchen backsplash above the countertop, we inspected the electrical outlet next to the wall ovens. We found that the rectangular tile cutout was cut slightly too large or positioned too high for the outlet box, leaving an open gap visible above the top edge of the standard plastic wall plate. You can see the raw edge of the tile and the wall space behind it. While the surrounding tile and cabinetry are in clean condition, electrical wall plates are designed to completely cover the wall opening and enclose the electrical box.


WHAT THIS COULD MEAN: Faceplates act like a protective shield around electrical wiring. When an open gap is left at the top edge of an outlet on a kitchen counter, kitchen spills, cleaning sprays, crumbs, or dust could accidentally get behind the plate and enter the electrical junction box. Over time, moisture contacting electrical components can create a shock hazard or short out the circuit.


RECOMMENDATION: Have a qualified electrical contractor or tile specialist evaluate the outlet cover plate and install an oversized ("mid-way" or "jumbo") decorative wall plate to fully seal and conceal the wall opening.

7.1 Item 11 (Picture)
7.1 Item 12 (Picture)
(5) OBSERVATION: While testing the ceiling fixtures, we operated the wall switch for the recessed ceiling light. The light fixture did not turn on or illuminate. The surrounding ceiling drywall, trim ring, and ceiling fan light are in clean condition, but this specific recessed can light remained dark when tested with normal controls. In new construction, this can simply be an unseated LED driver, a disconnected quick-connect plug in the junction box, or a loose wire nut at the switch or fixture.


WHAT THIS COULD MEAN: A light that does not turn on could mean a loose wire connection, an unplugged LED module, or a faulty component. While this is a common issue during final punch-out work, unverified electrical wiring behind the ceiling should always be confirmed to make sure it is safe and connected properly.


RECOMMENDATION: Have a qualified licensed electrical contractor evaluate the recessed light fixture, switch wiring, and connections to ensure safe, proper illumination.

7.2 Smoke Detectors
Comments: inspection
7.2 Item 1 (Picture)
The smoke detectors should be tested and/replaced upon moving in to home.

Safety reminder only

7.3 Carbon Monoxide Detectors
Comments: inspection
7.3 Item 1 (Picture)
The carbon monoxide detector should be tested and/installed before moving in to home.

Safety reminder only

The electrical system of the home was inspected and reported on with the above information. While the inspector makes every effort to find all areas of concern, some areas can go unnoticed. Outlets were not removed and the inspection was only visual. Any outlet not accessible (behind the refrigerator for example) was not inspected or accessible. Please be aware that the inspector has your best interest in mind. Any repair items mentioned in this report should be considered before purchase. It is recommended that qualified contractors be used in your further inspection or repair issues as it relates to the comments in this inspection report.
8. Heating / Central Air Conditioning
Description
The inspector shall inspect: The heating system and describe the energy source and heating method using normal operating controls. And report as in need of repair electric furnaces which do not operate. And report if inspector deemed the furnace inaccessible. The central cooling equipment using normal operating controls. The fireplace, and open and close the damper door if readily accessible and operable. Hearth extensions and other permanently installed components. And report as in need of repair deficiencies in the lintel, hearth and material surrounding the fireplace, including clearance from combustible materials.

The inspector is not required to: Inspect or evaluate interiors of flues or chimneys, fire chambers, heat exchangers, humidifiers, dehumidifiers, electronic air filters, solar heating systems, solar heating systems or fuel tanks. Inspect underground fuel tanks. Determine the uniformity, temperature, flow, balance, distribution, size, capacity, BTU, or supply adequacy of the heating system. Light or ignite pilot flames. Activate heating, heat pump systems, or other heating systems when ambient temperatures or when other circumstances are not conducive to safe operation or may damage the equipment. Override electronic thermostats. Evaluate fuel quality. Verify thermostat calibration, heat anticipation or automatic setbacks, timers, programs or clocks. Determine the uniformity, temperature, flow, balance, distribution, size, capacity, BTU, or supply adequacy of the cooling system. Inspect window units, through-wall units, or electronic air filters. Operate equipment or systems if exterior temperature is below 60 degrees Fahrenheit or when other circumstances are not conducive to safe operation or may damage the equipment. Inspect or determine thermostat calibration, heat anticipation or automatic setbacks or clocks. Examine electrical current, coolant fluids or gasses, or coolant leakage. Inspect the flue or vent system. Inspect the interior of chimneys or flues, fire doors or screens, seals or gaskets, or mantels. Determine the need for a chimney sweep. Operate gas fireplace inserts. Light pilot flames. Determine the appropriateness of such installation. Inspect automatic fuel feed devices. Inspect combustion and/or make-up air devices. Inspect heat distribution assists whether gravity controlled or fan assisted. Ignite or extinguish fires. Determine draft characteristics. Move fireplace inserts, stoves, or firebox contents. Determine adequacy of draft, perform a smoke test or dismantle or remove any component. Perform an NFPA inspection. Perform a Phase 1 fireplace and chimney inspection.

Heating system inspection will not be as comprehensive as that performed by a qualified heating, ventilating, and air-conditioning (HVAC) system contractor. For example: identification of cracked heat exchangers requires a contractor inspection. Report comments are limited to identification of common requirements and deficiencies. Observed indications that further inspection is needed will result in referral to a qualified HVAC contractor. The general home inspection does not include any type of heating system warranty or guaranty. Inspection of heating systems is limited to basic inspection based on visual examination and operation using normal controls. Report comments are limited to identification of common requirements and deficiencies. Observed indications that further inspection is needed will be referred to a qualified heating, ventilating, and air-conditioning (HVAC) contractor. Inspection of heating systems typically includes (limited) operation and visual inspection of: the heating appliance (confirmation of adequate response to the call for heat); proper heating appliance location; proper or adequate heating system configuration; exterior cabinet condition; fuel supply configuration and condition; combustion exhaust venting; heat distribution components; proper condensation discharge; and temperature/pressure relief valve and discharge pipe (presence, condition, and configuration).

Inspection of home cooling systems typically includes visual examination of readily observable components for adequate condition, and system testing for proper operation using normal controls. Cooling system inspection will not be as comprehensive as that performed by a qualified heating, ventilating, and air-conditioning (HVAC) system contractor. Report comments are limited to identification of common requirements and deficiencies. Observed indications that further inspection is needed will result in referral to a qualified HVAC contractor. To avoid the potential for system damage, the air-conditioning system will not be operated if the outside air temperature is below 65 degrees F (17 C). 

Styles & Materials: Heating / Central Air Conditioning
Heat Type:
Furnace
Energy Source:
Natural gas
Number of Heat Systems (excluding wood):
Two
Heat System Brand:
GOODMAN
Ductwork:
Insulated
Filter Type:
Disposable
Filter Size:
16x25
Types of Fireplaces:
Insert
Cooling Equipment Type:
Air conditioner unit
Cooling Equipment Energy Source:
Electricity
Number of AC Only Units:
Two
Central Air Brand:
GOODMAN
Items: Heating / Central Air Conditioning
8.0 Heating Equipment
Comments: inspection
8.1 Distribution Systems (including fans, pumps, ducts and piping, with supports, insulation, air filters, registers, radiators, fan coil units and convectors)
Comments: inspection
8.2 Chimneys, Flues and Vents (for fireplaces, gas water heaters or heat systems)
Comments: inspection
8.3 Solid Fuel Heating Devices (Fireplaces, Woodstove)
Comments: inspection
8.4 Gas/LP Firelogs and Fireplaces
Comments: inspection
8.4 Item 1 (Picture)
8.4 Item 2 (Picture)
OBSERVATION: During our check of the living space, we evaluated the built-in linear electric fireplaces set into the feature walls. When we operated the units using normal operating controls and power switches, the fireplaces did not respond, turn on, or produce flame effects or heat. The front glass panels, surrounds, and lower bases are in clean, undamaged cosmetic condition. However, neither unit powered on during testing. In brand-new homes, this commonly occurs when a dedicated branch circuit breaker remains switched off in the panel, an internal connection plug is unhooked, or an inline power switch inside the maintenance hatch is turned off.

WHAT THIS COULD MEAN: When an electric fireplace does not respond, you cannot use it for supplemental heat or ambiance. An inoperative unit could mean an unpowered circuit, a loose electrical connection behind the wall, or a faulty control board that needs service before safe use.

RECOMMENDATION: Have a qualified electrical contractor or fireplace technician evaluate the electric fireplace units, power supply circuits, and controls to restore proper operation.

8.5 Cooling and Air Handler Equipment
Comments: inspection
8.5 Item 1 (Picture)
8.5 Item 2 (Picture)
8.5 Item 3 (Picture)
8.5 Item 4 (Picture)
8.5 Item 5 (Picture)
(1) OBSERVATION: Outside by the exterior brick wall, we took a close look at the exterior heat pump or air conditioner condenser unit. The unit rests on a level plastic equipment pad, and the painted protective cabinet is in clean, undamaged condition. However, looking through the metal louvers, we observed that grass clippings, dried pine needles, and yard dirt have collected across the bottom section of the aluminum condenser coil fins. An outdoor HVAC unit relies on drawing clean outdoor air directly across these thin metal fins to release heat gathered from inside your home.


WHAT THIS COULD MEAN: When yard debris and dirt coat the coil fins, airflow into the unit is restricted. This could cause the compressor and fan motor to work harder and run longer, which may raise your monthly electric bills. Over time, restricted airflow could also increase wear on internal parts and reduce the overall cooling capacity of the system during hot summer days.


RECOMMENDATION: Have a qualified HVAC technician evaluate and gently clean the condenser coils, and establish a seasonal maintenance routine to keep grass and pine needles cleared at least two feet away from the unit.

8.5 Item 6 (Picture)
(2) Unit 1: Daikin / Goodman; Model GLXS4BA3010AA; Serial No. 2503309926; 2.5 Ton (30,000 BTU) nominal capacity; 208/230V, Single Phase; Max breaker 25A / Min circuit amps 15.0A; Factory charge 63 oz R-32 refrigerant.


Unit 2: Daikin Comfort Technologies / Goodman; Serial No. 2502297259; Single Phase; Max breaker 40A / Min circuit amps 25.5A; Factory charge 138 oz R-32 refrigerant.


AGE / TYPICAL LIFESPAN:


Manufacture Date: 2025 (Decoded from serial numbers starting with "2502" and "2503" indicating early 2025 production).


Current Age: Approximately 1 year old (near-new condition).


Typical Lifespan: 12 to 17 years with regular annual servicing.


MAINTENANCE TIPS / BUDGET PLANNING:


Keep grass clippings, leaves, and pine straw cleared at least two feet away from all four sides of each cabinet to ensure plenty of fresh airflow.


Gently rinse down the exterior aluminum fins with a garden hose on a low-pressure spray setting once each spring (never use a high-pressure washer, as it bends the delicate metal fins).


Schedule a professional tune-up with a licensed HVAC technician once a year to check electrical connections, confirm proper refrigerant pressures, and keep your equipment running smoothly and efficiently.

8.6 Normal Operating Controls
Comments: inspection
The heating and cooling system of this home was inspected and reported on with the above information. While the inspector makes every effort to find all areas of concern, some areas can go unnoticed. The inspection is not meant to be technically exhaustive. The inspection does not involve removal and inspection behind service door or dismantling that would otherwise reveal something only a licensed heat contractor would discover. Please be aware that the inspector has your best interest in mind. Any repair items mentioned in this report should be considered before purchase. It is recommended that qualified contractors be used in your further inspection or repair issues as it relates to the comments in this inspection report.
9. Insulation and Ventilation
Description
The home inspector shall observe: Insulation and vapor retarders in unfinished spaces; Ventilation of attics and foundation areas; Kitchen, bathroom, and laundry venting systems; and the operation of any readily accessible attic ventilation fan, and, when temperature permits, the operation of any readily accessible thermostatic control. The home inspector shall describe: Insulation in unfinished spaces; and Absence of insulation in unfinished space at conditioned surfaces. The home inspector shall: Move insulation where readily visible evidence indicates the need to do so; and Move insulation where chimneys penetrate roofs, where plumbing drain/waste pipes penetrate floors, adjacent to earth filled stoops or porches, and at exterior doors. The home inspector is not required to report on: Concealed insulation and vapor retarders; or Venting equipment that is integral with household appliances.

In addition to those items typically inspected as part of the interior, inspection of the laundry room includes examination of the following:dryer connections and venting; room ventilation; and provision of proper clothes washer waste pipe.

Styles & Materials: Insulation and Ventilation
Attic Insulation:
Polyurethane foam
Ventilation:
Ridge vents
Exhaust Fans:
Fan only
Dryer Power Source:
220 Electric
 
 
Items: Insulation and Ventilation
9.0 Insulation in Attic
Comments: inspection
9.1 Insulation Under Floor System
Comments: inspection
9.1 Item 1 (Picture)
OBSERVATION: Looking up at the overhead floor joists, we checked the plumbing and insulation rough-ins. A white PVC drain pipe and an insulated water supply line are suspended between the framing members. Near the center, the fiberglass batt insulation has pulled loose and hangs down in a ragged clump, leaving the pipes exposed. Additionally, an unsupported yellow electrical cable drapes diagonally across the space. While the framing and ductwork throughout this area are clean and straight, the insulation here was disturbed and never secured back into place.


WHAT THIS COULD MEAN: Floor insulation works like a warm winter blanket. When it pulls loose, cold or warm air can circulate around the subfloor and pipes. This could make your floors above feel chilly and cause your heating system to work harder. Exposed water pipes in unheated spaces may also face higher risks of cold drafts during winter drops in temperature.


RECOMMENDATION: Have a qualified insulation contractor or handyman evaluate this ceiling bay to properly secure the fallen insulation batts and confirm the pipes and wiring are fully protected.

9.2 Vapor Retarders (in Crawlspace or basement)
Comments: inspection
9.3 Ventilation of Attic and Foundation Areas
Comments: inspection
9.4 Venting Systems (Kitchens, Baths and Laundry)
Comments: inspection
9.5 Ventilation Fans and Thermostatic Controls in Attic
Comments: inspection
The insulation and ventilation of the home was inspection and reported on with the above information. While the inspector makes every effort to find all areas of concern, some areas can go unnoticed. Venting of exhaust fans or clothes dryer cannot be fully inspection and bends or obstructions can occur without being accessible or visible (behind wall and ceiling coverings). Only insulation that is visible was inspection. Please be aware that the inspector has your best interest in mind. Any repair items mentioned in this report should be considered before purchase. It is recommended that qualified contractors be used in your further inspection or repair issues as it relates to the comments in this inspection report.
10. Built-In Kitchen Appliances
Description
Inspection of kitchens typically includes (limited) operation and visual inspection of the following: wall, ceiling and floor; windows, skylights and doors; range/cooktop (basic functions, anti-tip); range hood (fan, lights, type); dishwasher; Cabinetry exterior and interior; door and drawer; Sink basin condition; supply valves; adequate trap configuration; functional water flow and drainage; disposal; Electrical switch operation;  and outlet placement, grounding, and GFCI protection. Note: Appliances are operated at the discretion of the Inspector. 
Styles & Materials: Built-In Kitchen Appliances
Dishwasher Brand:
KITCHEN AIDE
Disposer Brand:
UNKNOWN
Exhaust/Range hood:
UNKNOWN BRAND
Range/Oven:
KITCHEN AIDE
Built in Microwave:
KITCHEN AIDE
 
Items: Built-In Kitchen Appliances
10.0 Dishwasher
Comments: inspection
10.0 Item 1 (Picture)
10.0 Item 2 (Picture)
10.0 Item 3 (Picture)
10.0 Item 4 (Picture)
OBSERVATION: While evaluating the kitchen appliances, we took a close look at the built-in dishwasher installed under the counter. We found that the top mounting brackets are not fastened to the underside of the countertop or surrounding cabinetry, allowing the unit to shift and tilt forward when pulled. In addition, when we attempted to run the dishwasher using normal operating controls, the digital display illuminated showing an error code ("6 2b"), but the appliance did not start or complete a normal wash cycle.


WHAT THIS COULD MEAN: A dishwasher needs to be anchored securely so it does not tip forward when the racks are fully loaded with heavy dishes. Constant movement can also loosen or strain the water supply line, drain hose, and electrical wiring underneath. Furthermore, an appliance that shows an error code and will not run through a normal cycle indicates an internal electrical issue, a sensor communication fault, or an improper initial setup.


RECOMMENDATION: Have a qualified appliance technician or installation specialist evaluate the dishwasher, secure it properly with suitable mounting hardware, and diagnose the control panel error code to ensure full, normal operation.

10.1 Ranges/Ovens/Cooktops
Comments: inspection
10.2 Range Hood (s)
Comments: inspection
10.3 Microwave Cooking Equipment
Comments: inspection
10.4 Food Waste Disposer
Comments: inspection
10.4 Item 1 (Picture)
10.4 Item 2 (Picture)
OBSERVATION: While checking the sink and countertop area, we observed that the garbage disposal air-switch button assembly is sitting loose on the solid surface countertop. The brushed metal trim ring, center push button, and rubber sealing gasket are disassembled and have not been mounted into the countertop deck. The stainless steel undermount sink basin, running water, and stone counter appear brand new and in clean condition. However, this push-button control was left uninstalled prior to final turnover, leaving the sink station without a secure countertop control to conveniently turn the food waste disposer on and off during daily kitchen use.


WHAT THIS COULD MEAN: An air switch uses a harmless pulse of air through a small tube to safely turn on the disposal without running electrical wiring near water. When the button is uninstalled, you cannot operate the disposer normally from the sink deck. If an unsealed hole is present in the countertop, water from dishwashing could also seep underneath the counter and slowly drip into the sink base cabinet.


RECOMMENDATION: Have a qualified licensed plumbing contractor or certified installer evaluate the garbage disposal switch assembly and properly mount, connect, and seal the air-switch button into the countertop deck.

10.5 Refridgerator
Comments: inspection
10.5 Item 1 (Picture)
OBSERVATION: During our walkthrough of the kitchen area, we checked the built-in, stainless steel KitchenAid side-by-side refrigerator. When we opened the door, the internal lights did not turn on, and the cooling compressor and circulation fans were completely silent and inactive. The stainless steel exterior, door handles, internal glass shelves, and storage bins appear brand-new and in clean physical condition. However, the appliance did not receive power or function during our evaluation. In newly built homes, high-end built-in appliances are frequently left unplugged behind the custom cabinetry or have their dedicated circuit breaker turned off in the electrical panel until the homeowners move in.


WHAT THIS COULD MEAN: When a refrigerator has no power, it cannot cool down to keep food fresh and safe. An inoperative unit also prevents us from testing essential features, like the automatic ice maker, internal water dispenser, digital temperature settings, and water supply lines behind the unit to verify that there are no hidden plumbing leaks.


RECOMMENDATION: Have a qualified appliance technician or licensed electrical contractor evaluate the refrigerator's power supply outlet, breaker circuit, and control panel to restore normal operation.

The built-in appliances of the home were inspected and reported on with the above information. While the inspector makes every effort to find all areas of concern, some areas can go unnoticed. Please be aware that the inspector has your best interest in mind. Any repair items mentioned in this report should be considered before purchase. It is recommended that qualified contractors be used in your further inspection or repair issues as it relates to the comments in this inspection report.